A DDR Rangefinder camera

We all have our weak-spots as photography enthusiasts. I certainly have a weak spot for the lovely Carl Zeiss Jena Tessar lens. I will not in any way claim that I am even close to a lens and optics expert, but this lens, with its four elements in three groups, gives a sharpness and tone to the images I just love. I had one of these lenses for my M42 cameras, but this lens would benefit from some servicing as the aperture blades keeps jamming when stopping down further than f8, and the focusing ring is very heavy to operate.

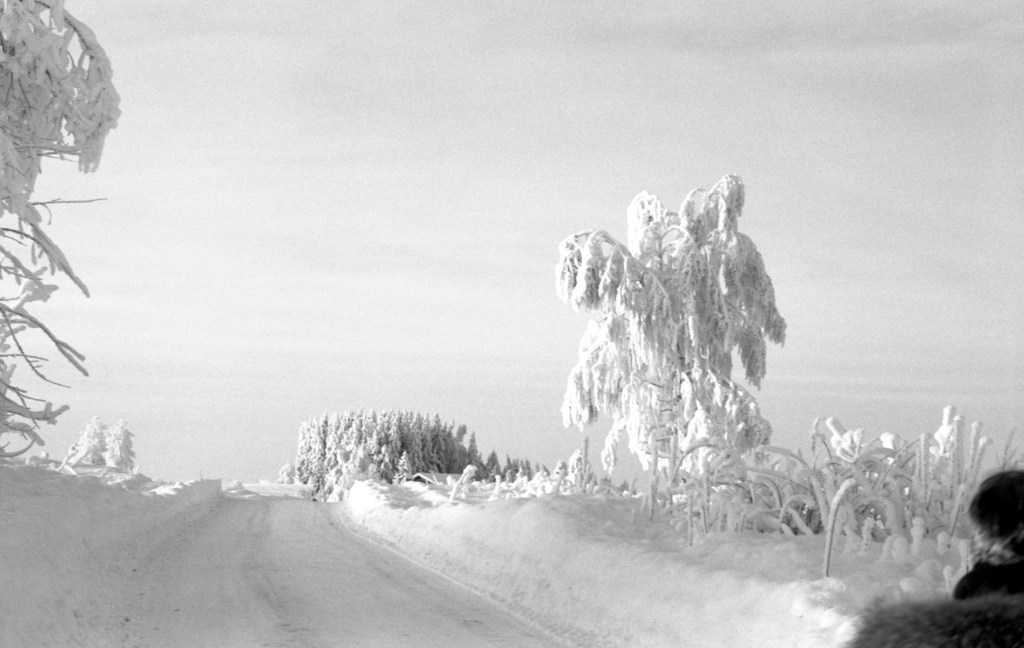
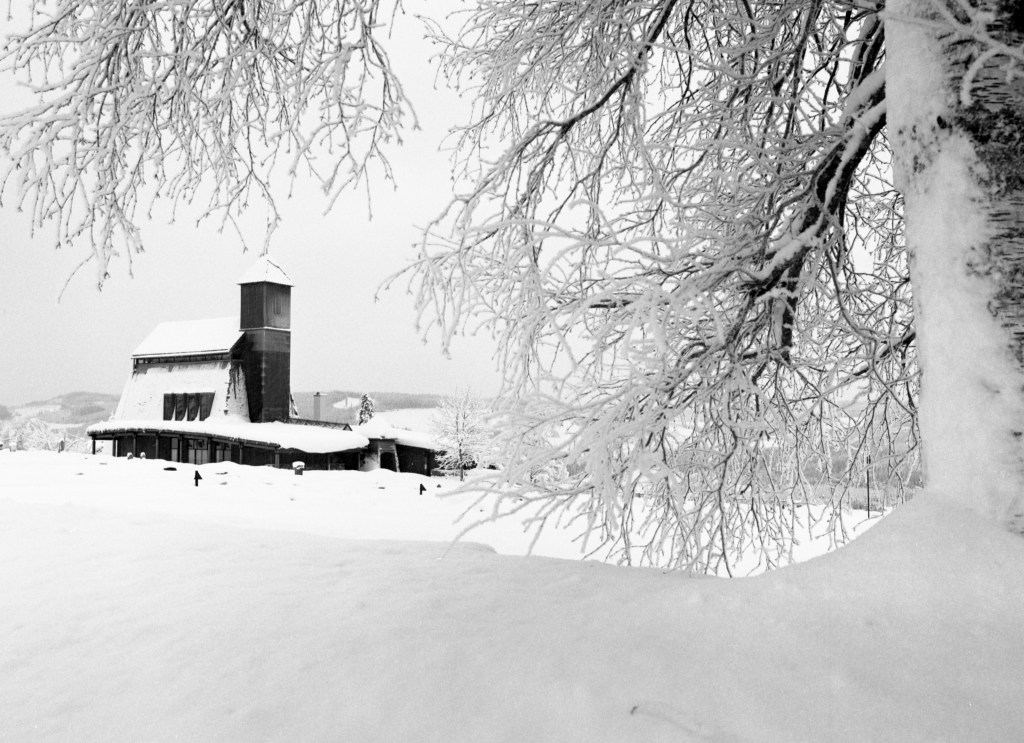
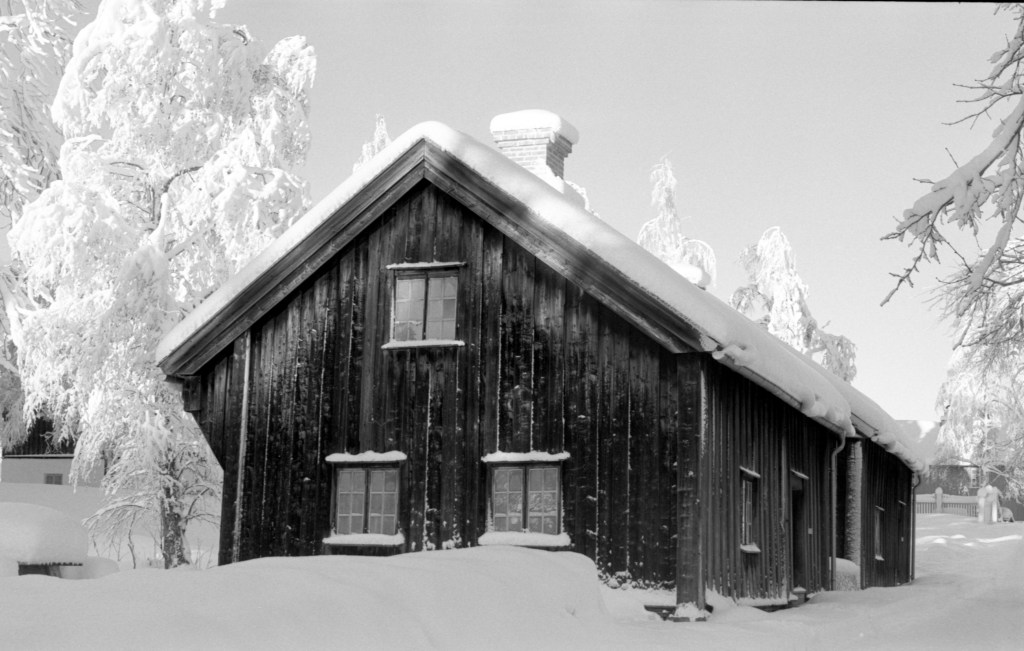
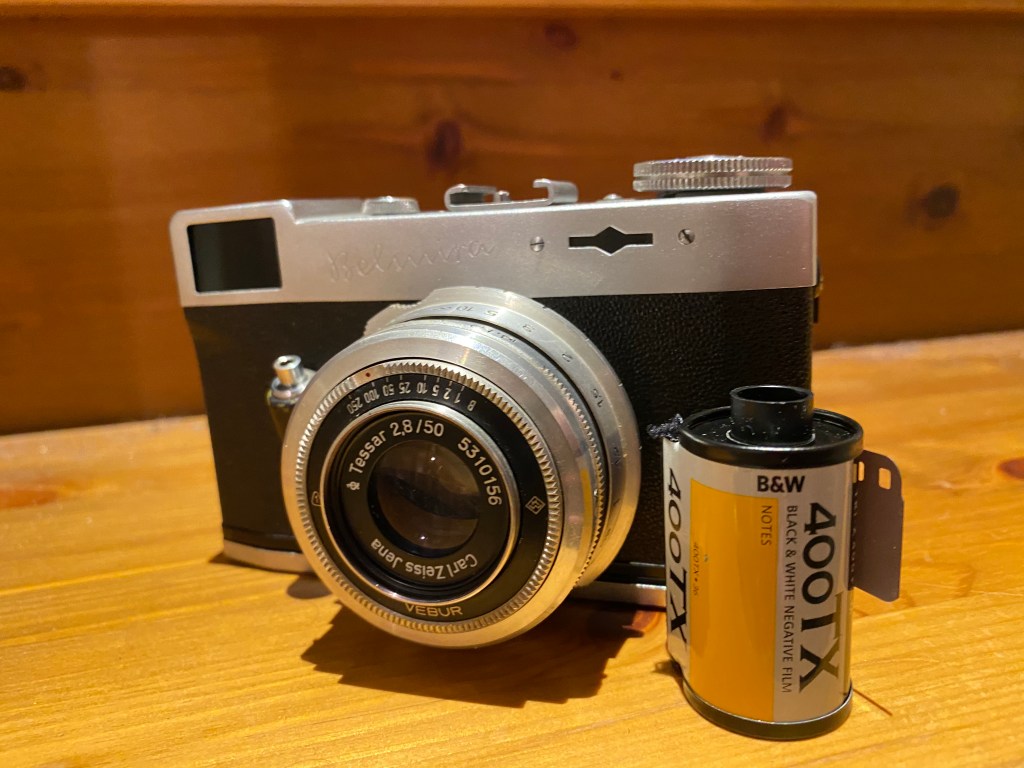
A little while back, I read about a little rangefinder camera from East Germany that was said to be magnificent value for money and deliver splendid image quality and sharpness. The camera was called «Welta Belmira» and was, believe it or not, equipped with a lovely Carl Zeiss Jena Tessar 50mm f2,8 lens. I started looking for one of these cameras to try out, and it was not difficult to find them. However, they were often in very varying condition and it was clear that getting the right and good one would take a while. And so sure it did, but after some months of searching and looking, I found one in decent condition. Yes, it was a bit dusty, and yes it had a dim rangefinder, but the camera in itself seemed to work really well.

My lineup for this test – a Welta Belmira and a roll of Kodak Tri-X400. I also used an external rangefinder unit, because the inbuilt one is very dim and only usable if the light is bright.

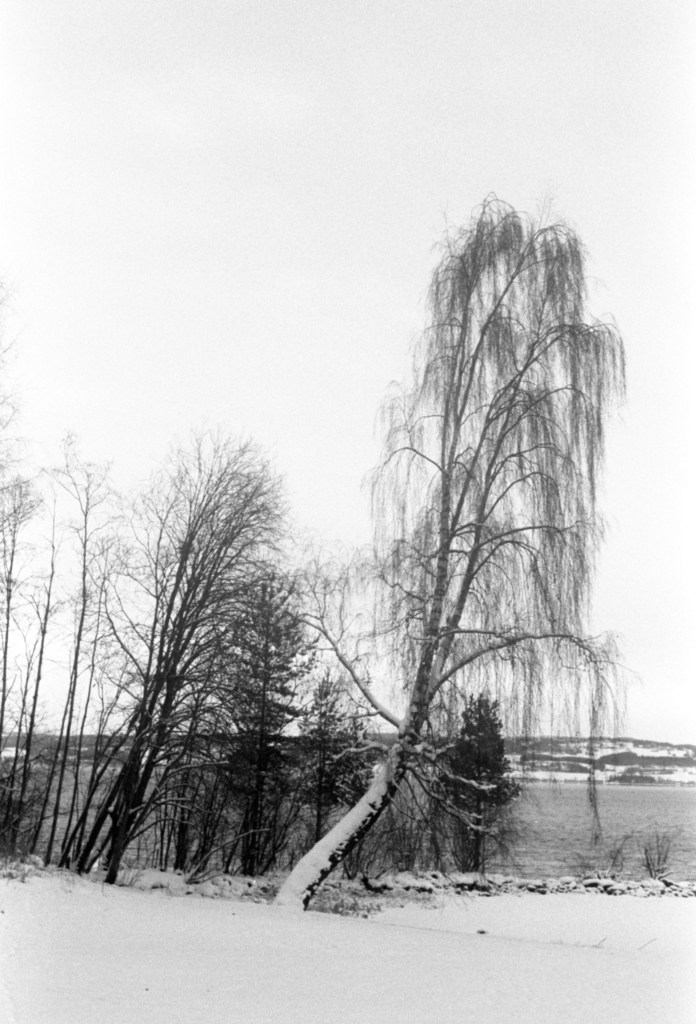
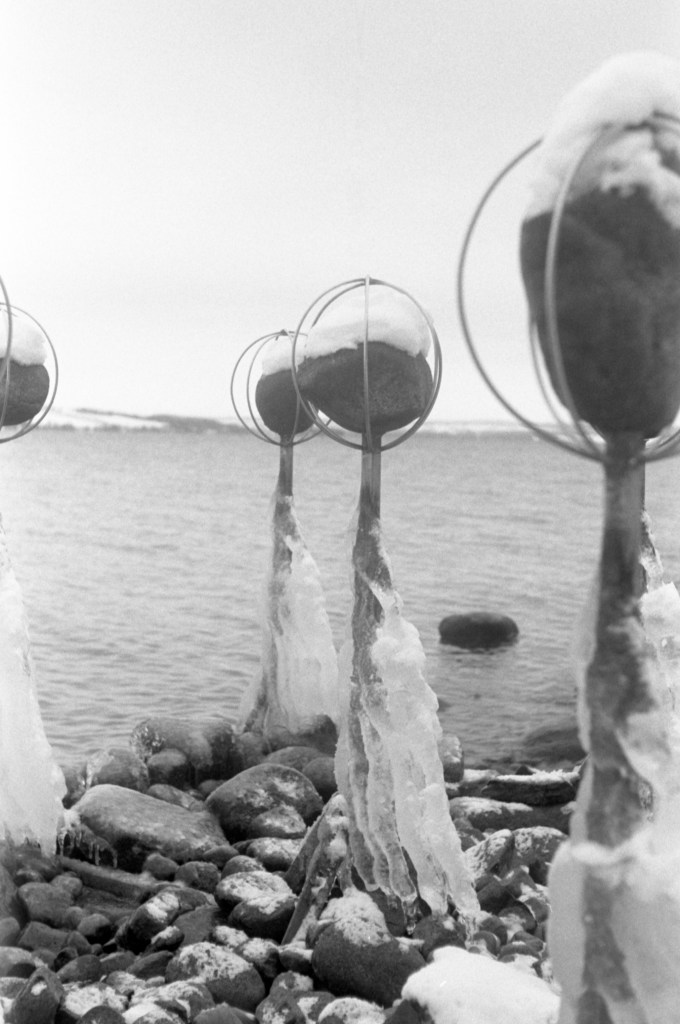
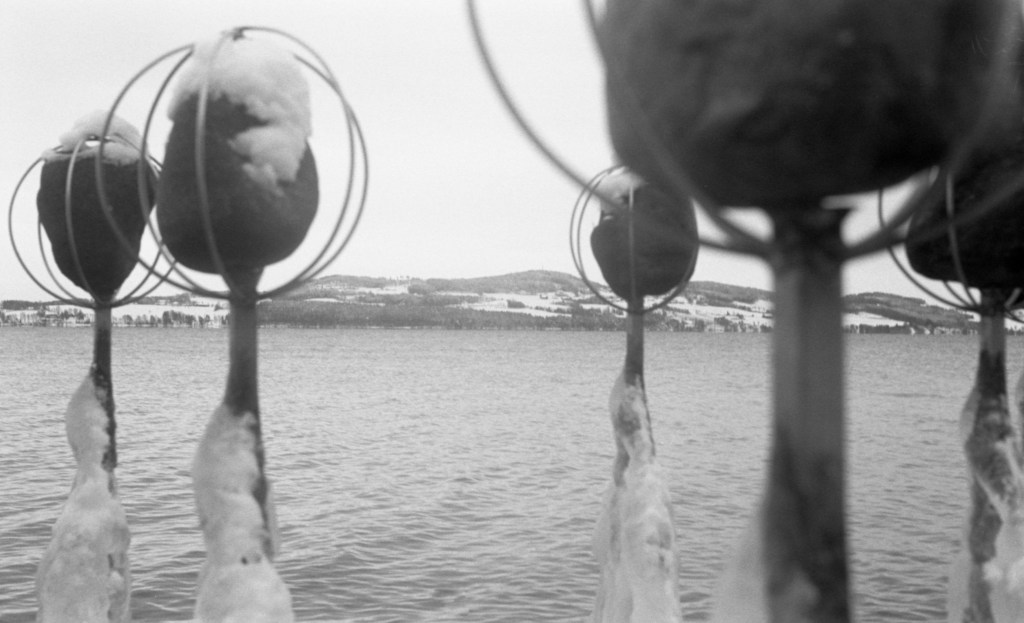
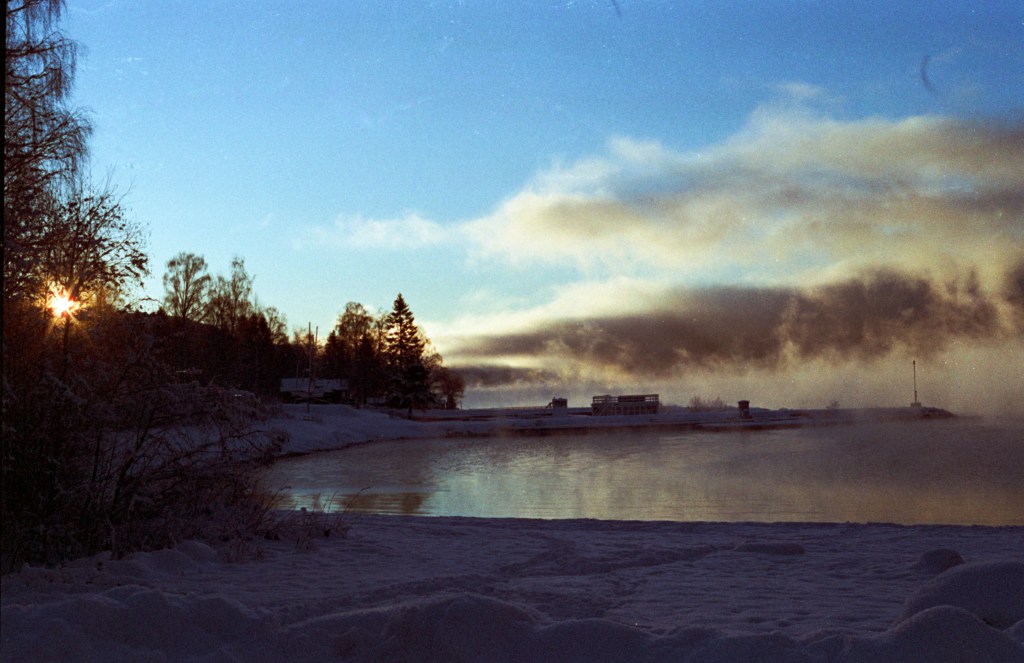
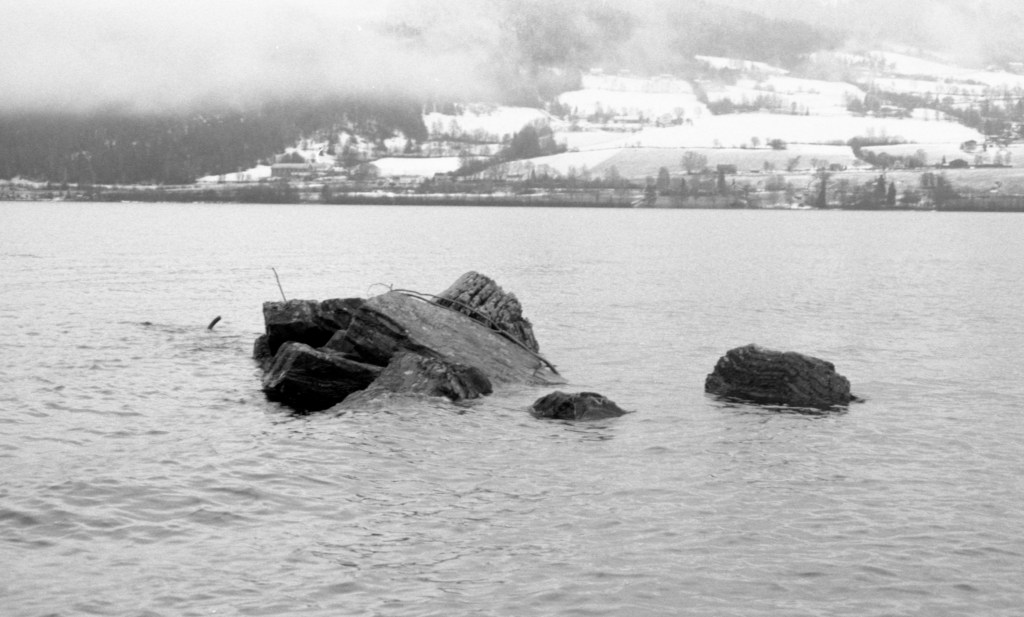
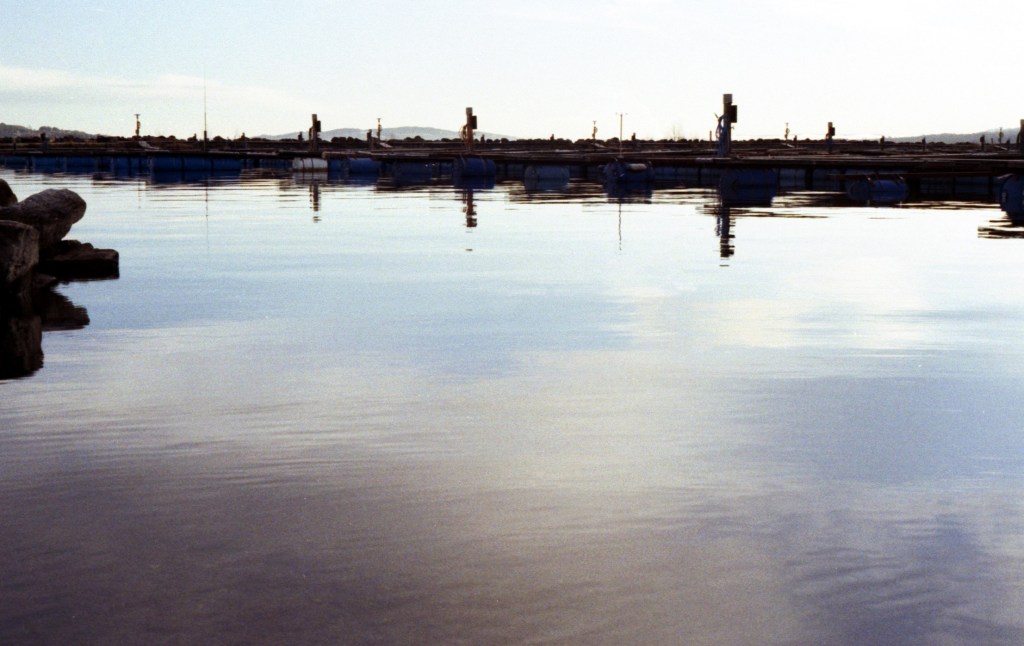
I went out to a location where there is a lovely artistic installation close to the lake, and I have thought for a while to experiment with some photography around this location. The origin of this artwork is unknown to me, but it is only accessible in the winter and spring time, as it will be submerged by the lake most of the summer time.

Welta Belmira – Kodak Tri-X 400 Adox Atomal 49 1+1
Reklamer

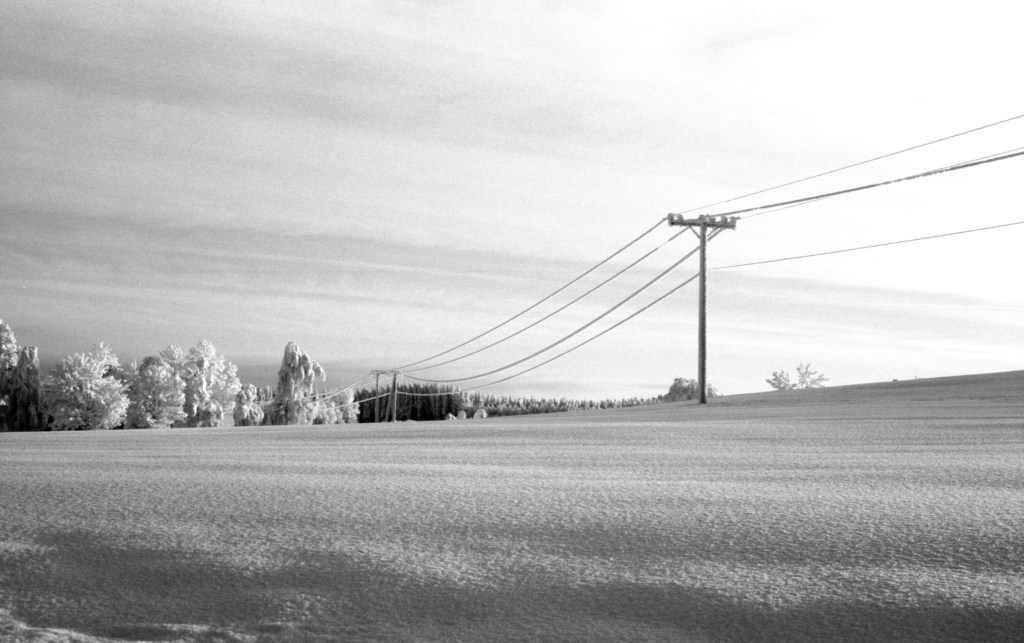
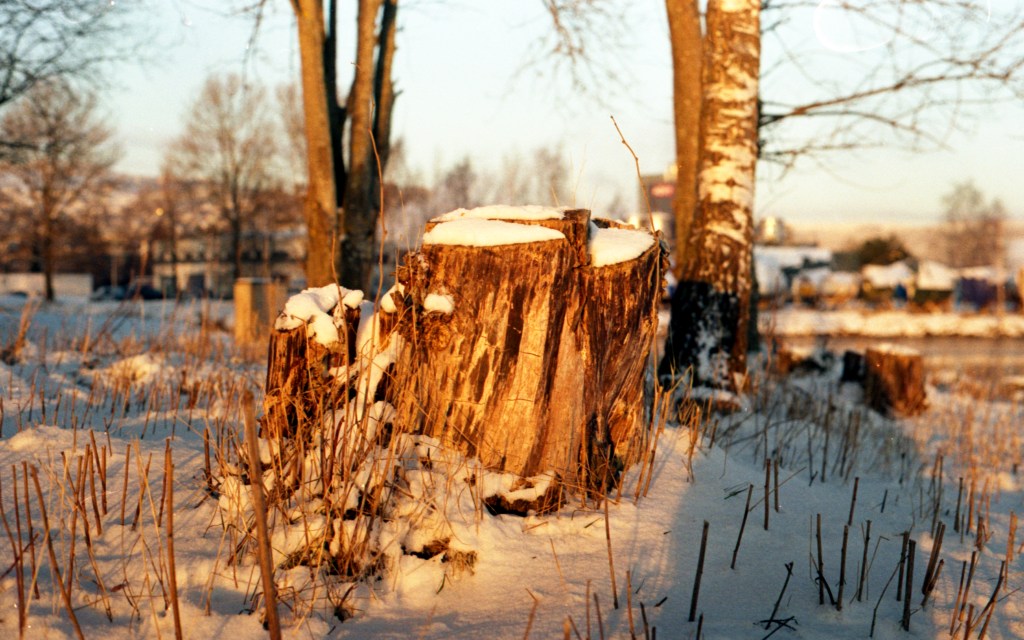
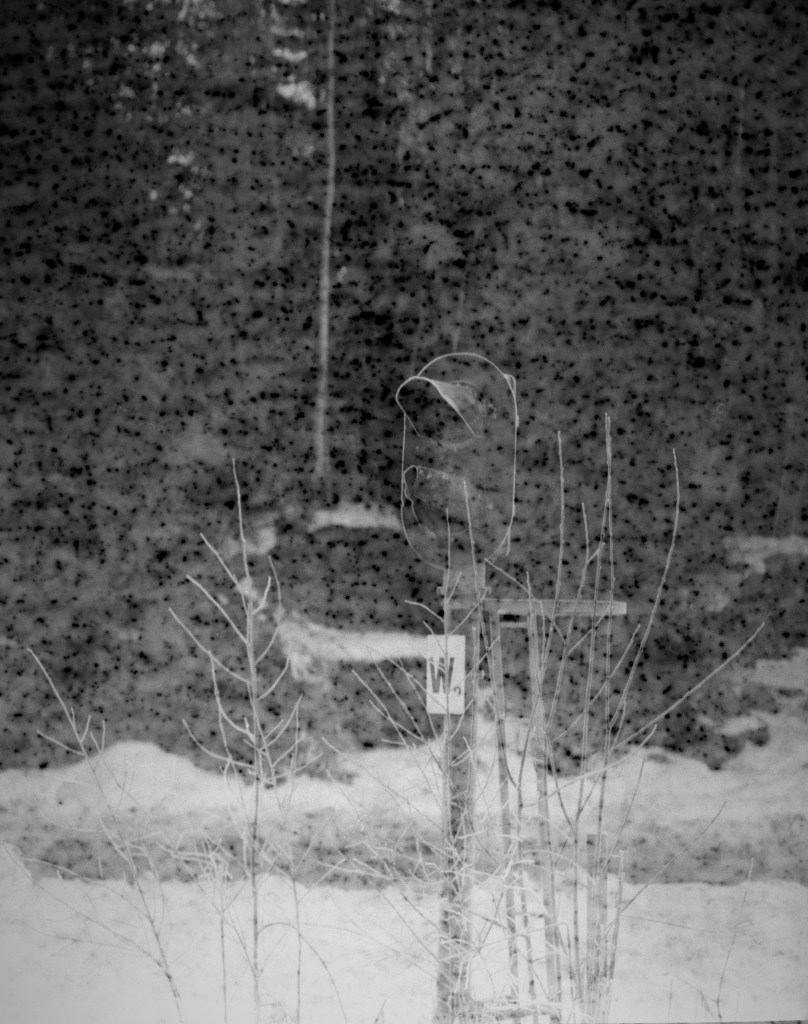
I also with this outing, made my first test of the Adox Atomal 49 developer. I read a bit about it online and saw some images developed in it, and I got curious to try it out myself. Atomal 49 is a very fine grain developer that gives you full film speed unlike Perceptol that will eat some of your speed. For that reason alone, I bought a 5L package of it and decided to give it a try. And based on these results with Tri-X at 35mm, I am very happy with what it looks like. This might well become a developer of preference to me, but I will obviously have to make more tests before deciding.

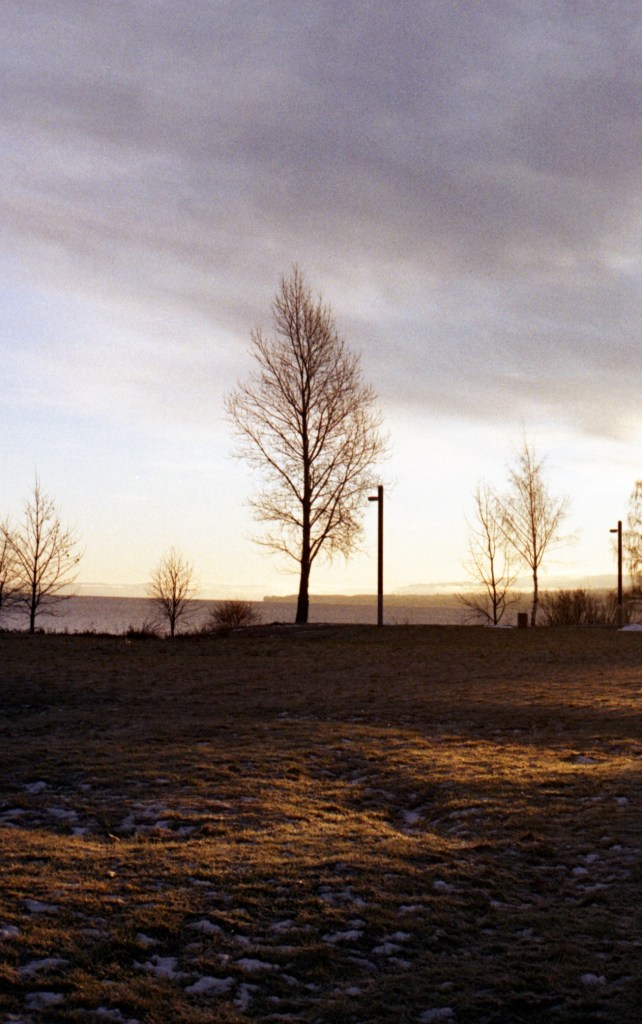
Back to the camera. I really enjoyed using the camera. It has a very special and differently engineered slider instead of the usual advance lever. It is a bit fiddly to use and has a tendency to stick at different points, but it works faultlessly. The dim rangefinder is not really an issue as long as you have an external one, and the focus ring seems to be pretty much accurate. However, I believe the camera «drags» the shutter speeds a little bit, but slight overexposure is not any issue with any negative film really.

Trying out a Konica Autoreflex TC (Part3)

As you have seen through my previous posts, I have been playing around with a Konica Autoreflex TC lately, doing different styles and types of photography with it and different films. Some days ago, I took it out once again with a roll of Fomapan 100and a yellow and a graded orange filter. I went for subtle snowy shapes in nature to test out both the sharpness of the lens, and to once again try the Fomapan 100. Over 2020, I shot many rolls of Fomapan 100 to test it out and get familiar with that film, and I must say that Fomapan 100 is a film I really like shooting, and that I find to give very fine grain when developed in Kodak X-tol at stock level, and that I get very nice results with it for most of my photography. However, this is my first test of this in snowy conditions.

Konica Autoreflex TC w 50mm Hexanon f1,8 lens w yellow filter. f11 1/125th Fomapan 100@100 Fomadon Excel 1+0

I did not have Kodak Xtol at this moment, because I’ve recently had two batches that split. I initially thought this was my mistake and that I hadn’t mixed it properly or made some other mistake with it; however, after some research online, I got leads about a bad batch of Xtol that had this issues. The date I bought the two bags of powder correlated well with the production and estimated sell-dates of the problem batch. Even though the two batches didn’t cause me any issues, I have not bought Xtol for a while. I will, however buy another batch some time soon. But I had a few bags of Fomadon Excel left, which is basically Foma’s take on the Kodak Xtol.

Reklamer

Previously, I used to have Xtol in the spring, summer and autumn-time, when I shoot most film, and Fomadon Excel in wintertime, when I shoot less. When handeled properly, I cannot see difference between negatives developed with Excel and Xtol. One difference though, is that Fomadon Excel can be slightly more challenging to mix. I have found that mixing it as you wold mix Ilford Chemistry, with warmer water, makes the powder dissolve better and easier, and that is how I mix Fomadon Excel. For this particular process, I also used Foma Fixer and Foma Stop bath as well. So this is a all around Fomapan Process.

All in all, I am very happy with these images. They were taken very quickly whenever I saw something that I found worthy of shooting, and I find that they make the sky come forward in a very pleasant way.

Photographing a modern church

Not far from where I live, there is a modern, wooden church called Seegård. It was built in 1997, following the tragic fire in the old church during easter in 1994. The new church was raised in the same spot as the old one, and in an attempt to keep the cross structure of the old church and modernizing it, but at the same time make something that would suit its area. Not easy demands for an architect to meet, but I find that the architect Arne Thorsrud has pulled it off really well.

I have worked with this church on multiple occasions, mainly digital, but the other day, I decided to bring out my Bronica ETR, and make some black and white images of the church in winter time. I fitted the Bronica with the 50mm Zenzanon lens and a yellow filter to help balance the contrasts a bit.

Reklamer

To get the smooth results I wanted for this shoot, I decided to go with Ilford FP4 plus and combining it with Ilfotec Perceptol extremely fine grain developer. This is a combination I have found to work very well with winter conditions where snow and whites are prominent. However, you lose some film speed. In this instance, I shot the FP4 plus at ISO 50, and went for f11 which I find to be the sweet-spot of this lens. With a still standing subject like this church, which does not tend to move a lot, slower shutter speed is no real issue, and my shutter speeds were around 1/4th and 1/8th of a second with the correction for the yellow filter.

Seegård Church under the winter carpet. Zenza Bronica ETR w Zenzanon 50mm f2,8 and yellow filter. Ilford FP4 plus at 50 ISO – Ilfotec Perceptol 1+1

I did a few different angles and compositions, and a little bit of bracketing on a few of the compositions. After all, I ended with two images that I am very happy with, and they are the two I will share.

Seegård Church under the winter carpet. Zenza Bronica ETR w Zenzanon 50mm f2,8 and yellow filter. Ilford FP4 plus at 50 ISO – Ilfotec Perceptol 1+1

Testing a Konica Autoreflex TC (Part 2)

This entry is a sequel of a previous entry where I shot a roll of Ilford FP4 plus trying out my new Konica Autoreflex TC camera, and where I, somewhat irrelevantly compared it to the Olympus OM-1 because I saw a video about it on Youtube. In retrospect, I regret that comparison because I find the cameras to be very different and not too comparable. I therefore cleared my mind, and I rolled the Konica up with a roll of Kodak ProImage 100, which is my preferred colour film for 35mm winter photography, and I went for a little walk.

My car needed to visit the garage that morning, and I had some time to walk around shooting the Konica handheld to get a good feeling about how it performed. Since the morning weather (The lovely thing about Winter-Norway around 10.00) was bright, colourful and vibrant I chose to go with Colour Shooting

A short time-lapse of the beautiful weather conditions this day.

Even though the Konica really dislikes the cold weather and can start to play up in different ways, I learnt from this last time, and this time, I chose to consider where it had issues last time before I started working. Fist of all, when the shutter gets cold, it tends to stick a little bit, therefore I tried to keep the cameras as close to my body, under my jacket, most of the time. This probably looked a bit strange, but it worked. I also avoided the lens fogging up due to this.

Another issue I found last time, was that the rewind button under the camera sticked and would not operate properly outside and the film ripped. I tried this button on multiple occasions indoors later, and it always worked. So this time, I did not rewind the film before I came home, and I did not have any issues with ripped film. That said, though. The take-up spool did in fact cut off the tip of the film leader in some weird way.

Konica Autoreflex TC w 50mm Hexanon f1,8 lens – f11 1/60th Kodak ProImage 100. Tetenal C41
Reklamer

I shot without filters this time, but I would probably have chosen to use a two stop polarizer if I had one for the ø55 filter tread. But when looking at the images, that was not really necessary after all. Working with the Konica camera is very pleasant, and it lies very well in the hand and has easy controls to operate. It also seems to be quite accurate in the normal shutter speeds that I have tried out, but then again, it doesn’t have shutter speeds between 1/8th and B.

What I really like, is that lovely Hexanon-lens. It has a very nice sharpness and it helps me render really vibrant colours and grey tones very well. I am looking forward to trying this one out with some Bokeh-shots with wide apertures at some stage. Stay tuned.

Shooting Boots film?

A short while ago, I shot a roll of expired medium format film and got «interesting» results with a lot of mottling and so on. I am not a very frequent user of expired films, but once in a while, I get hold of some expired film, and I do not mind trying it out either. Normally, the expired films you get hold of are your big manufacturers such as; Kodak, Ilford, Fuji and their friends. However, in the late 1990s and early 2000s, there were a huge number of rebranded films and budget options that are not present today.

In this entry, I am writing about my tryout of one of these films. A film sold in the pharmacies back in the day. The Boots Universal 400. Which film this actually is, is not easy to read out of the packaging or negatives. The negatives are fairly anonymous without much writing on them, and on the box, it only says that it is made in the EU for Boots Pharmacies in England. The EU-part leads my suspicion to either Agfa or Ferrania as the real producer of this film, but I will not make any claims. Please let me know in the comments if you know.

My equipment and film for this entry. Olympus OM-1 and the Boots Universal 400. Sadly, I did not get the extra 100 advantage card points from Boots, because I developed the film myself at home.

I chose to go with the Olympus OM-1 as it was a very cold morning. The temperature was -20 degrees when I arrived at the location, and the Olympus has an impeccable record of always functioning in cold weather conditions like the ones today.

Because the film expired in 2006, I chose to abide with the rule of thumbs, one stop pr decade, and I metered my shots at ISO 160, and did some slight bracketing just in case. My expectation from this film was slight colour casts and an increase in grain, which I indeed got. The colours were severely off in many of the shots, rendering the misty lake in everything from strong oranges to fiery reds. Instead of making heavy colour corrections in post-processing, I chose to go with the colours the film gave me, and I did not do any grain reduction either.

Boots photographic aquarelle – Olympus OM-1 w Zuiko 50mm f1,8 lens. Boots Universal 400@160

Some of the images got a nearly «Aquarelle like» mood to them, and I find them quite interesting and beautiful in their own way, even though they are clearly not the most spotless, nor grain free images I have taken by any means.

Reklamer

Another interesting thing from this morning, was the the lighting conditions changed so much over the 45-60 minutes I was out shooting. The previous image was taken at the beginning of the session, and the following was image nr 36 on the roll.

Boots photographic aquarelle – Olympus OM-1 w Zuiko 50mm f1,8 lens. Boots Universal 400@160

Shooting films with huge amounts of grain is not normally my thing, but sometimes grain gives you images a little extra punch in the mood and makes them more interesting. In this case, I think that is what the grain did. It gave the images a level of abstraction that I find very pleasing. But I appreciate that this might not be everybody’s cup of tea.

Testing a Konica Autoreflex TC (Part 1)

Sometimes my interest is sparked in some way when I watch Youtube videos. A few weeks ago, I watched a video called «Konica Autoreflex TC – The poor mans OM-1». To me, this title did not really make much sense. In my opinion, the Olympus OM-1 is extensive value for money and indeed very affordable both when it comes to lenses and camera bodies. They are also accurate like clockwork, and relatively hassle-free to service and maintain. I have shot a large number of rolls through my OM-1 and it has never given me any problems even in very cold winter days. So if there would be a cheaper camera that reliable, that had to be a gem for this blog indeed.

My lovely Konica Autoreflex TC with its marvelous Konica Hexanon AR 50mm f1,8 lens

I searched briefly online, and I actually found one incredibly cheap on a local Facebook sales page, and I got it for about 200 Norwegian Kroner (about 20 GBP) with shipping included. A real bargain there indeed. For the first tryout, I loaded it with a roll of Ilford FP4 plus that I shot at ISO50 and developed with Ilford Ilfotec Perceptol. I find that Perceptol really helps me get the winter tones I want for my shots, as well as a very fine grain.

The Konica turned out to be a lovely camera to work with. It is indeed a bit heavier and more bulky than the OM-1 but it fits my hand very well and everything is where you expect it to be, and it all seems to work rather well. I did not try the Aperture priority setting on the camera, but shot it on a variety of shutter speeds and aperture settings with a wide range of filters I found to be helpful for me at this location, which is an old museum. However, I do not see this camera and the Olympus OM-1 to be comparable as equipment.

Reklamer

The Olympus OM-1 is a far more accurate camera with a broader selection of shutter speeds, all the way from a whole second to 1/1000th of a second plus BULB-mode. On the Konica, there is nothing between 1/8th and B, and the longer shutter speeds on my one «drags» a little bit. This could be the particular camera.

Konica Autoreflex TC w Konica Hexanon 50mm f1,8 lens. Ilford FP4 plus@50 F8 1/25th Yellow filter – Ilfotec Perceptol

Also in the perceived build quality, the Konica is clearly a cheaper and less sophisticated camera than the OM-1. But if you forget about the irrelevant comparison to a clearly better camera, the little Konica is a very pleasant camera to work with, and the 50mm Hexanon Lens, is just outstanding. It gives a really nice sharpness, even at wide apertures and it is easy to focus.

Konica Autoreflex TC w Konica Hexanon 50mm f1,8 lens. Ilford FP4 plus@50 F2.8 1/8th Yellow filter – Ilfotec Perceptol

Through my about 60 minutes photo-walk today, the Konica performed rather well for the first 20 minutes. After that, it coughed up a nice selection of issues and creative problems that I guess is it reacting with the cold weather. The temperature was about -12 degrees and some if these issues might be due to that.

Nr 1. Sticky shutter: After some shots the shutter started sticking every now and then. It did not matter which shutter speed the camera was set to. The only thing to do, was to tap the camera slightly so that the shutter would go off, and then shoot another frame to get one without immense camera shake.

Reklamer

Nr 2. Slowed focusing. After a while out in the cold, the focusing ring got very slow, almost as if the lubrication thickened and became a gooey syrup.

Nr 3. Camera refused to rewind the film back into the cassette and ripped it instead. When I manually retrieved the film, it actually broke on another place as well. Luckily, I did not lose more than four shots, and all of them were bad. (happy days)

Konica Autoreflex TC w Konica Hexanon 50mm f1,8 lens. Ilford FP4 plus@50 F11 1/25th Graduated Magenta filter – Ilfotec Perceptol

All these issues aside, I like the Konica Autoreflex and the Hexanon lens. A ripped film could very well be my mistake and the other issues could be weather related. My next test out of this camera will be with a colour film, trying to capture some lovely, bleak winter colours.

Trying out Delta 400

When I first tried out Ilford HP5 plus, I completely fell in love with the film. I just loved the amazing latitude and the rich feel it gave my photos, and since then, I have mainly used HP5 plus whenever I needed a 400 or even a 200 speed film, which the occasional use of Tri-X-X when I want to push the film slightly, or just want to have a yellow cassette in my camera instead of a green one. At box-speed the two films are interchangeable in my humble opinion and I challenge you to spot which photo was shot with which of these two if I put up a selection.

A While back, before Covid and quarantines were an issue, I was in Aarhus in Denmark visiting a friend and enjoying the lovely Danish landscape and all the lovely pastries and coffee shops they have. I also visited Mimosa Photo shop in Aarhus city center, and picked up some rolls of film. Since I only had one roll of HP5 plus left, I needed a 400 speed film, and the only one they had in at that moment was Delta 400. I bought three rolls, and since then they have just been sitting around in the fridge, and not been tested. The other day, I went out for a little outing in the misty Norwegian winter-weather, and I decided to shoot with Ilford Delta 400.

Reklamer

I put one of the rolls in my Minolta Dynax SPxi, and screwed on the yellow filter and went for a spin, trying to find black and dark grey contrasts against the misty, white skies. I have often found the yellow filter to help me get the results I want in winter time, lifting the darks, while helping me retain detail in the very bright whites. I was curious how this film would be different from the HP5 plus, but after only one tryout, I can obviously not say that I have the knowledge to make a comparison nor a good enough photographic bank of results to base any personal judgement on. But I do know what I would expect from HP5 plus in these situations. An my prediction was more or less the same, but with finer grain.

Minolta Dynax SPxi w Minolta AF Zoom 35-70mm f4,5 Yellow filter – Ilford Delta 400 professional Ilford Ilfotec DD-X

The grain on this test-roll was actually finer than I expected, but I did not get the same contrast boost that I would have expected comparing FP4 plus and Delta 100 which I know both of very well. But all in all, I do rather like my results. The Minolta Zoom lens is not by any means the sharpest of lenses, but I tried out different aperture settings and even at some points used «Aperture priority» mode to get the most out the lens that I had on. The camera has a few functions that I find to be very helpful.

First of all, I like the two sensors on the right hand handle that will automatically focus when you touch them. In rainy weather; however, it turned out that these sensors were actually reacting to the rain touching it as well as my fingers, to the AF went berserk a few times. Also the AF tends to select different spots and, as visible in the images, it back focuses somewhat. It would be interesting to try this camera out with a different lens, to see whether this is a camera or lens-issue.

Reklamer

Second, I like the way you set the different parameters on different places on the camera. However, I do find it a bit fiddly and that you very easily forget which knob does what, and hence, shooting this in fully manual mode, is sometimes really exasperating. But the idea of having the controls on knobs and not on wheels, is something I really like. If Minolta only would have been friendly enough to mark these knobs with what they do.

Minolta Dynax SPxi w Minolta AF Zoom 35-70mm f4,5 Yellow filter – Ilford Delta 400 professional Ilford Ilfotec DD-X

Even with the AF on, as you can see, the focus gets very soft, and I suspect that there might be an issue with the AF system on this camera. But at the same time, I think that some of these photos gets some additional mood with that soft focus.

I chose to develop with Infotec DD-X which I know is made for the Delta series. I got the developer from Bjørn Joachimsen in November, and I would recommend you to look through his amazing catalogue of photos both here on WordPress and on Flickr.

More Christmas decorations

This entry is a sequel of the FP4 shoot with the Advent decorations. If you haven’t seen that entry, please scroll down and find it. In this entry, I have once again done like a cat, playing with the Christmas decorations. This time, I played with the Christmas tree and a roll of Kodak ProImage 100 and I used the Olympus OM-1 with the same 50mm lens that I often use it with. Originally my plan was to shoot this with the Praktica MTL5 B and the Helios 44-2 lens, but it turned out that the lovely Praktica didn’t really appreciate being hooked up with the shutter release cable, and it therefore decided to jam. Not the kind of jammed that you can easily fix yourself, the properly jammed jam. Therefore, I had to restart the shoot with the Olympus, which handled the cable just fine.

I shot the Zuiko Lens fully open at its maximum aperture of f1,8, but I chose to let the Christmas tree lights be my only light source and ended up using longer shutter speeds, such as 1/2, 1/4 and even one and three seconds.

Christmas tree angel – Olympus OM-1 w 50mm Zuiko f1,8 lens. f1,8 shutter 1/2 seconds. Kodak Proimage 100

I know that there are many opinions on the Kodak ProImage 100 out and about. For my style and preference of photography, I find the ProImage to be brilliant for capturing winter colours where I often find Ektar too vibrant. Also, for indoor photography like this, I find this film to work perfectly, as I would often have to de-saturate Ektar in these situations. But again, this is personal preference. Personally, I like the «level between» Ektar and Portra as I see this film to be.

Reklamer

These images are slightly colour corrected in Photoshop after scanning, there were no colour shifts, but I found that the images got scanned with slightly different white balance. Not a big deal though, as it was easily correctable with Photoshop. The film was developed using the Tetenal Colortec C41 kit, which I find to work very well and be easily controllable. When using this kit, I cannot understand why it took me so long before I dared to try developing colour myself.

Thank you for reading and following me through 2020. Let us all hope for a better and less troublesome and pandemic 2021.

Trying out an expired film

I am normally not too enthusiastic about expired films. For me photography is more about precision and less about experimenting. However, a while back I bought a camera online, and with it came a full package of Svema Foto65 expired in 1986. As this package was full and dust-free, I guessed they had been stored properly, maybe frozen or refrigerated over time. Therefore I decided to give these films a go.

As they are 120 films, I rolled one of them into my Bronica ETR, and went back to my favorite old derelict train station. If you have followed my blog for a while, you will have seen me shooting at that location before. I chose to rate the film at ISO 20 and bracket one stop in each direction. As it turned out, ISO 10 would have been my best pick for this outing. The films original box-speed was once ISO 80, and with the «one stop pr decade» 10 would be the correct speed I guess.

Because I feared very low contrast in the images, I chose to shoot with an orange filter to give the film some extra contrast boost. It seems to have worked out the way I expected it to.

Bronica ETR w 150mm Zenzanon f3,5 – Orange filter – Svema Foto65 @Iso10 – Rodinal 1+100 70min

Despite the nasty mottling all over the frame, the Svema Foto65 seems to have been a very fine grain and sharp film once. My guess is that this mottling has come off the backing paper, there are visible discoloration on both the negatives and the backing paper. If I am mistaking, please let me know in the comments. All in all, the Svema performed acceptably I find, and maybe a well kept roll of this film would still make really nice images, despite its age.

Reklamer
Bronica ETR w 150mm Zenzanon f3,5 – Orange filter – Svema Foto65 @Iso10 – Rodinal 1+100 70min

Capturing the winter colours

Shooting in winter time can sometimes be very uninspiring and difficult. There are no vibrant colours in the nature, and the weather is sometimes really and truly nasty. Therefore, I have made myself a project this winter. To capture the mood of the Norwegian winter with analog photography. I have not limited myself in terms of films, developers or styles. The goal with the project is to convey the Norwegian winter mood through my photography.

This is the second entry in the project, and in this one, I am working with one of the days where the weather is nice and where there are colours to work with.

To capture the colours, I chose to go with a very under-rated film that I find to work very well with the Norwegian winter tones. The Kodak Pro Image 100. I have used some rolls of this film previously, ordered on eBay as it was not sold in Europe. From what I have gathered online, this film was originally introduced in South America and Asia as an entry-level professional colour negative film. Based on the Kodak Gold, it was then altered, tweaked and improved to produce better skin tones, but keep the warm Kodak colour palette that the Kodak Gold is renown for.

Olympus OM-1 Zuiko Olympus 50mm f,18 w 1,6 stop Circular Polarizer. Kodak ProImage 100

When you google this film, you get a lot of «so-called experts in the field» who has written some kind of a review of this film based on their experience after shooting one roll of film. All of these conclude with something like «This film is so cheap, why would Kodak brand such a cheap film professional, Ektar is far better». I find this to be unfair to the Pro Image. KODAK Ektar is a brilliant film, and a film I use a lot myself, but I find it to be too vibrant for my winter shooting. I also mean, that you can never judge a film just by shooting one roll of it, and choice of film is a personal choice and relies heavily on personal preference. after fifteen rolls (three five-packs) of Pro-Image, I have found this film to work brilliantly for my preferences.

Reklamer

One of the lovely things about working in Norway in the winter, is that morning light happens at more comfortable times than in the summer. My «early morning shoot» started at 09.30 with a cup of coffee and ended around 11.00 with me rewinding the film back into the cassette and traveled home for development. Even so, I did not meet as many people as I expected on my little outing into the lovely lights and colours. And I find that I was able to capture the mood of this morning.

A sunny, cold winters day after many grey dull days, with some lovely almost purple colours in the skies and a yellowish tone on the ground near the lake.

Olympus OM-1 Zuiko Olympus 50mm f,18 w 1,6 stop Circular Polarizer. Kodak ProImage 100

I then ended my day with doing a C41 process. I had fresh chemicals which were mixed right before, and the cycle went like a dream. I see a slight cyan-cast in the scans. This could be because I had to pause the development between the Developer and the Blix due to a temperature fall in the Blix. I then left the films in the tank with some 38 degrees clean water for some minutes, while the Blix heated up again.