Frames of Norway 4

Finally, after a spring seeming never to produce any heat or greens in nature, summer temperatures have finally arrived. And what arrival it took on. Temperatures shot up 20 degrees in just a few hours and from dull and bland grey weather we suddenly saw blue skies without any noticeable clouds. Weather where one has to think about how to deal with the conditions. I decided to go to a local woodland-area called Sevalskogen. An area I just noticed for having really nice «old-forest» conditions and being relatively untouched for a while.

This is also an area that was heavily disputed in the 1920s and 30s. In these years this farm was owned by former Vardal Kommune, the municipality, until it was sold to a private farmer in 1932. At this time, the forest and the uncultivated fields were still owned by the municipality, and was broken up and sold out as so-called «bureisningsbruk». These were plots that people could buy and build their own farms on. This was a very unpopular decision and after just a few (I believe 4) plots were sold, the rest of the land was given back to Seval farm. This lot of land was obviously smaller than the original farm, both with forest and land. All the farms that were built in this time still stands today.

A fragment of the path – Hasselblad 500c w planar 80mm f2,8 – Fujifilm pro400h

To accompany me on this little outing, I chose the Hasselblad 500c. I have found myself to lean very much towards medium format lately, and I love using cameras with a waist-level viewfinder. I chose to roll the camera up with some Fujifilm pro 400h, a film that was sadly discontinued in January this year. I find this film to be a perfect mix of subtle colours and sharp green tones, and I find it to lean towards more of a water-color feel in the way it renders the images.

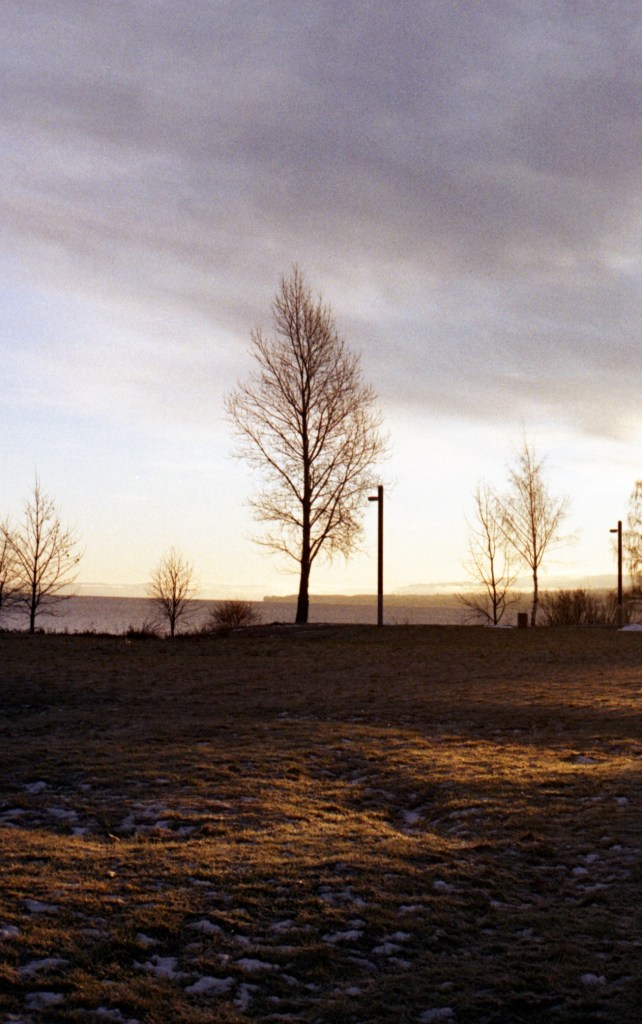
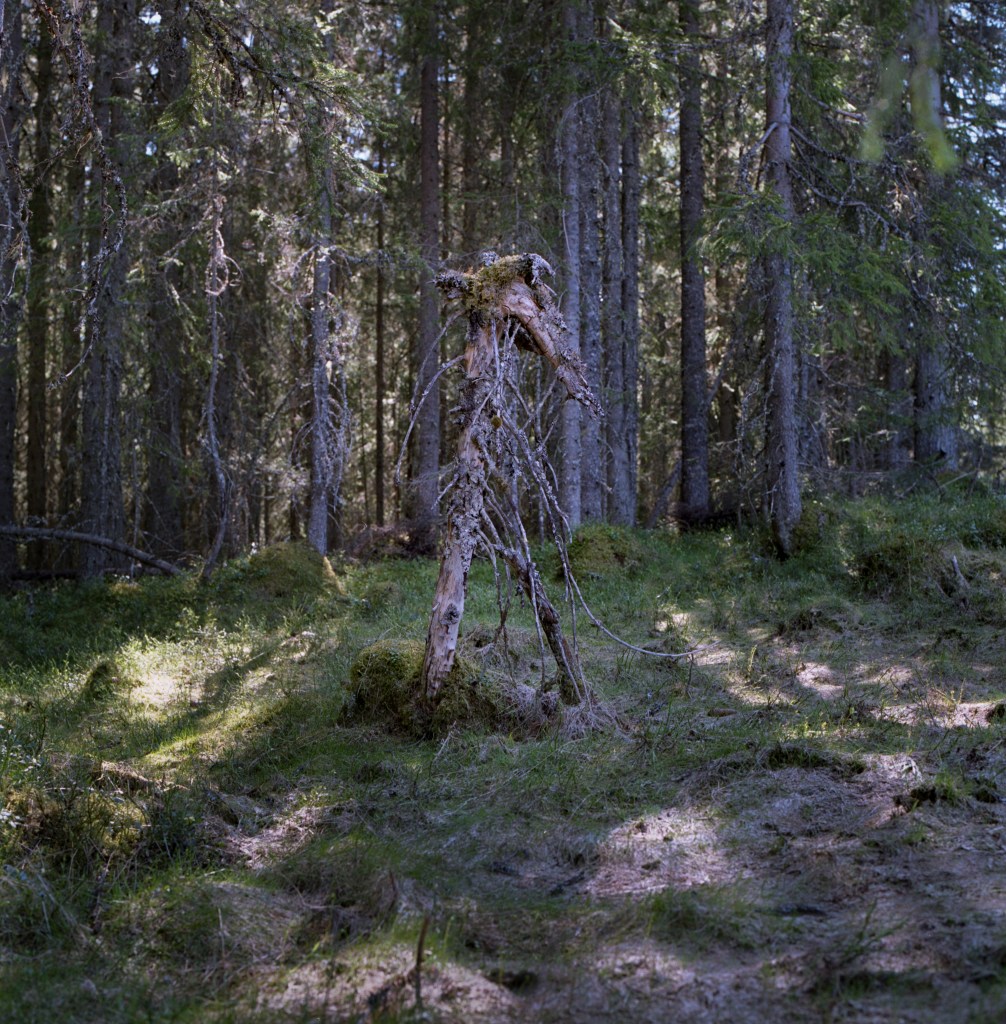
I went out with a happy spirit, but I found myself to really struggle with «getting going» this time. Just to get started, I made myself a very simple path-scene as you can see above. It is not under any circumstance a very strong composition, but it really helped me to get «into it» and get the right feel. I then progressed on and embarked into a felling-field. And here, the path mysteriously disappeared. My guess is that it has somehow been consumed by lack of use and new lush vegetation rising above the chopped down trees.

The felling field – Hasselblad 500c w planar 80mm f2,8 – Fujifilm pro400h

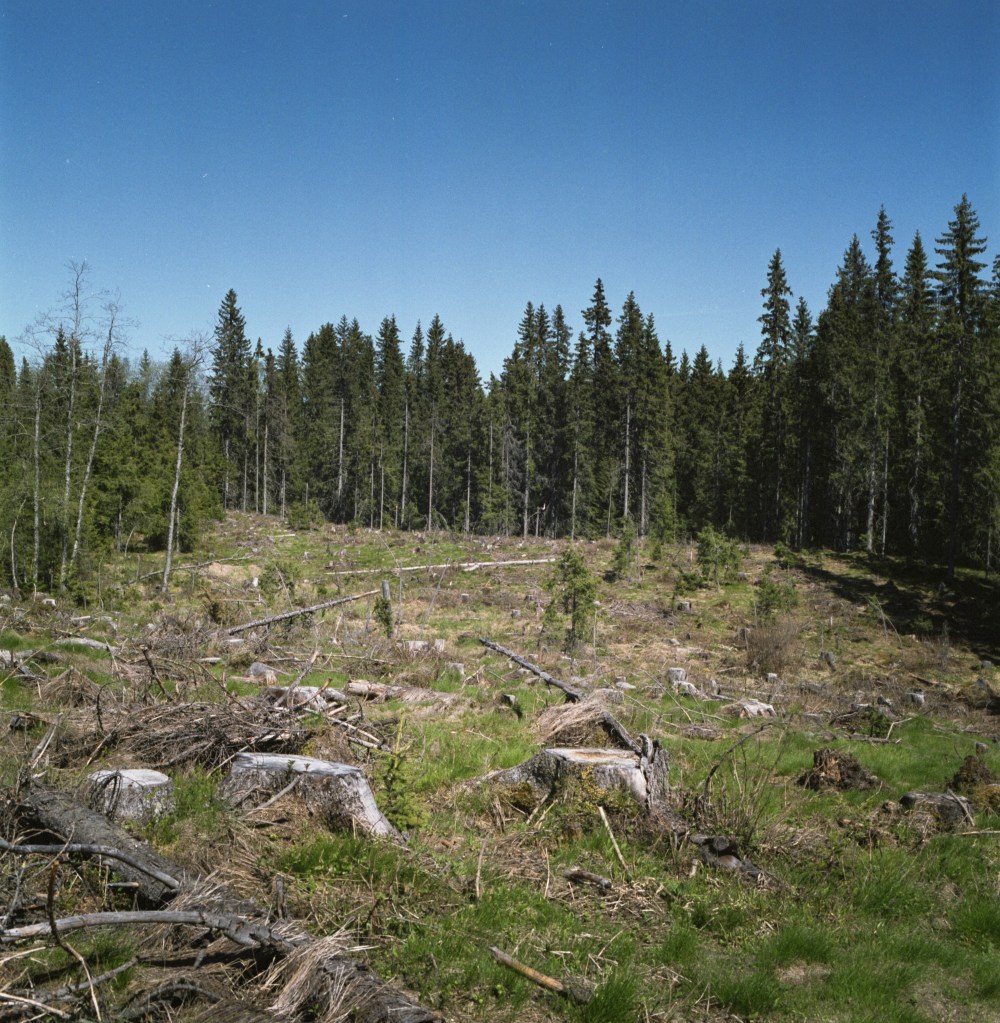
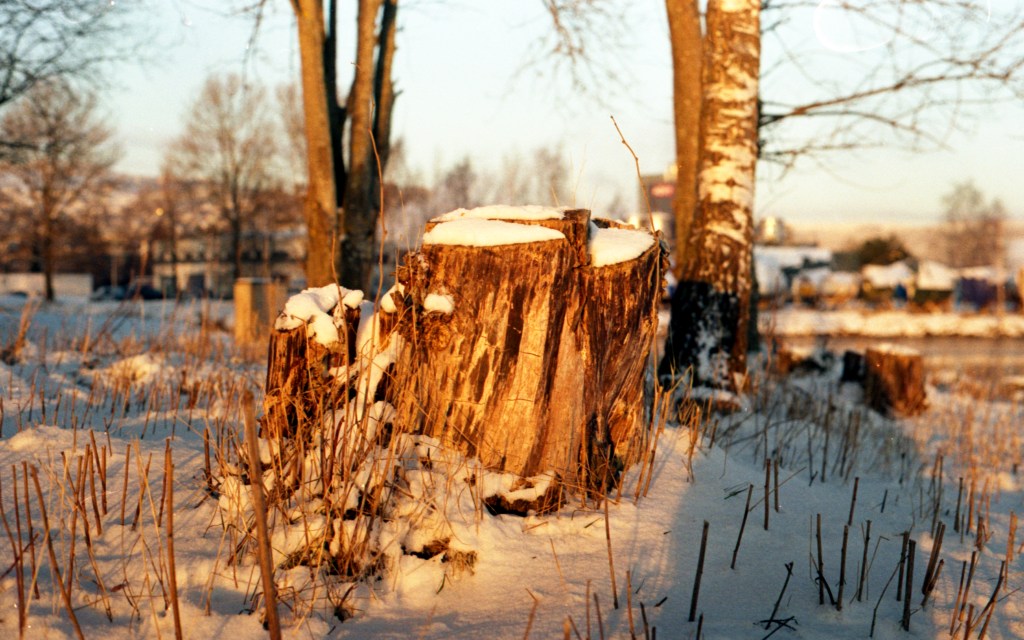
Although I couldn’t find the path, I saw a lot of small amphibians and I would guess there would be some adders lurking around the area, and since the path was a bit confusing, I decided to abandon the search for a path in the sunshine, and rather focus on the area I was already in. I turned my attention to a little tree-stub and attempted my luck there instead.

A tree-stump thingie – Hasselblad 500c w planar 80mm f2,8 – Fujifilm pro400h

I then started my walk back to the car, and I came across a scene with lovely windflowers and some forest in the background. I decided to capture it and I will share it with you here.

Windflowers sparkling in the green – Hasselblad 500c w planar 80mm f2,8 – Fujifilm pro400h

Out walking with Fuji C200

A little while back, I bought some rolls of Fujifilm C200 colour negative film. A consumer film I remember very well to have used as a photo-interested teenager. Back then I had a Nikon F60, a camera that sadly has stopped working and that is too expensive to have repaired. I upgraded it with a Nikon F80 after it died. When I tried C200 again, I was excited to see how well this film actually performs, even today in 2021. On my first tryout I shot it at 160 just to be sure that I biased towards over-exposure and not under-exposure. I realized that I lost some shadows at 200, and I decided to go out once again the other day, but this time, I shot it at ISO 100. One stop over-exposure. I was a bit nervous about this tactic as I don’t know the films characteristics that well. I was afraid I would get the very «washed out» colours you get when you over-expose Fuji-films too much, but I needn’t worry.

My chosen camera for this outing, was the Canon T70. A camera that I find to have a very good light-meter and aperture-priority setting. Since I was out walking and scouting for possible locations, I shot it using aperture-priority. The camera is manual focus and you can set your aperture, so this program gives med decent control over my exposures even if I am not controlling the shutter-speeds myself.

An iPhone snap of the Canon T70. When this image was taken it was on frame 24.

Over-exposing colour negative film is normally not an issue. The dynamic range is made to deal well with over-exposure and you get more details in the shadows. Exactly what I wanted for this outing. My location this time is Steinsodden, a little islet that is accessible by foot in spring-time when the water in the lake is low. Once the snow-melt in the mountains pick up and reach the big lakes, this islet is inaccessible without either using a boat or getting wet. The name of the Islet is «Steinsholmen» or «Steinsborga» as the locals say. It is home to the ruins of a medieval castle that you can read more about if you google «Mjøskastellet». The ruins are protected, and when I was there id didn’t see any reasons to photograph it, as some moron has figured out that putting up barrier-tape around was a marvelous idea. It is just ugly and dis-respectful to the historic site and I guess the medieval king who got it built will haunt this moron forever! (At least I hope)

Reklamer

But.. No-one reads this blog for my thoughts about barrier-tape in nature, you want to see my images:

The path – Canon T70 w Canon 50mm f1,8. f8 – Fujifilm C200@100 Tetenal C41

The first image I am going to show here, is this lovely image of the path leading towards the islet. I just love all the leading lines giving this image the depth it has, and I also love seeing that I have retained so much shadow-detail with my process of over-exposing. I was a bit concerned as the day was very sunny, but not even the sky in the background is completely «blown out». Also, with my Epson v600 scanner, this film is very easy to scan. I am having trouble getting good scans of 35mm Ektar, but the C200 really is a star.

Some nice rocks – Canon T70 w 50mm Canon f1,8 – Fujifilm C200@100 – Tetenal C41

I really love the way this image turned out. I cannot remember whether this image was taken at f4 or f5,6, but it gives a very nice focus area, and a very smooth and sift background. It is so nice that the snow is melting and that I once again can take these nature-detail images that I love looking for. I have not corrected this image for sharpness or haze, but I have tinted the colours slightly, as they were a tad too green for my liking.

Reklamer

The last one that I will show in this post, is a shot at your famous f11. The main setting of the landscape photographer. It is an early afternoon view over the lake and the weather was indeed very sunny and harsh. Even so, I see that the film coped very well with the over-exposure and I am very pleased with how it turned out.

The view – Canon T70 w50mm Canon f1,8. -Fujifilm C200@100 – Tetenal C41

I am actually surprised how well this film works and considering its price, it is quite good value for money. I might very well be shooting it again soon.

Church photography and Fujifilm C200

One of my preferred subjects for winter photography is churches. I find them to be inspiring and they always spark some kind of interest in my photographic work. I will elaborate this somewhat in this entry.

On a recent outing, I visited two very beautiful and different churches along with my new acquisition, the Canon T70 and a roll of Fujifilm C200. This film is a consumer level colour film that I tended to prefer using back in the day, around 2004 when I was given my first SLR camera, an Nikon F60. This combination, the F60 and the Fujifilm C200 (or its equivalent at the time) was what sparked my interest in photography. Sadly, out of pure vanity and neglectance, I haven’t used this for a very long time, but when I saw a three-pack of C200 at a discontinuation sale at a “everything shop”, I bought it and suddenly remembered why I loved using this film. It really has some “zing” to it that I really like. 

The most spectacular of the churches I visited on this outing, was Skute kirke, near Hov in Søndre Land. Finished  in 1915, it sought to be a “modern” take on the Norwegian Stave churches, and the architect Ole Stein was clearly both inspired by Art Nouveau and Stave churches when drawing this church. It was named after one of the neighbouring farmers, Peder Skute, who gave land for the construction under two conditions. All locals should be given the right to a free burial, and the graves should never be removed. This promise has been kept alive until this day. 

Side door at Skute church – Canon T70 w Canon 50mm f1,8 FD lens. Fujifilm C200@160

To me, Skute is one of the locations I always return to for church photography. It is such a beautiful and special building that I find to inspire my photography because of its beautiful lobster red colour and its colourful details in doors and ornaments. This is the first time I have been here in winter time, and if possible, the snow made it even more striking.

Their prominence and “standing out” of the environment is one of the reasons I like shooting churches. They are built to be proper landmarks and people tend to be very proud of their church and something they talk proudly of when asked. Often, when I am working around churches with my cameras, I get to speak to locals and employees and am often granted access to the inside as well. Sadly, I didn’t meet anyone at this trip to Skute, and was not able to photograph the incredible Neo-Baroque and Art Nouveau inspired interior, but I met a local lighting a candle on a grave, who welcomed me and was very happy to see someone photographing the church he was so proud of. 

Reklamer

Another reason why I tend to shoot churches in winter time is accessibility. In the Norwegian winter, the amount of snow makes your options for locations limited to where it is in some way prepared for people to move about. The area around a church is always plowed and there are always some paths around the graveyards to walk on while taking your photos. Churches also provide some contrast and colour in an otherwise quite uninspiring and monochromatic winter landscape. Making them ideal for photography.

Earlier on the day I visited the much older and more traditional Fluberg Kirke. About 25 minutes away from Skute, this is another church that I tend to revisit. Working around Fluberg is great for detail shots and the lovely aerial view over the lake Randsfjorden with its closest settlements Fluberg and Odnes. This is also just a few minutes walk from Meierilandet, where I did my Expired roll of Mitsubishi MX-III 400, and to get to Skute, you cross the bridge you see in that entry, 

Reklamer

Fluberg Kirke was built consecrated in 1703, but its wind flag says 1699 indicating the year it the land was consecrated. At its time, Fluberg was built to be the main church of its are, and hence in the most exquisite way imaginably at the time including three galleries seating in total 450 people for a sermon. 

Main gate from Fluberg church – Canon T70 w Canon 50mm f1,8 FD lens. Fujifilm C200@160

On this outing, I looked at shooting details around the church rather than aerial shots of a white church in white snow, and I must say that I am becoming very fond of the Canon T70 camera. This is definitely a camera I will be using more in the future. I will probably extend my collection of lenses suiting it to contain a wide-angle and a short tele-foto lens in addition to the 50mm. 

Also, using the C200 again was a fun experience. This time I chose to set the camera light meter to ISO160, on third of a stop over exposure, to make sure the camera would bias that way if hesitating. I find that this works very well for what I wanted to achieve with this shoot. Even though there are better, sharper, finer grained and in general more flexible, but for its price, C200 is a very good choice and alternative. 

Capturing bleak winter colours

As I have previously written on my blog, I like shooting Kodak ProImage 100 in the winter. There is something about the colours and the subtlety of it, that I find to be exactly the right media for my style of winter-shooting. Some days ago, I gave the Konica a roll of ProImage and went for a little outing to some different locations where I could access the lake. The day were one of those days where it was clearing up after some dull and grey days, and there were very bleak, oranges and purples in the landscape.

Lith Print feel – Konica Autoreflex TC – Hexanon 50mm f1,8 – Kodak ProImage 100

I have also found myself to be very fond of the little Konica camera. Yes, it has a bit fewer shutter speeds than the OM-1 that inspired me to buy it, and indeed it hates cold weather. But the camera, and its lens is in mint conditions and takes beautiful images. The lens is very sharp and produces beautiful bokeh. It also feels very sturdy in the hand. From what I gather this is because mine is an early model where the whole body is a metal construction. It does not produce any light leaks at this point and I guess the light meter would work if I gave it a battery.

Tree root in snow – Konica Autoreflex TC – Hexanon 50mm f1,8 – Kodak ProImage 100

Based on the fact that this was marketed as an «entry level» SLR camera in its time, I must say that its performance is incredible. If I was to recommend an entry level SLR to anyone at this point, I would be very tempted to say Konica Autoreflex TC and just smile. I am very happy that I purchased this camera and I will probably keep it as one of my regular users over some time, along side with the Olympus OM-1.

Mitsubishi Film?

Did you know that Mitsubishi, the manufacturer of cars, air conditioning units and heaters also at some point made film? At least, they had a line of film branded with their name on it at some point, and whether it is a rebranded Fujifilm or Konica film, is unknown to me. What I do know, is that the film I got in my hand is «Made in Japan» and has English writing on it. It also states that it was made at «Mitsubishi paper mills».

Roll with 24 frames of Mitsubishi MX-III 400 colour film.

Since the film was 15 years expired, I decided to shoot it at ISO 160 and use a camera that I trust. I therefore went for my Nikon F80 with a modern 85mm Sigma lens, that is substantially newer than this film was at the time it was exposed in January 2021. I chose to shoot mainly at aperture priority, because of very changing lighting conditions and the fact that I wanted to shoot with gloves in the cold weather.

Reklamer

All in all, I am very pleased with how well the film held up over the years in terms of colour representation. How this film was when it was new is unknown to me, but as it stands today, it gives very nice colours, really capturing the subtle greens and detail in the shadows, really showing the nice day it was when it was taken.

Fluberg Bridge – Nikon F80 w Sigma 85mm f1,8 lens. Mitsubishi MX-III 400 @160 (Expired 2005)

In some images, I saw a weird magenta cast in the images. This was only visible in some of the images, and not consistently over the whole roll. I developed a roll of Kodak Portra 160 in the same tank at the same time as I developed the Mitsubishi, and I could not find any of these colour shifts on this roll, leading me to think there might be unevenness in the emulsion of this film. The images with the colour shifts, were at the end of the roll. Scan settings were identical all over the roll, and should not be impacting the images in any way.

I do like the images and how this film looks 15 years in though, and I have another roll of the same roll in the freezer, that I will meter at ISO 125 to give it a little more exposure. This will be done sometime in the spring, when there is more colour around to play with.

Testing a Konica Autoreflex TC (Part 2)

This entry is a sequel of a previous entry where I shot a roll of Ilford FP4 plus trying out my new Konica Autoreflex TC camera, and where I, somewhat irrelevantly compared it to the Olympus OM-1 because I saw a video about it on Youtube. In retrospect, I regret that comparison because I find the cameras to be very different and not too comparable. I therefore cleared my mind, and I rolled the Konica up with a roll of Kodak ProImage 100, which is my preferred colour film for 35mm winter photography, and I went for a little walk.

My car needed to visit the garage that morning, and I had some time to walk around shooting the Konica handheld to get a good feeling about how it performed. Since the morning weather (The lovely thing about Winter-Norway around 10.00) was bright, colourful and vibrant I chose to go with Colour Shooting

A short time-lapse of the beautiful weather conditions this day.

Even though the Konica really dislikes the cold weather and can start to play up in different ways, I learnt from this last time, and this time, I chose to consider where it had issues last time before I started working. Fist of all, when the shutter gets cold, it tends to stick a little bit, therefore I tried to keep the cameras as close to my body, under my jacket, most of the time. This probably looked a bit strange, but it worked. I also avoided the lens fogging up due to this.

Another issue I found last time, was that the rewind button under the camera sticked and would not operate properly outside and the film ripped. I tried this button on multiple occasions indoors later, and it always worked. So this time, I did not rewind the film before I came home, and I did not have any issues with ripped film. That said, though. The take-up spool did in fact cut off the tip of the film leader in some weird way.

Konica Autoreflex TC w 50mm Hexanon f1,8 lens – f11 1/60th Kodak ProImage 100. Tetenal C41
Reklamer

I shot without filters this time, but I would probably have chosen to use a two stop polarizer if I had one for the ø55 filter tread. But when looking at the images, that was not really necessary after all. Working with the Konica camera is very pleasant, and it lies very well in the hand and has easy controls to operate. It also seems to be quite accurate in the normal shutter speeds that I have tried out, but then again, it doesn’t have shutter speeds between 1/8th and B.

What I really like, is that lovely Hexanon-lens. It has a very nice sharpness and it helps me render really vibrant colours and grey tones very well. I am looking forward to trying this one out with some Bokeh-shots with wide apertures at some stage. Stay tuned.

Shooting Boots film?

A short while ago, I shot a roll of expired medium format film and got «interesting» results with a lot of mottling and so on. I am not a very frequent user of expired films, but once in a while, I get hold of some expired film, and I do not mind trying it out either. Normally, the expired films you get hold of are your big manufacturers such as; Kodak, Ilford, Fuji and their friends. However, in the late 1990s and early 2000s, there were a huge number of rebranded films and budget options that are not present today.

In this entry, I am writing about my tryout of one of these films. A film sold in the pharmacies back in the day. The Boots Universal 400. Which film this actually is, is not easy to read out of the packaging or negatives. The negatives are fairly anonymous without much writing on them, and on the box, it only says that it is made in the EU for Boots Pharmacies in England. The EU-part leads my suspicion to either Agfa or Ferrania as the real producer of this film, but I will not make any claims. Please let me know in the comments if you know.

My equipment and film for this entry. Olympus OM-1 and the Boots Universal 400. Sadly, I did not get the extra 100 advantage card points from Boots, because I developed the film myself at home.

I chose to go with the Olympus OM-1 as it was a very cold morning. The temperature was -20 degrees when I arrived at the location, and the Olympus has an impeccable record of always functioning in cold weather conditions like the ones today.

Because the film expired in 2006, I chose to abide with the rule of thumbs, one stop pr decade, and I metered my shots at ISO 160, and did some slight bracketing just in case. My expectation from this film was slight colour casts and an increase in grain, which I indeed got. The colours were severely off in many of the shots, rendering the misty lake in everything from strong oranges to fiery reds. Instead of making heavy colour corrections in post-processing, I chose to go with the colours the film gave me, and I did not do any grain reduction either.

Boots photographic aquarelle – Olympus OM-1 w Zuiko 50mm f1,8 lens. Boots Universal 400@160

Some of the images got a nearly «Aquarelle like» mood to them, and I find them quite interesting and beautiful in their own way, even though they are clearly not the most spotless, nor grain free images I have taken by any means.

Reklamer

Another interesting thing from this morning, was the the lighting conditions changed so much over the 45-60 minutes I was out shooting. The previous image was taken at the beginning of the session, and the following was image nr 36 on the roll.

Boots photographic aquarelle – Olympus OM-1 w Zuiko 50mm f1,8 lens. Boots Universal 400@160

Shooting films with huge amounts of grain is not normally my thing, but sometimes grain gives you images a little extra punch in the mood and makes them more interesting. In this case, I think that is what the grain did. It gave the images a level of abstraction that I find very pleasing. But I appreciate that this might not be everybody’s cup of tea.

More Christmas decorations

This entry is a sequel of the FP4 shoot with the Advent decorations. If you haven’t seen that entry, please scroll down and find it. In this entry, I have once again done like a cat, playing with the Christmas decorations. This time, I played with the Christmas tree and a roll of Kodak ProImage 100 and I used the Olympus OM-1 with the same 50mm lens that I often use it with. Originally my plan was to shoot this with the Praktica MTL5 B and the Helios 44-2 lens, but it turned out that the lovely Praktica didn’t really appreciate being hooked up with the shutter release cable, and it therefore decided to jam. Not the kind of jammed that you can easily fix yourself, the properly jammed jam. Therefore, I had to restart the shoot with the Olympus, which handled the cable just fine.

I shot the Zuiko Lens fully open at its maximum aperture of f1,8, but I chose to let the Christmas tree lights be my only light source and ended up using longer shutter speeds, such as 1/2, 1/4 and even one and three seconds.

Christmas tree angel – Olympus OM-1 w 50mm Zuiko f1,8 lens. f1,8 shutter 1/2 seconds. Kodak Proimage 100

I know that there are many opinions on the Kodak ProImage 100 out and about. For my style and preference of photography, I find the ProImage to be brilliant for capturing winter colours where I often find Ektar too vibrant. Also, for indoor photography like this, I find this film to work perfectly, as I would often have to de-saturate Ektar in these situations. But again, this is personal preference. Personally, I like the «level between» Ektar and Portra as I see this film to be.

Reklamer

These images are slightly colour corrected in Photoshop after scanning, there were no colour shifts, but I found that the images got scanned with slightly different white balance. Not a big deal though, as it was easily correctable with Photoshop. The film was developed using the Tetenal Colortec C41 kit, which I find to work very well and be easily controllable. When using this kit, I cannot understand why it took me so long before I dared to try developing colour myself.

Thank you for reading and following me through 2020. Let us all hope for a better and less troublesome and pandemic 2021.

Capturing the winter colours

Shooting in winter time can sometimes be very uninspiring and difficult. There are no vibrant colours in the nature, and the weather is sometimes really and truly nasty. Therefore, I have made myself a project this winter. To capture the mood of the Norwegian winter with analog photography. I have not limited myself in terms of films, developers or styles. The goal with the project is to convey the Norwegian winter mood through my photography.

This is the second entry in the project, and in this one, I am working with one of the days where the weather is nice and where there are colours to work with.

To capture the colours, I chose to go with a very under-rated film that I find to work very well with the Norwegian winter tones. The Kodak Pro Image 100. I have used some rolls of this film previously, ordered on eBay as it was not sold in Europe. From what I have gathered online, this film was originally introduced in South America and Asia as an entry-level professional colour negative film. Based on the Kodak Gold, it was then altered, tweaked and improved to produce better skin tones, but keep the warm Kodak colour palette that the Kodak Gold is renown for.

Olympus OM-1 Zuiko Olympus 50mm f,18 w 1,6 stop Circular Polarizer. Kodak ProImage 100

When you google this film, you get a lot of «so-called experts in the field» who has written some kind of a review of this film based on their experience after shooting one roll of film. All of these conclude with something like «This film is so cheap, why would Kodak brand such a cheap film professional, Ektar is far better». I find this to be unfair to the Pro Image. KODAK Ektar is a brilliant film, and a film I use a lot myself, but I find it to be too vibrant for my winter shooting. I also mean, that you can never judge a film just by shooting one roll of it, and choice of film is a personal choice and relies heavily on personal preference. after fifteen rolls (three five-packs) of Pro-Image, I have found this film to work brilliantly for my preferences.

Reklamer

One of the lovely things about working in Norway in the winter, is that morning light happens at more comfortable times than in the summer. My «early morning shoot» started at 09.30 with a cup of coffee and ended around 11.00 with me rewinding the film back into the cassette and traveled home for development. Even so, I did not meet as many people as I expected on my little outing into the lovely lights and colours. And I find that I was able to capture the mood of this morning.

A sunny, cold winters day after many grey dull days, with some lovely almost purple colours in the skies and a yellowish tone on the ground near the lake.

Olympus OM-1 Zuiko Olympus 50mm f,18 w 1,6 stop Circular Polarizer. Kodak ProImage 100

I then ended my day with doing a C41 process. I had fresh chemicals which were mixed right before, and the cycle went like a dream. I see a slight cyan-cast in the scans. This could be because I had to pause the development between the Developer and the Blix due to a temperature fall in the Blix. I then left the films in the tank with some 38 degrees clean water for some minutes, while the Blix heated up again.