Trying out a Konica Autoreflex TC (Part3)

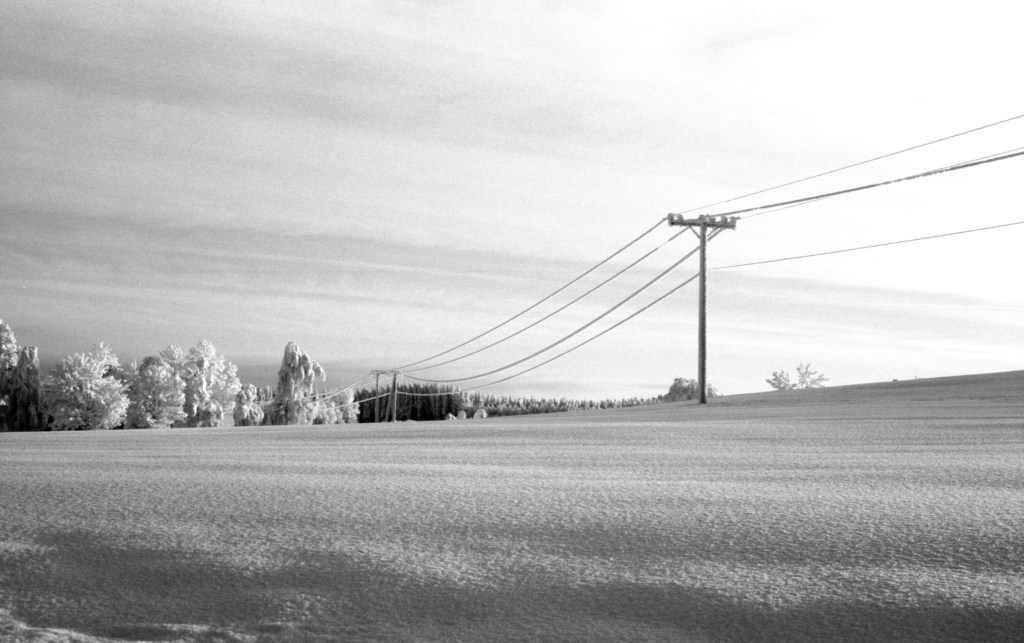
As you have seen through my previous posts, I have been playing around with a Konica Autoreflex TC lately, doing different styles and types of photography with it and different films. Some days ago, I took it out once again with a roll of Fomapan 100and a yellow and a graded orange filter. I went for subtle snowy shapes in nature to test out both the sharpness of the lens, and to once again try the Fomapan 100. Over 2020, I shot many rolls of Fomapan 100 to test it out and get familiar with that film, and I must say that Fomapan 100 is a film I really like shooting, and that I find to give very fine grain when developed in Kodak X-tol at stock level, and that I get very nice results with it for most of my photography. However, this is my first test of this in snowy conditions.

Konica Autoreflex TC w 50mm Hexanon f1,8 lens w yellow filter. f11 1/125th Fomapan 100@100 Fomadon Excel 1+0

I did not have Kodak Xtol at this moment, because I’ve recently had two batches that split. I initially thought this was my mistake and that I hadn’t mixed it properly or made some other mistake with it; however, after some research online, I got leads about a bad batch of Xtol that had this issues. The date I bought the two bags of powder correlated well with the production and estimated sell-dates of the problem batch. Even though the two batches didn’t cause me any issues, I have not bought Xtol for a while. I will, however buy another batch some time soon. But I had a few bags of Fomadon Excel left, which is basically Foma’s take on the Kodak Xtol.

Reklamer

Previously, I used to have Xtol in the spring, summer and autumn-time, when I shoot most film, and Fomadon Excel in wintertime, when I shoot less. When handeled properly, I cannot see difference between negatives developed with Excel and Xtol. One difference though, is that Fomadon Excel can be slightly more challenging to mix. I have found that mixing it as you wold mix Ilford Chemistry, with warmer water, makes the powder dissolve better and easier, and that is how I mix Fomadon Excel. For this particular process, I also used Foma Fixer and Foma Stop bath as well. So this is a all around Fomapan Process.

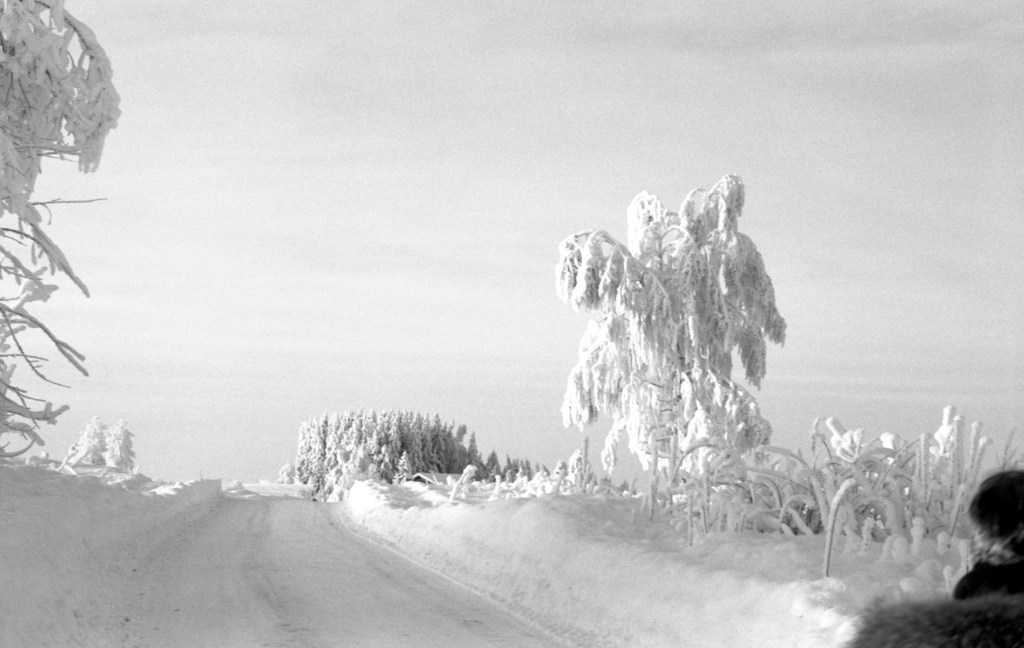
All in all, I am very happy with these images. They were taken very quickly whenever I saw something that I found worthy of shooting, and I find that they make the sky come forward in a very pleasant way.

Really pushing it with portraits

Sometimes you come across settings and situations where there just isn’t sufficient lighting to go smooth and grain free photography with reasonable shutter speeds and settings. Especially with living subjects, like people, you need to allow for some «life» in your model and hence use 4 seconds shutter speed. In these situations, an option is to push the film. However, when pushing film, you will lose some of the detail get increased contrast added to your images.

For this entry, I created a situation where I had very limited light, and I went for two 400 speed films which I pushed. My initial Idea was to push both of the two stops to 1600 and see what differences I could spot, but due to a change in lighting conditions, I had to do one of them at 3200, a three stop push.

Ilford HP5+@1600

My first film for this photoshoot was a roll of Ilford HP5+ Medium format film. This is a film I regularly shoot, and I am very familiar with the characteristics of this film at both 400 and 800, but I have never pushed it further than that before. Therefore, I was curious how it would deal with the extra stop of push, both in terms of grain and contrast.

The only lighting used for this shoot was the available light in the old derelict class-room and what I could reflect back using the «sunfire»side of my reflector. I shot as close to F4 as I could and got shutter speeds around 1/60th of a second.

Reklamer

I was surprised to see the negatives when I pulled them out of the tank. I expected a very punchy-looking negative with a substantial lot of contrast and severe loss of detail, but the negatives looked reasonably good. The push was obviously visible, but not as prominent as I would have guessed. My quick scans also turned out some nice images. Although grainy, I like the look of these pictures.

I see that I got a bend mark on one of the images, I clearly was a bit unlucky when reeling the film for development.

Kodak Tri-X400@3200

If I expected grain and heavy contrast on the HP5+, I did not expect much of the images from the three stop pushed one. On my way home, I actually doubted my move and was already drafting my apology letter to the model, who friendly joined me for this experiment. I was, however surprised in two different ways.

Even though I followed the guidelines for a three stop push found in the massive dev-chart and had fresh and well tempered chemistry (20 degrees) some of these negatives came out very thin. I metered in the same way all the way through the shoot, and I obviously developed the whole roll at the same time so the big difference surprised me. I must have made a mistake with my metering at some of these images.

However, some of the negatives looked really nice. Although they were obviously very contrasty and punchy they looked to have kept at least some of the detail I looked for. As you can see in the pictures the push is very visible, and I would not go for a three stop push if it could be avoided.

This shoot was a real gamble, and I am thankful for the model who helped me on this. Although I couldn’t really compare the two films because I had to do different pushes, I must say that I am surprised how well both films coped. However, I would say that the grain and latitude of the HP5+ appeals more to me than the TRI-X. But this is a personal observation.

I have decided to try out these negatives in the darkroom at some point, and I will post my results and workflow from that at a later point.