Trying out Delta 400

When I first tried out Ilford HP5 plus, I completely fell in love with the film. I just loved the amazing latitude and the rich feel it gave my photos, and since then, I have mainly used HP5 plus whenever I needed a 400 or even a 200 speed film, which the occasional use of Tri-X-X when I want to push the film slightly, or just want to have a yellow cassette in my camera instead of a green one. At box-speed the two films are interchangeable in my humble opinion and I challenge you to spot which photo was shot with which of these two if I put up a selection.

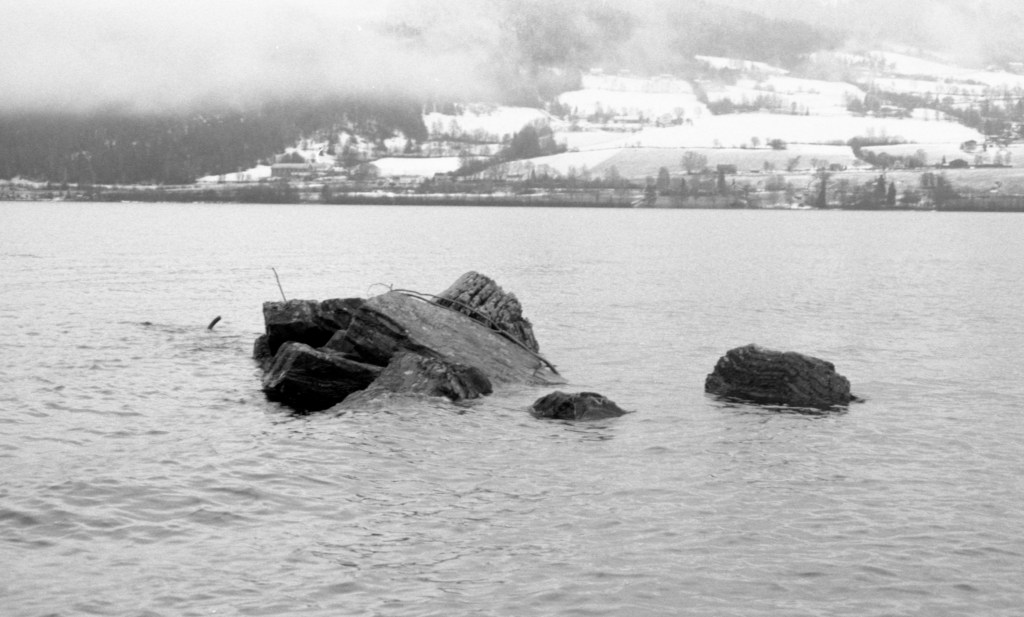
A While back, before Covid and quarantines were an issue, I was in Aarhus in Denmark visiting a friend and enjoying the lovely Danish landscape and all the lovely pastries and coffee shops they have. I also visited Mimosa Photo shop in Aarhus city center, and picked up some rolls of film. Since I only had one roll of HP5 plus left, I needed a 400 speed film, and the only one they had in at that moment was Delta 400. I bought three rolls, and since then they have just been sitting around in the fridge, and not been tested. The other day, I went out for a little outing in the misty Norwegian winter-weather, and I decided to shoot with Ilford Delta 400.

Reklamer

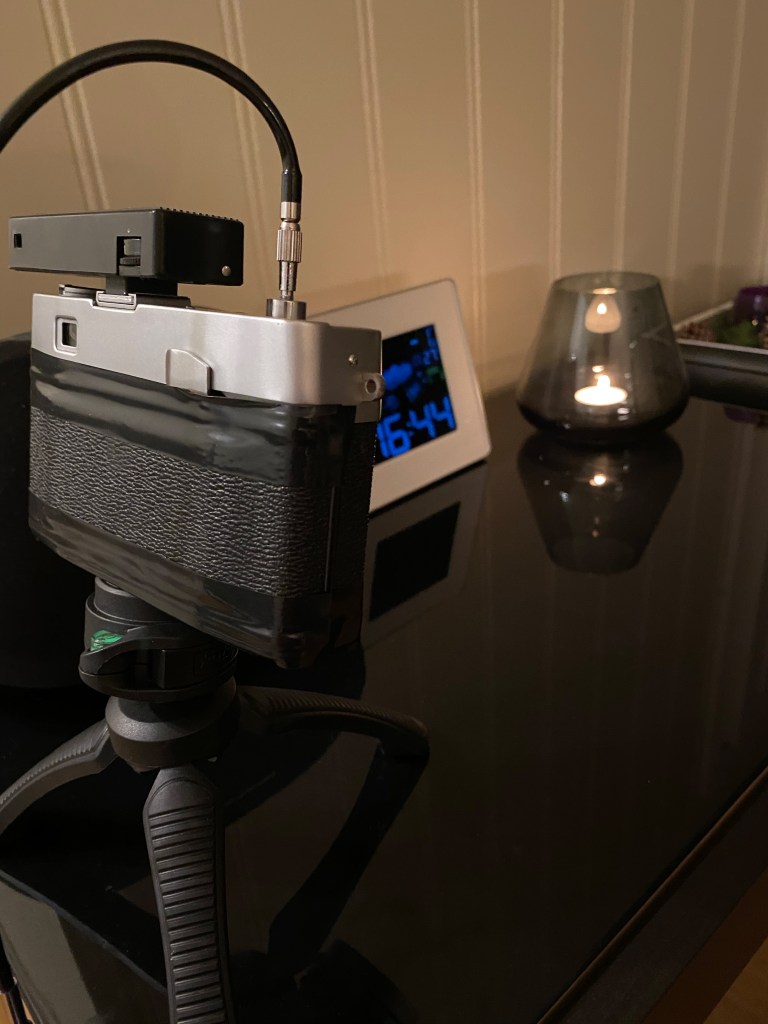
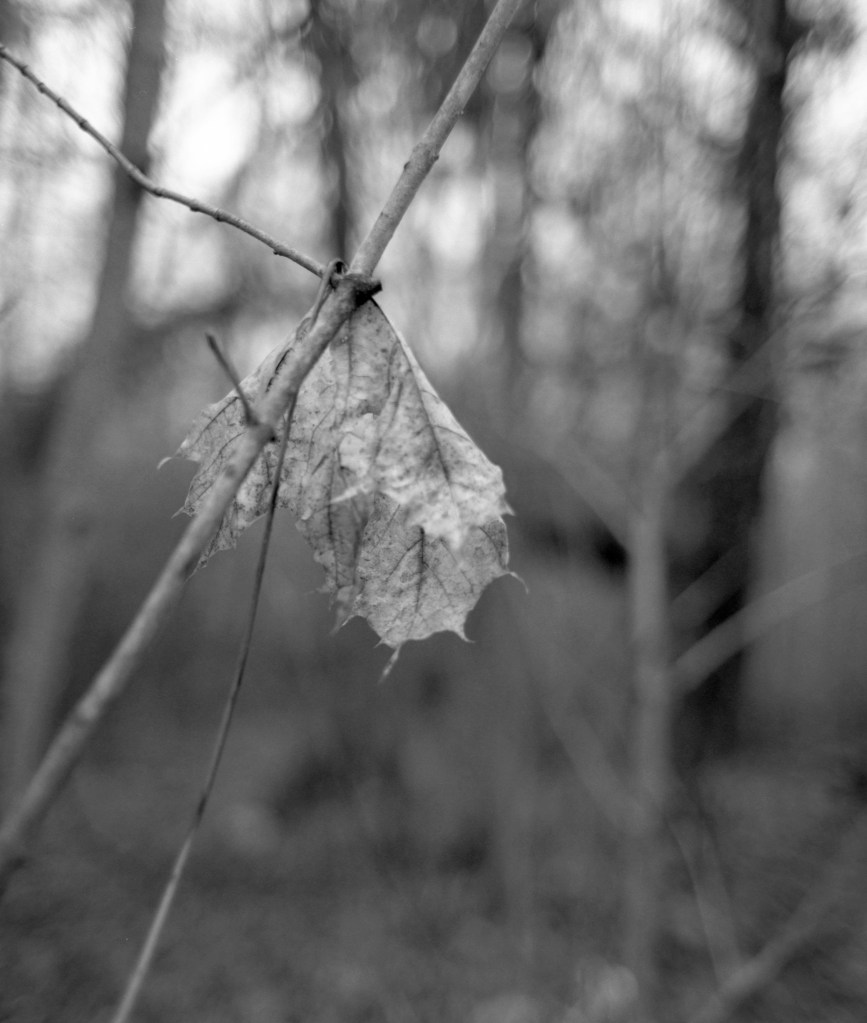
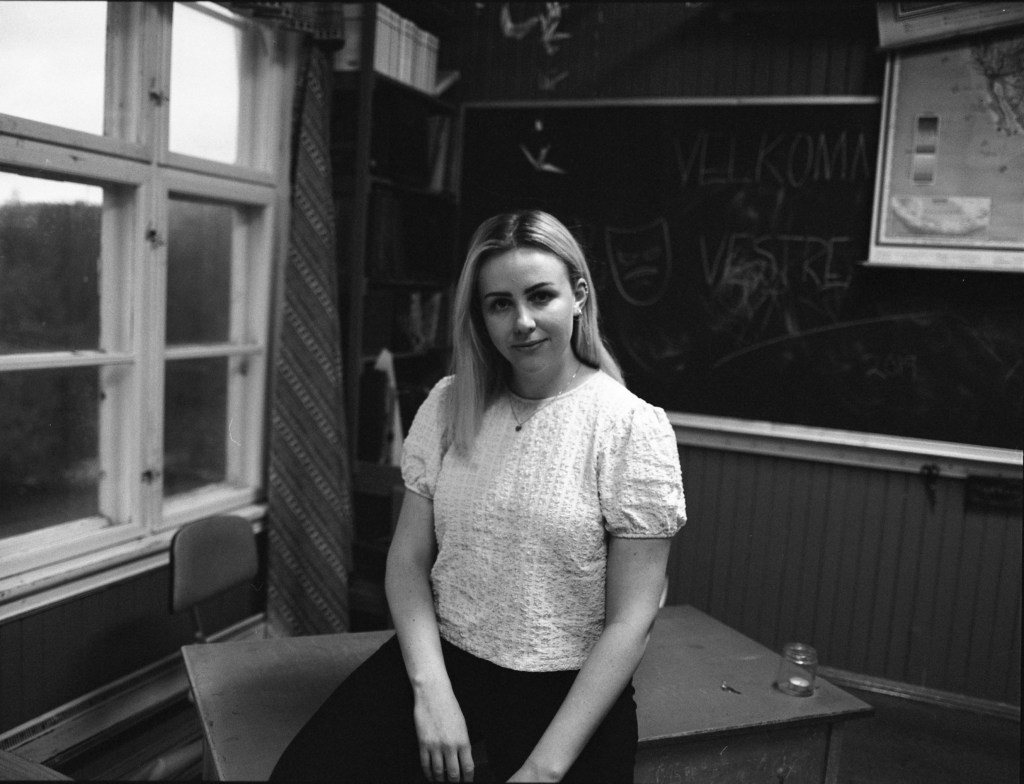
I put one of the rolls in my Minolta Dynax SPxi, and screwed on the yellow filter and went for a spin, trying to find black and dark grey contrasts against the misty, white skies. I have often found the yellow filter to help me get the results I want in winter time, lifting the darks, while helping me retain detail in the very bright whites. I was curious how this film would be different from the HP5 plus, but after only one tryout, I can obviously not say that I have the knowledge to make a comparison nor a good enough photographic bank of results to base any personal judgement on. But I do know what I would expect from HP5 plus in these situations. An my prediction was more or less the same, but with finer grain.

Minolta Dynax SPxi w Minolta AF Zoom 35-70mm f4,5 Yellow filter – Ilford Delta 400 professional Ilford Ilfotec DD-X

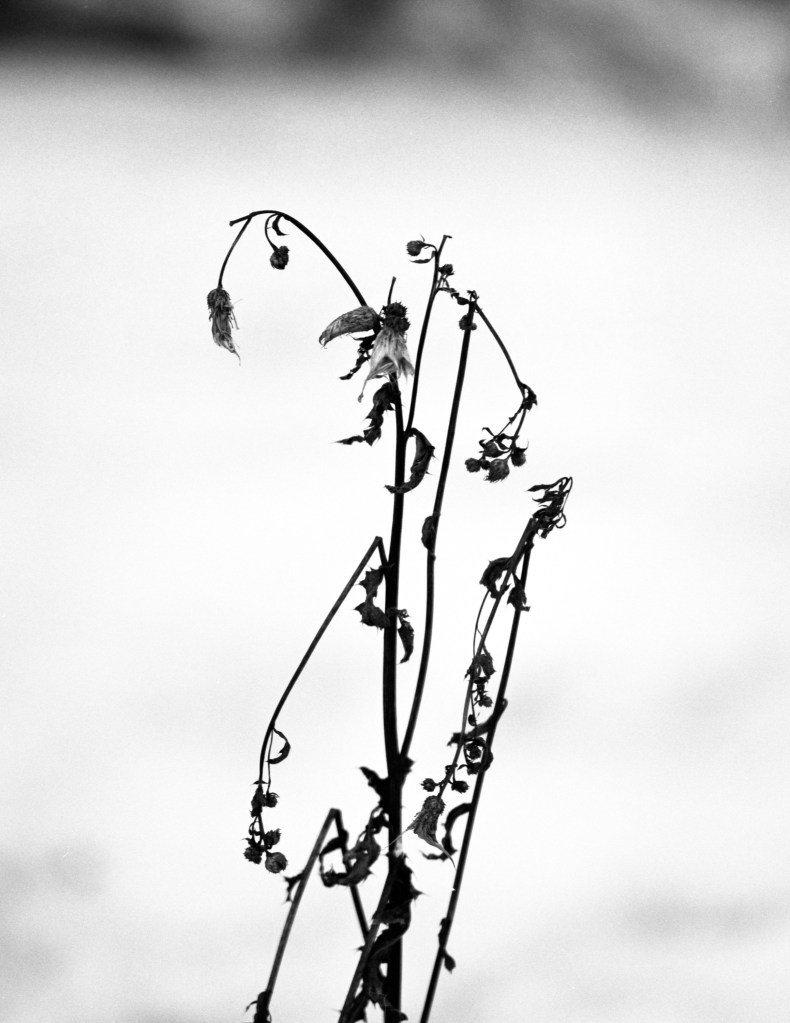
The grain on this test-roll was actually finer than I expected, but I did not get the same contrast boost that I would have expected comparing FP4 plus and Delta 100 which I know both of very well. But all in all, I do rather like my results. The Minolta Zoom lens is not by any means the sharpest of lenses, but I tried out different aperture settings and even at some points used «Aperture priority» mode to get the most out the lens that I had on. The camera has a few functions that I find to be very helpful.

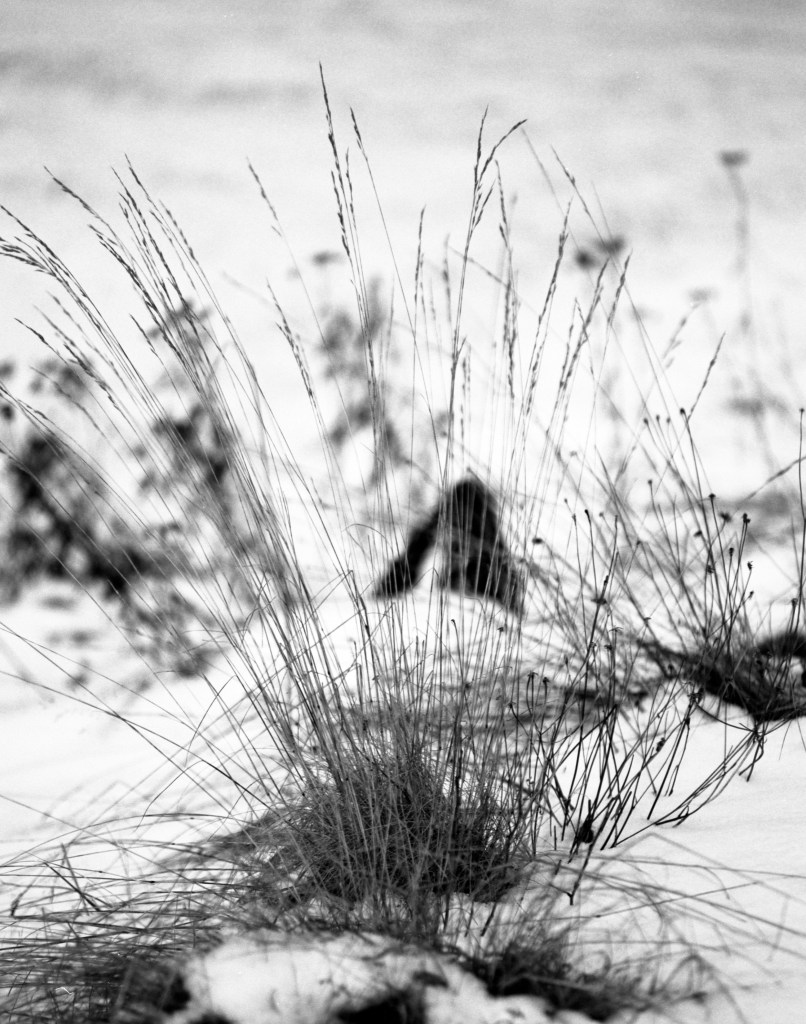
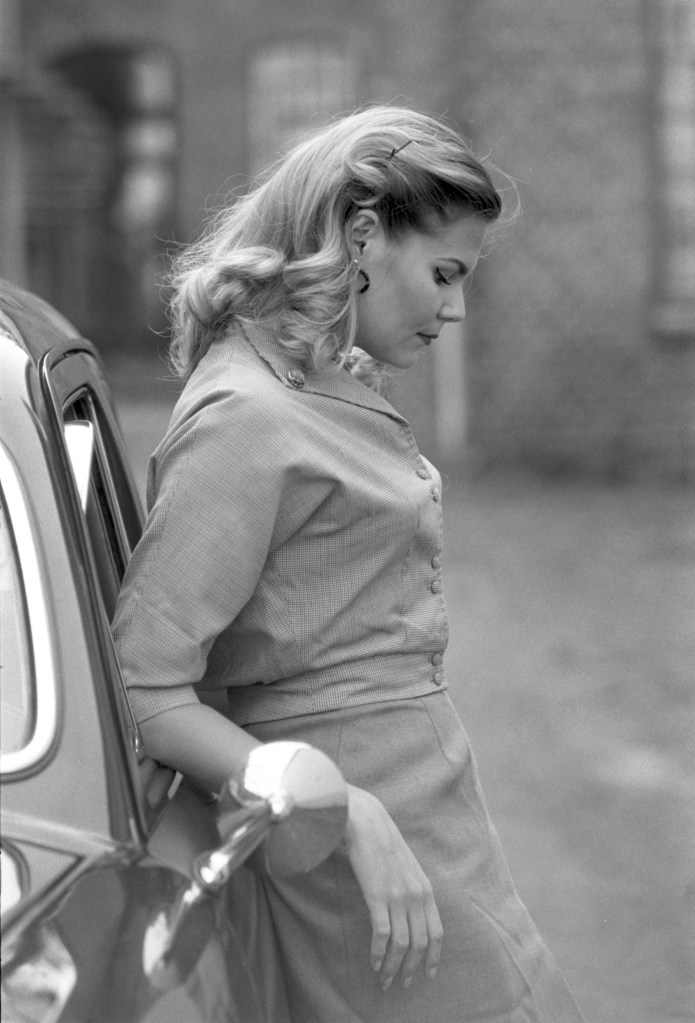
First of all, I like the two sensors on the right hand handle that will automatically focus when you touch them. In rainy weather; however, it turned out that these sensors were actually reacting to the rain touching it as well as my fingers, to the AF went berserk a few times. Also the AF tends to select different spots and, as visible in the images, it back focuses somewhat. It would be interesting to try this camera out with a different lens, to see whether this is a camera or lens-issue.

Reklamer

Second, I like the way you set the different parameters on different places on the camera. However, I do find it a bit fiddly and that you very easily forget which knob does what, and hence, shooting this in fully manual mode, is sometimes really exasperating. But the idea of having the controls on knobs and not on wheels, is something I really like. If Minolta only would have been friendly enough to mark these knobs with what they do.

Minolta Dynax SPxi w Minolta AF Zoom 35-70mm f4,5 Yellow filter – Ilford Delta 400 professional Ilford Ilfotec DD-X

Even with the AF on, as you can see, the focus gets very soft, and I suspect that there might be an issue with the AF system on this camera. But at the same time, I think that some of these photos gets some additional mood with that soft focus.

I chose to develop with Infotec DD-X which I know is made for the Delta series. I got the developer from Bjørn Joachimsen in November, and I would recommend you to look through his amazing catalogue of photos both here on WordPress and on Flickr.

Experimenting with depth of field

Playing with the Christmas decorations is not an activity reserved for cats. When I tested the Petri 7s for the first time in the beginning of December, I noticed how good the lens seemed to be. Even though my test then showed that the camera had seen better days, the f1,8 lens turned out to give very nice, details and I decided to shoot some frames to test it out. I decided to go with the Christmas, or actually Advent, decorations. I lit a candle in a glass candle holder, and let that work as a foreground, and I placed the rest of the decoration approximately 80cm away from the lens, which would be the closest focus length for this camera.

My setup. Petri 7s on a black glass plate with the decorations. I have taped the camera because the back has a tendency to «pop open» at any point.

I went with shots at f1,8, f4 and f16 to see how much difference there would be in sharpness and how they would turn out. I did not change the lighting conditions, but I adjusted my shutter speeds to compensate for the smaller aperture. for the f16 image, that was two and ha half minutes with compensation for the Schwarzschild effect.

All in all I think the lens gave me the results I anticipated. The f1,8 gives me a very nice bokeh, but the focus is a little bit off, so maybe the focus ring isn’t as accurate as I would hope for. The f4 image gives more sharpness and retains the nice bokeh feel, and the f16 gives a very sharp image.

The mood changes a lot between the images, and I am not sure which one is my favorite. You can make a judgement yourself, and I hope the images are to your liking.

Capturing the mood

Some days ago, I was tidying up my darkroom, and I found what I assume to be a previous test-roll. I assumed that the roll was around half, but it turned out to be around 24 exposures of HP5 plus. I then got the Idea of trying to capture the miserable weather we have had in the area lately. I figured HP5 plus would be brilliant at that, it has grain, but not too much and coarse. I also chose to go with Ilford’s Perceptol developer, to reduce the grain in the whites a bit, but not eradicate it. 

My aim was not to get razor sharp images, but rather to capture the feeling and mood of this time of year. I am thinking more in the direction of a charcoal drawing than a crystal clear image of the mood. I know some photographers would have gone with a Holga or something similar to that on an outing like this, but I have never really befriended my Holga camera, and I prefer the effect the Petri Racer gives.

Snowy and wet December day – Petri Racer w Ilford HP5 plus@250. F8 1/60s – Ilford Perceptol stock

For that reason, I chose to bring along the Petri Racer. For long term readers of this blog, you know the Petri Racer camera very well. It was the first camera I bought for this blog, and the camera that inspired me to make a blog about cheap cameras, hence CCadventures – Cheap Camera Adventures. Not that all cameras featured on this blog is «Cheap», but they are reasonable and affordable alternatives that in some way sparks my interest.

Reklamer

The day was very snowy and it was unpleasant walking around in the snowy weather. I also had to wipe and dry the Petri a few times during the outing, to make sure it was not soaking or that the lens got fogged up. The camera had been in the car for a few hours before the shoot to «climatize» somewhat, but the wet snow and humidity made it fog up slightly anyway. I therefore let the film reach room-temperature before developing it. I often do this when the weather is cold to avoid swift temperature changes during the process. Not that the weather this day was very cold, only around -2 degrees, but it never hurts to be on the safe side.

Even capturing the snow falling – Petri Racer w Ilford HP5 plus@250 f8, 1/4 sec – Ilford Perceptol stock

The whole outing took me around half an hour, and I was soaked afterwards after wading in deep snow to reach a dam with view over the little lake Skumsjøen close to Gjøvik.

For the images, I am quite satisfied with the images as I find that they convey the mood and feeling I was aiming at conveying. These are not my strongest photographic moment by any means, but in terms of conveying the unpleasant Norwegian December-wet snow, I think I did a decent job.

Going minimalistic with Delta 100

Today as I was relaxing, enjoying a cup of coffee, I looked out the window. The first fall of snow has just blessed us with its arrival, and this always brings new objects to my attention. Things that I maybe haven’t noticed because it is hidden in the November-browns.

Today my attention was drawn towards some wilted plants. Their very dark brownish colors made a nice, almost minimalistic, tone towards the snowy background. I immediately ran to put a roll of Ilford Delta 100 into my Bronica ETR. I also fitted it with a lens I just bought. a Zenzanon 150mm f3,5. Equivalent to around 90mm at a 35mm camera, and used a yellow filter to get the minimalistic contrast that I was looking for.

Zenza Bronica ETR w 150mm Zenzanon f3,5 + Yellow filter. Ilford DD-X developer

I aimed to keep the snowy areas around zone 8-9, to not completely blow it out, and my dark areas around zone 3-4 to retain some shadow detail. I got fairly good negatives, but I would have loved to have retained some more detail, especially in the most contrasty images.

Reklamer

Once again I chose to develop Delta 100 in DD-X developer, and this time as well, it gave me fabulous negatives. I am really looking forward to working with some of these images in the darkroom, and I expect to use lower grade filters, or maybe some split grading to get the most out of the negatives. A spot on my wall is already prepared for one of these images.

Once again. Thanks to Bjørn for sending me these films and the developer to test. I do really love the results it gives.

Trying again with the Condor

A few says ago, I wrote about my new camera. A 1947 Condor I. Mine was sold without the Ferrania logo, and from my research online, I see that these cameras were sold like this in 1947. This means that the camera is 73 years old, and was sold two years after WWII ended in Europe. In the early stages of the European healing time. In Italy, this is two years after Mussolini died, and Germany was still referred to as «Handelsschiffe» and completely divided into four sections by the allies. From Germany came the Leica IIc, a camera that is way above my budget, even today. And from Italy came Officine Galileo with their Condor I.

The Condor I is a relatively simple camera in many ways. 100% manual with shutter-speeds on a wheel around the lens, aperture settings on a lever and a coupled rangefinder with two viewfinders, one for sharp focussing with some magnification, and one for a preview of the whole Image. On mine, alas, the range finder is too dim to be of any help when focussing on my particular camera.

The beautiful Officine Gallileo Condor I

Operating the camera is a little fiddly, especially because of the very hard mechanics. It does not seem to have been used and looked after for some time, and it would not object to a little lubrication and a little clean. Other than that, it seems to work pretty well.

Reklamer

Walking around with a camera like this, makes you think more than if you walk around with a fully automatic digital camera, where you know that what you see is what you get. An old, vintage, piece of equipment seems also to put a smile on people’s faces. When shooting this today, I was asked by several elderly people about the film I used, what camera it was, and what I knew about it. I also had to tip some of them about my blog, where some of the images would be posted.

Another interesting thing with this camera is that it gives med 40 images on a 36-roll of film. This is because you stick the leader properly in place, and can close the back before you start advancing it. The lens is relatively sharp, sharper than I would expect from a camera this age, and way sharper than my Argus camera. On the down side, I am limited by having to «guess-focus» and I can’t really see its potential before I have some kind of rangefinder to help me. It also seems like the lens has a little hazing on it. Not that it is a dealbreaker for me, but it is something to consider then using it, as it gives very hazy results when there is some backlighting in the image.

Even so, the camera is fun to shoot, and I will probably use it for a few outings in the future. After all, it cost me close to nothing, and It is fun being so bound to your own skills.

Printing lonely leaf

In my previous entry, I went out in the grey, misty Norwegian November to take some calm and pleasant pictures with my Bronica ETR and a roll of Ilford Delta 100. I also tested a new developer, Ilford DD-X, and I was very pleased with one of the images. So pleased in fact, that I decided to take a trip into the darkroom to make myself a print for my own wall at home.

The picture I chose to work with.

I brought along my GoPro and made a very basic and amateur video coverage of the darkroom session. My video skills are not good, and this is actually the first time I have tried to mount together a video in this way. I might do more of these.

Reklamer
My very amateur video. Please enjoy.

Working with Delta 100

Some days ago, I was contacted by another Norwegian photographer who has a collaboration with Ilford Photo. He kindly sent med some rolls of Ilford Delta100, some DD-X developer, Fixer and Wetting agent to try out. Today I went out with my Bronica ETR to try it out. Before I go any further, visit his amazing gallery on Flickr and read his posts here.

WordPress: https://bjorn-joachimsen.com

Gran Canaria
Bjørn Joachimsen Flickr

When I heard that I would be sent Delta100, I was thrilled. When I took up analog photography again some years ago, Delta 100 was one of the films that really rekindled my interest in film-photography and I find it to be one of the best films I know about. The smooth and soft T-grain structure gives pleasant results. even when developed in Rodinal. In most cases I shoot Delta 100 at 50, but today I chose to go at box speed, because of the lighting conditions.

Reklamer

My location for this outing was Tallodden. A beautiful little place not too far from where I live, and I brought my Bronica ETR, some square filters and a tripod. I always mount the Bronica on a tripod. It is too heavy to shoot steadily by hand, especially at shallow apertures or longer shutter speeds.

My setup at the location.

There is something about walking around with a proper MF SLR like this. It makes people interested, and I had a shot chat with a nice elderly man who was out for a little stroll along the lake. He told me that he had not seen anyone with such equipment around that area for years, and asked me all sorts of questions about the camera, my lens, film, plans and where I would post my images for him to see.

A lonely autumn leaf. Bronica ETR w 50mm Zenzanon f2,8. Shot at f2,8 1/30th with yellow filter. Developed in Ilford Ilfotec DD-X 1+4

I spent some time scouting around for interesting subjects that would give me a smooth and calm mood to my images. I wanted the fine grain the Delta100 gives to be one of the main focus on my shots. I chose to use a yellow filter for most of the images to boost some contrast, and get the most out of the range. But I swapped for an orange filter for shots where I wanted the «silky water» effect, and more depth in the range.

I then went home and developed.

Reklamer

This is the first time I have ever used DD-X. Actually I have never used Ilford Developers before, so I was very excited to see what the grain structure and the range would be like. This is a shoot where I would normally have gone for Kodak Xtol, and I am comparing a bit to what I would have expected from Xtol.

I am very happy with my results, and I am happy to see the smooth and lovely grain in this shoot, and I think the DD-X brought it out beautifully. I still have more rolls to shoot and develop in this developer, so I will not come with any analysis of any kind based on my limited knowledge, but so far I am very happy.

Once again, thank you for sending me films and chemistry to try out. More entries with this film and developer will come. Also a video of me making darkroom prints of some of these images.

Stay tuned

Contrast and foggy landscape

Today was a wet, unpleasant and foggy day in Norway. No real need and point in going out, but there was some interesting fog, and a very white sky that lured me out anyway. The conditions were almost black and white anyway, so I chose to go with a Black and White film. Because of the verylow level of natural contrast, I went with a slow film. Ilford FP4 Plus. I also chose to stand-develop the film in Rodinal 1+100 for an hour, to get some extra contrast and find some beautiful grays.

I chose to use the Bronica ETR, because I wanted to do medium format and that it would give me 15 frames to a roll.

I also got to test out my new scanner. Thank you for the friendly photographer who pointed out to me that my old scanner was probably shot. My new one is far better and gives me lovely scans.

Really pushing it with portraits

Sometimes you come across settings and situations where there just isn’t sufficient lighting to go smooth and grain free photography with reasonable shutter speeds and settings. Especially with living subjects, like people, you need to allow for some «life» in your model and hence use 4 seconds shutter speed. In these situations, an option is to push the film. However, when pushing film, you will lose some of the detail get increased contrast added to your images.

For this entry, I created a situation where I had very limited light, and I went for two 400 speed films which I pushed. My initial Idea was to push both of the two stops to 1600 and see what differences I could spot, but due to a change in lighting conditions, I had to do one of them at 3200, a three stop push.

Ilford HP5+@1600

My first film for this photoshoot was a roll of Ilford HP5+ Medium format film. This is a film I regularly shoot, and I am very familiar with the characteristics of this film at both 400 and 800, but I have never pushed it further than that before. Therefore, I was curious how it would deal with the extra stop of push, both in terms of grain and contrast.

The only lighting used for this shoot was the available light in the old derelict class-room and what I could reflect back using the «sunfire»side of my reflector. I shot as close to F4 as I could and got shutter speeds around 1/60th of a second.

Reklamer

I was surprised to see the negatives when I pulled them out of the tank. I expected a very punchy-looking negative with a substantial lot of contrast and severe loss of detail, but the negatives looked reasonably good. The push was obviously visible, but not as prominent as I would have guessed. My quick scans also turned out some nice images. Although grainy, I like the look of these pictures.

I see that I got a bend mark on one of the images, I clearly was a bit unlucky when reeling the film for development.

Kodak Tri-X400@3200

If I expected grain and heavy contrast on the HP5+, I did not expect much of the images from the three stop pushed one. On my way home, I actually doubted my move and was already drafting my apology letter to the model, who friendly joined me for this experiment. I was, however surprised in two different ways.

Even though I followed the guidelines for a three stop push found in the massive dev-chart and had fresh and well tempered chemistry (20 degrees) some of these negatives came out very thin. I metered in the same way all the way through the shoot, and I obviously developed the whole roll at the same time so the big difference surprised me. I must have made a mistake with my metering at some of these images.

However, some of the negatives looked really nice. Although they were obviously very contrasty and punchy they looked to have kept at least some of the detail I looked for. As you can see in the pictures the push is very visible, and I would not go for a three stop push if it could be avoided.

This shoot was a real gamble, and I am thankful for the model who helped me on this. Although I couldn’t really compare the two films because I had to do different pushes, I must say that I am surprised how well both films coped. However, I would say that the grain and latitude of the HP5+ appeals more to me than the TRI-X. But this is a personal observation.

I have decided to try out these negatives in the darkroom at some point, and I will post my results and workflow from that at a later point.

Vintage shoot with Frida and her old Ford

Analog photography is has the loveliest tones imaginable for vintage style photography. The special look an old lens gives is an exquisite vibe to your photo that no digital preset can really copy, and the feeling of doing this with vintage equipment adds an extra element. Photography is not just about the picture, but the way to get there and the feeling of the process.

Yesterday I went out to photograph my friend Frida and her lovely 1950 Ford Shoebox. To go with me for this shoot, I chose two cameras. The Weist SL-35 and my lovely TLR, the Zeiss Ikon Ikoflex. Both these cameras are reasonably accurate and has sharp lenses that does really bring out that «vintage feel». I rolled up both cameras with Ilford FP4 Plus, A film that for me is my first choice when I want that «Vintage feel». This film has a really fine cubical grain structure, and has a more visible grain than other films around its speed, and I love how this grain structure affects the images.

My equipment for this shoot. Zeiss Ikon Ikoflex medium format TLR and the Weist SL-35, 35mm M42 SLR.

We met at a lovely location in Kapp just south of Gjøvik. This location used to be a condensed milk factory back in the days, but today it is used for cultural purposes among other things.

Reklamer

We first set off with the Ikoflex. I shot as close to f4 as I could get, and did some bracketing with f5,6 to be sure not to overexpose too wildly. I shot the Ikoflex at its highest shutter speed around 1/300th of a second, but my guess is that this shutter speed is a bit slower. Probably around 1/250th which is still very good for a 70 year old camera like this.

I refer to the Ikoflex as «the bird box» and this is one of my absolute favorite camera in use. When I bought it, it came from a Swedish Zeiss collectors house, and the seller did not believe that it worked. Probably because he didn’t really understand how it works. These cameras have their specific way of use, and you will not be able to shoot this camera if you don’t know how to load film in it and how to set it up.

When we were done with the film in the IKOFLEX, I changed it for some Kodak Portra 160, but these images are not included in this entry.

Reklamer

We then set off with the Weist and its exquisite Weistar 135mm lens. I also shot this one as close to F4 as I could to get that lovely bokeh you get from this lens. This is the first time I tried this camera and lens for a shoot with a model, and I am very happy with how it performed.

These are just quick scans of the negatives. This shoot will be finished as Darkroom prints. Whether the prints and the process of making them will be entered in this blog is yet to be decided.

All in all, I am very happy with how both cameras performed during this shoot and I feel humble and lucky for being allowed to with with people like Frida, who is on board with the analog nerdity.

Photographs open doors into the past, but they also alloq a look into the future

Sally Mann