Working with long lenses

One of the things I have been working with lately, is familiarizing myself with long super-tele lenses. I recently found and picked up a Vivitar 400mm lens for my Olympus OM-system and I also have a 75-300mm Tamron Zoom lens for my Nikon F-system. I have used the Tamron a little, but I have never explored it on the longest setting. For that reason, I decided to make this a project. I shot three different films. A Kodak ProImage 100, an expired Colorama 200 and a roll of Kentmere 100. The ones in-date were shot in the Olympus and the Colorama in the Nikon.

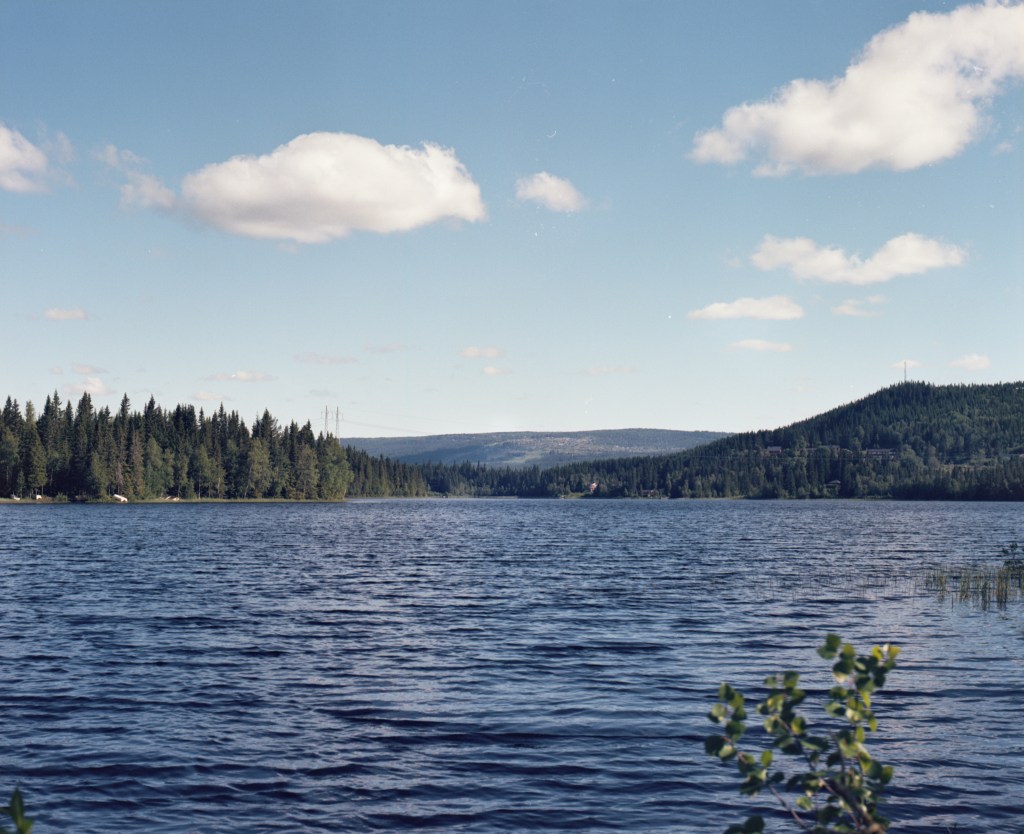
I first went out on an evening outing with the 400mm Vivitar. I shot a roll of Kodak ProImage that I had lab-developed my OsloFoto. I shot most of the shots on a tripod using a cable release. The lens is so long it cannot be safely hand helt by the camera without risks at the low shutter speeds I had to use. It was inspiring seeing how much was now suddenly a possible picture and seeing how I now had to think composition in a very different way.

Olympus OM-1 + Vivitar 400mm f5.6 – Kodak ProImage 100

I started looking for things that would usually not work as compositions. Like the top of the electrical masts at the location and some people out fishing in the lovely weather.

Olympus OM-1 + Vivitar 400mm f5.6 – Kodak ProImage 100

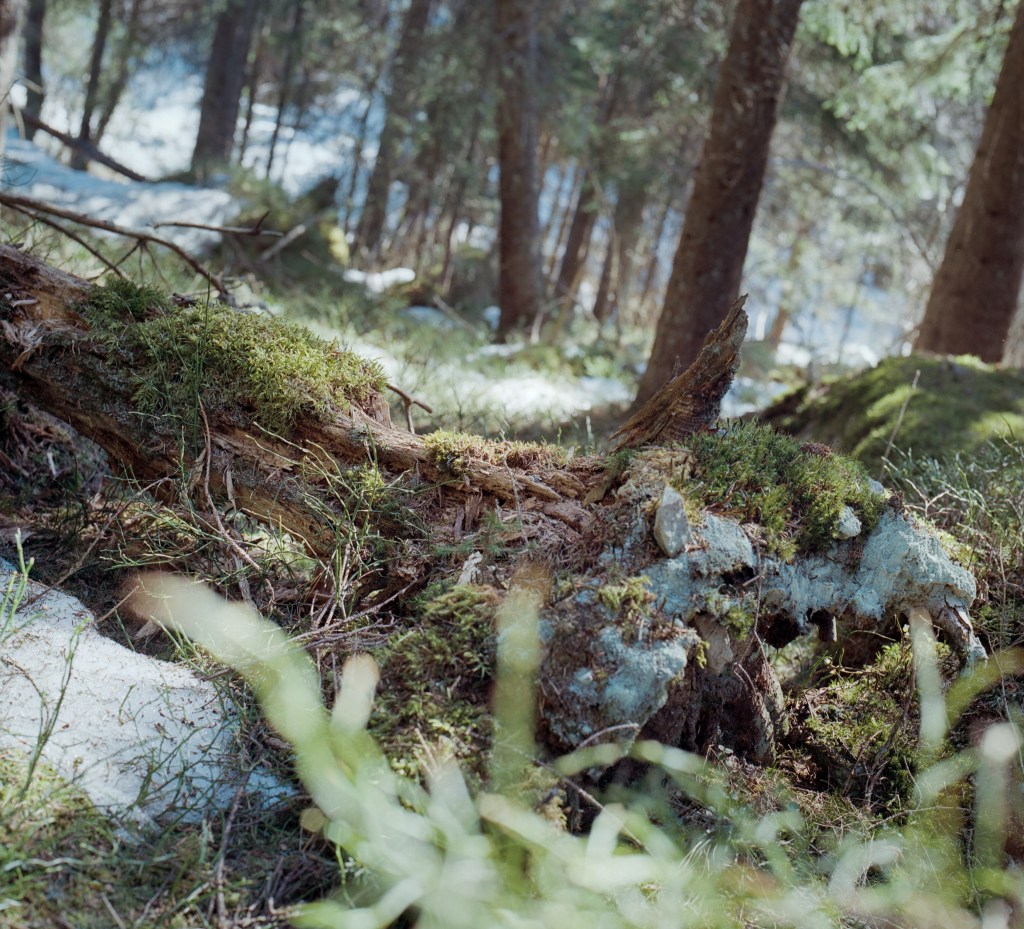
I then figured that a long lense like this would most likely produce a lovely bokeh and I chose to see if I could get some lovely macroesc shots of plants and flowers. The Bokeh is silky and looks really nice to my eyes.

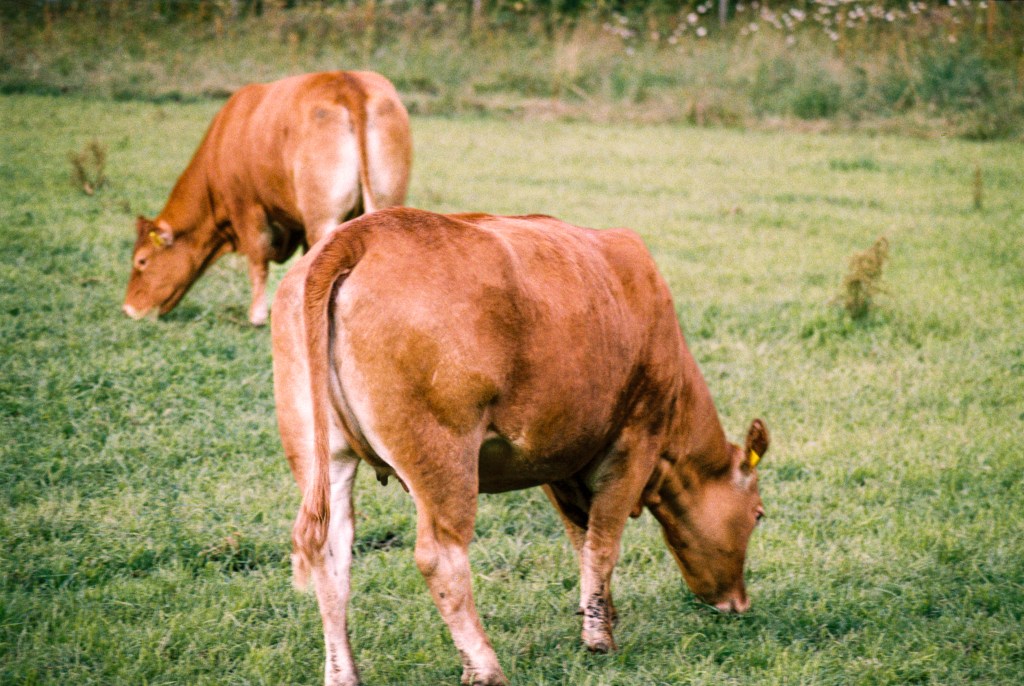
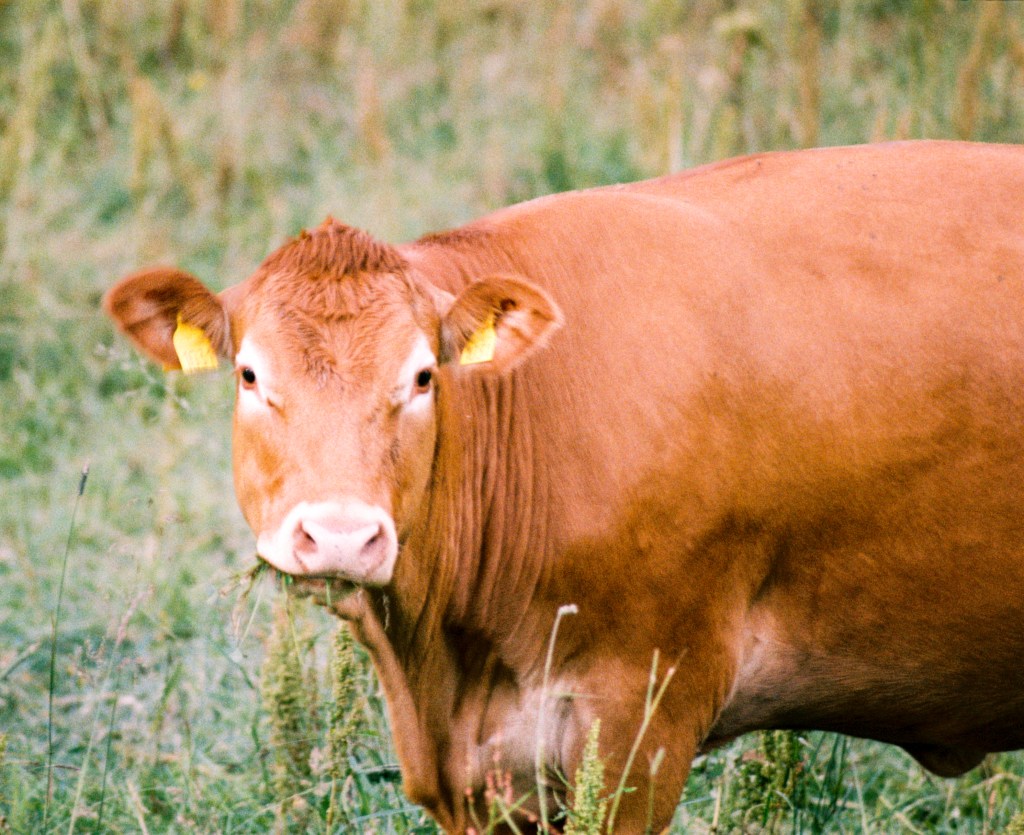
My next experiment was keeping a roll of expired Colorama 200. A consumer grade film made in the EU. My guess based on the colors is that we are talking about a repackaged Agfa Vista 200, but the film is expired and it is difficult to know what is attributes to the film and what is degradation over time. The film is 20 years expired and was shot at ISO 50. I managed to shoot it decently hand held on my Nikon F80 and I got a few interesting shots from this combination as well. My main focus for this film was some cows grazing in a field next to where I live. I made these shots when I was out strolling with my little daughter trying to get her to nap.

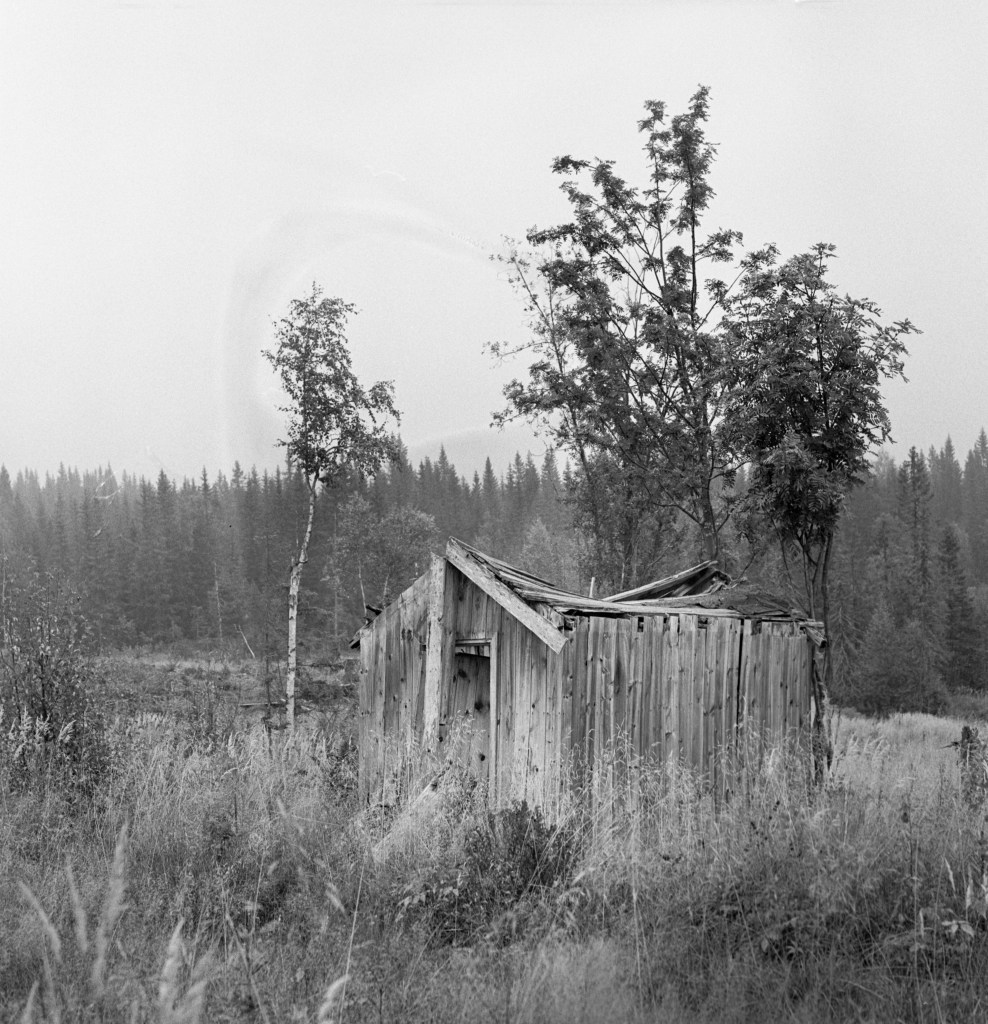
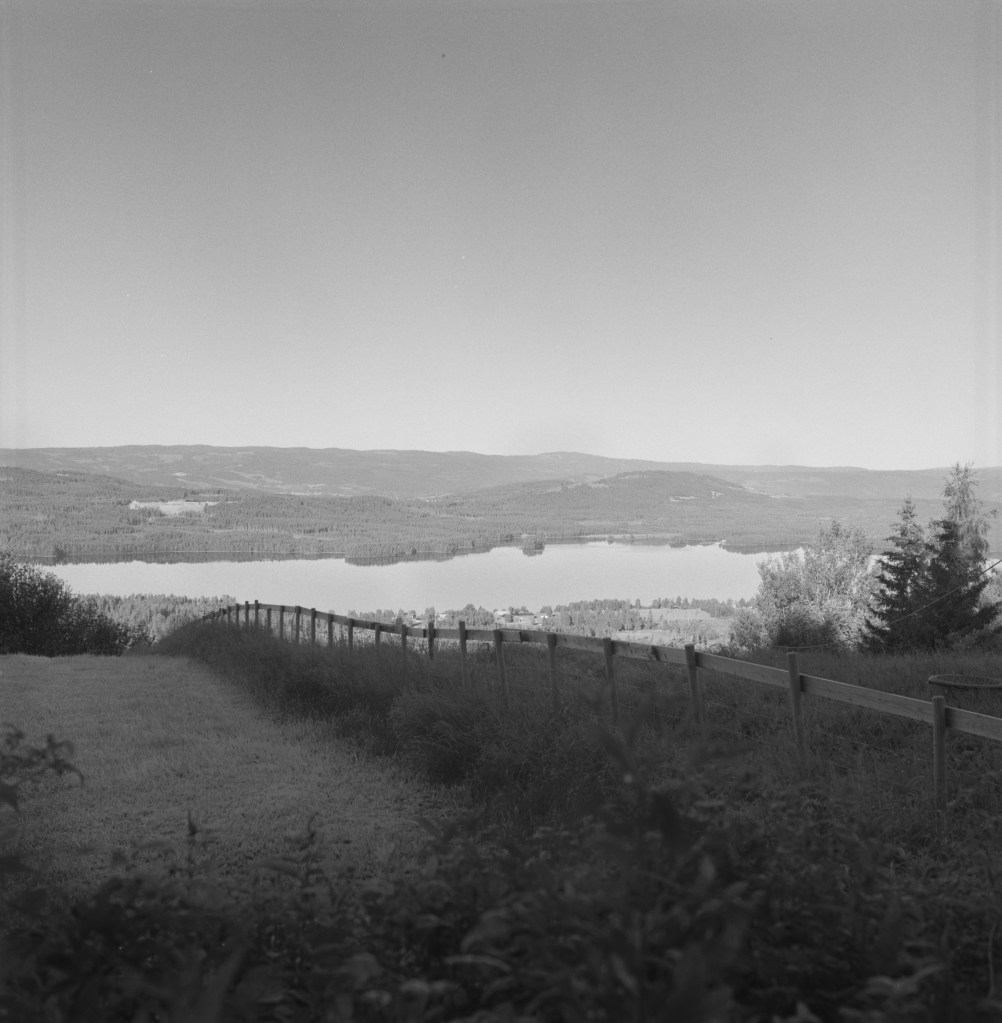
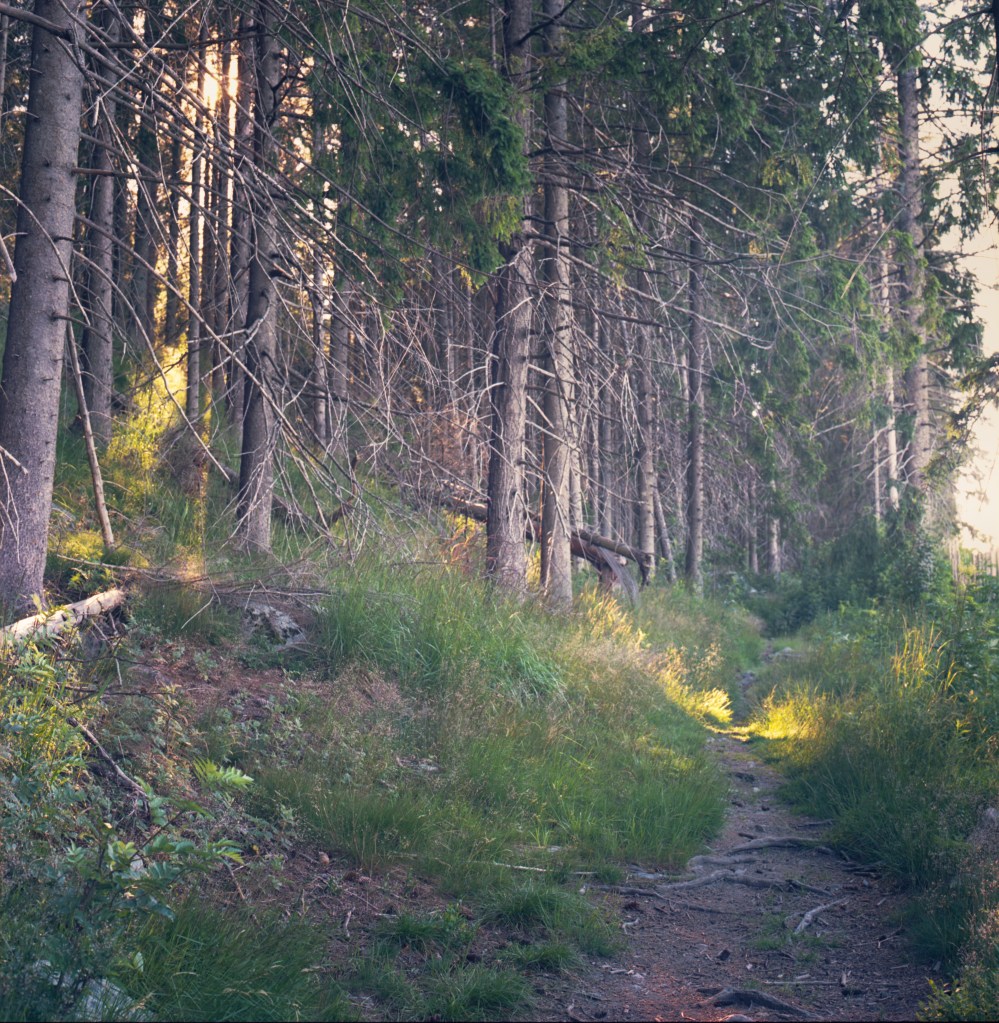
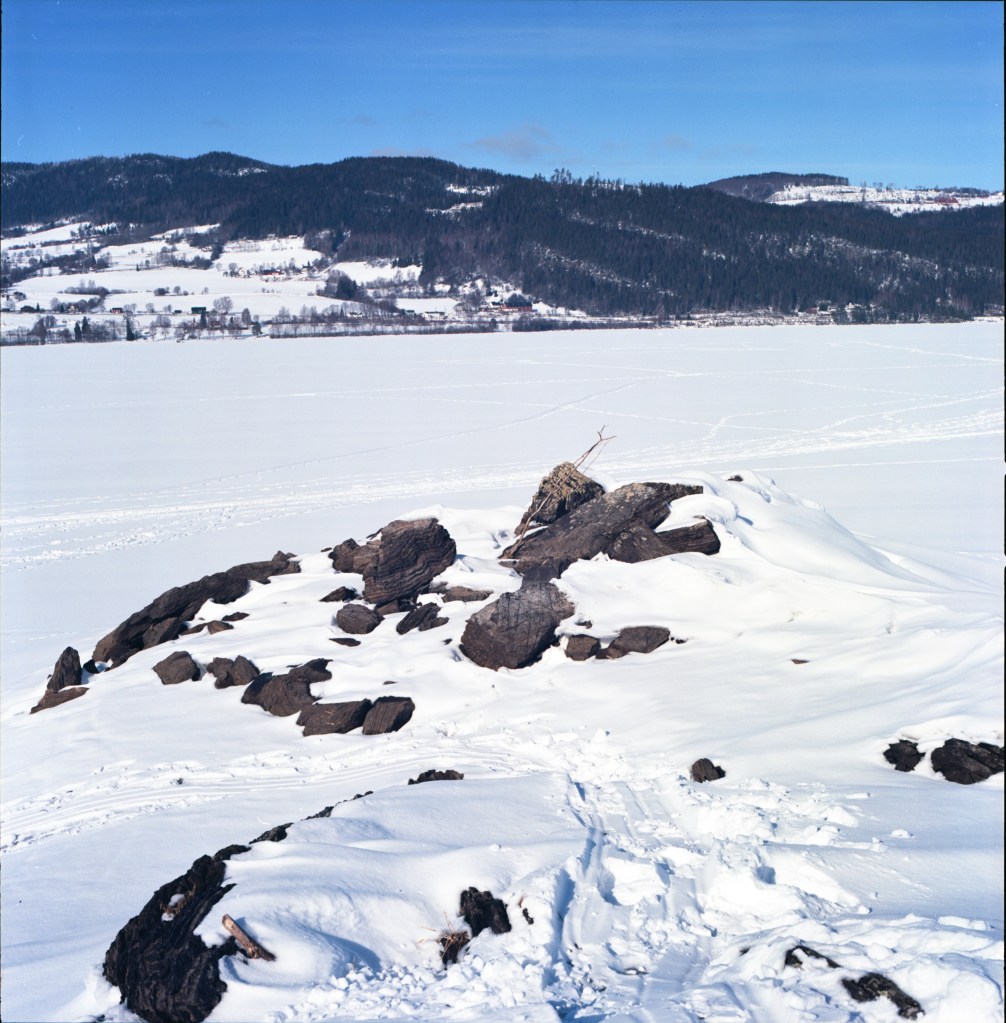
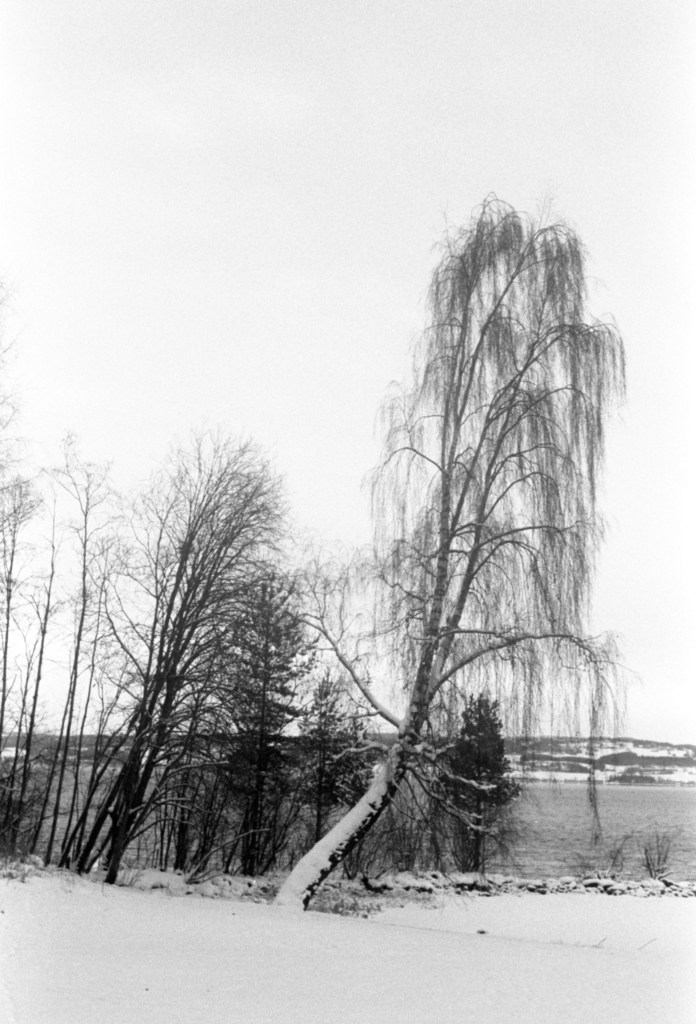
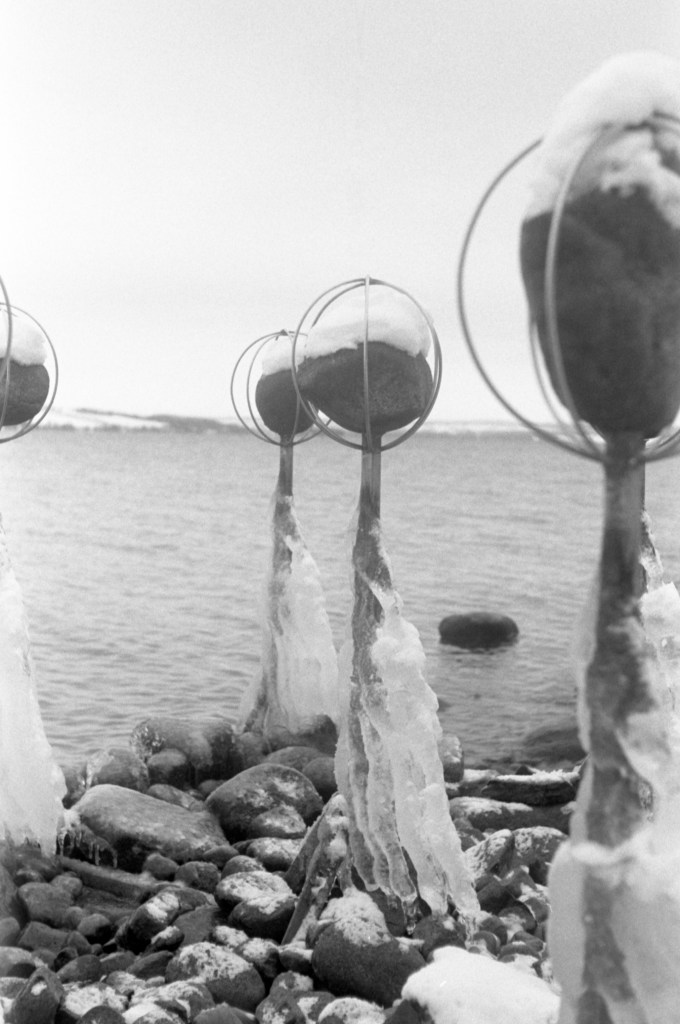
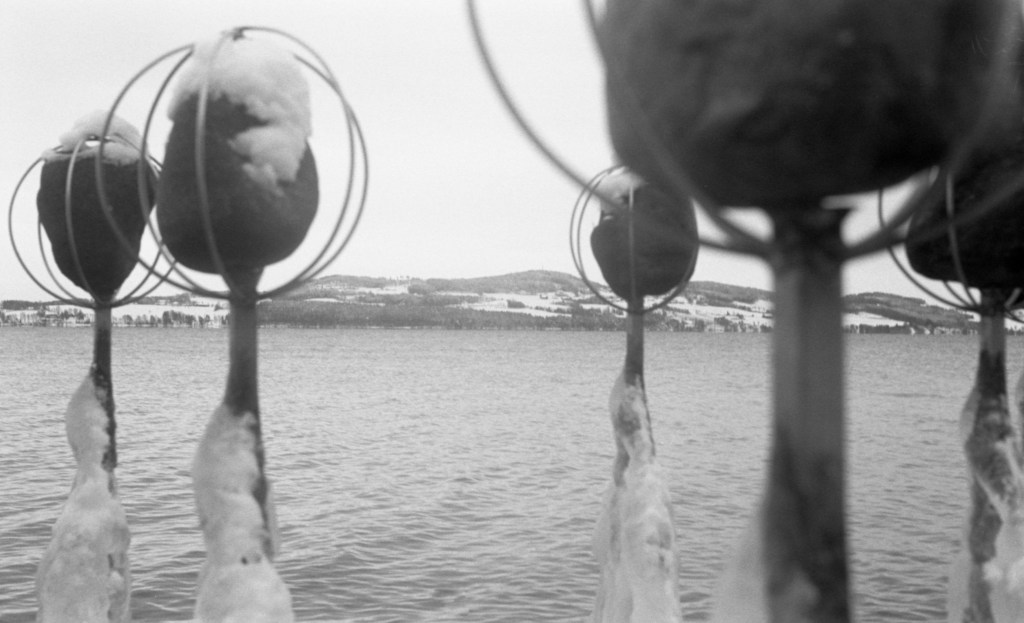
For the last outing I also shot some images with the 50mm f1.8 because I went to an interesting location I have visited a few times before.

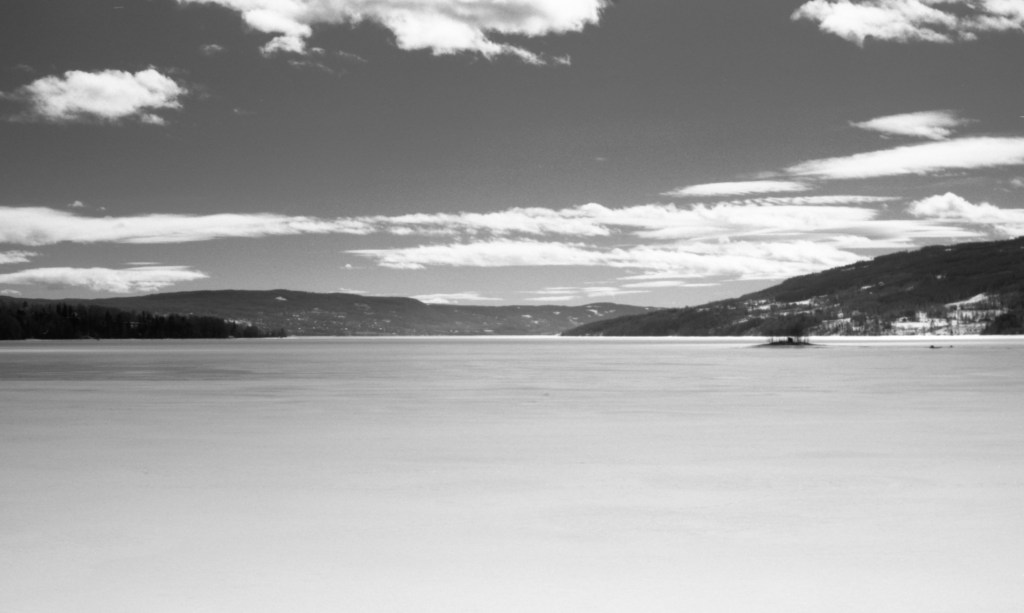
The images above are shot with the 50mm lens and a yellow filter for contrast. I didn’t find the same luck on this outing with the longer lens, and I have to go for another outing with black and white. These images are shot with the Olympus OM1 and a roll of Kentmere 100. I developed it myself with Adox Atomal 49. A fine grain developer that I have found to be fantastic. It has a bad reputation for being highly toxic, but so are most developers anyway. Considering that the SDS-sheets we look at are referring to the powder and not the stock of working solutions, I would argue that most developers are stock and working strength are reasonably safe when taking proper precautions. I always use gloves, eye protection and a dust mask when mixing the solutions. I also use gloves and eye protection when developing with a liquid solution.

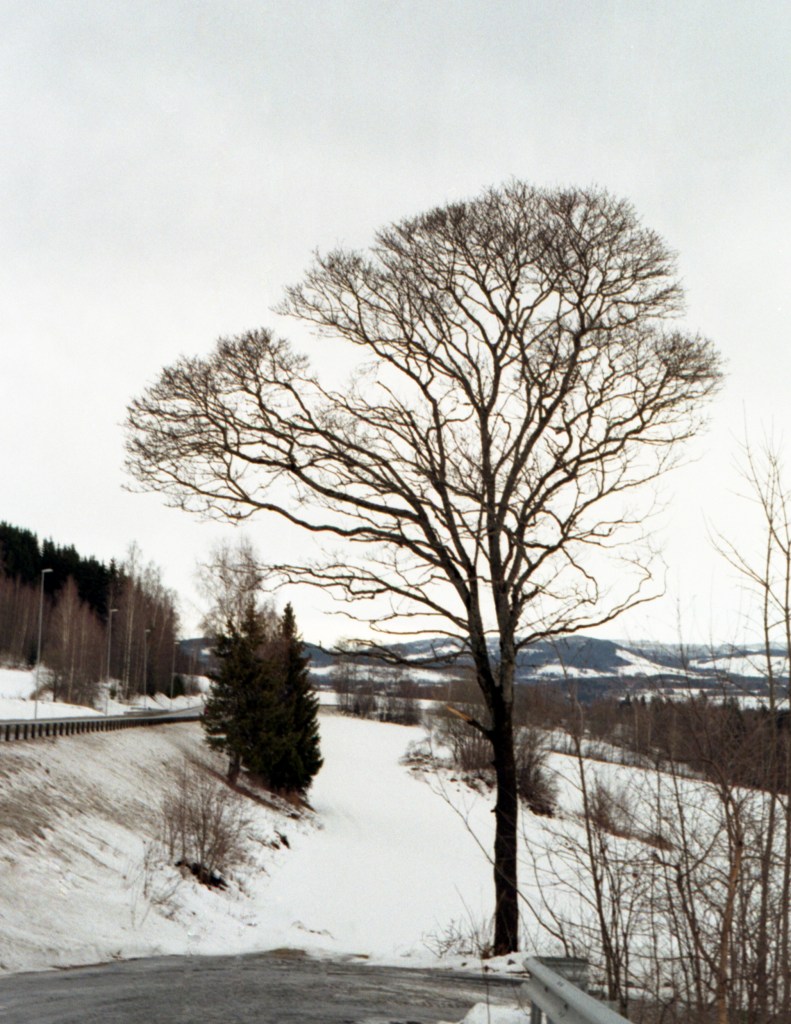
My favorite image from the 400mm on this trip is this little spruce.

I have truly enjoyed working with this project and I will keep working on my long-lens skills. You might see more here in the coming months.

Playing with lamp posts

Some days ago, while driving home I realized that there are a plethora of different types of lamp posts in my local area. Different both in design, placement and light source. I decided to spend a roll of Kodak Tri-X, a film I rarely use, to play with the lamp post and a red filter for contrast. I had never tried using a red filter in different conditions before, and I decided to just leave it on regardless if the lighting conditions changed from sunny to overcast. This turned out to be a mistake and some of the shots did not come out well. However, the well exposed turned out very nice.

Canon T70 – Kodak Tri-X 400 – 510 Pyro 1+100 semi-stand

To take these images, I had to look up into the sky, hence my idea to use a red filter for the backgrounds. I like how the sky and the contrast to the light post turned out. I see little bit of evidence of dust inside the camera house, which I will have to figure out at a later point.

This roll was also the first roll I developed using 510 Pyro, a developer I had heard so much about but never really tried. I bought a bottle that I will be trying out over the coming months. The concentrate is a bit gloopy, but not anything I haven’t seen from HC110 in earlier developments. All in all, I am very happy with the results. The grain is surprisingly fine on the well exposed negatives, and obviously more prominent on the underexposed negatives. This is my fault entirely.

A seagull started to dive towards me at one point. I like how the grain makes this image more active.

The derelict hut

Over the last year, I have noticed an old wooden hut, standing on its own in a chopping-field a short distance from Gjøvik. The hut in itself is not really that beautiful to look at anymore. The roof has fallen down and the wood looks withered and dry. It would need significantly more than a lick of paint to make it shine once again. All the times I have driven past it or seen it when out walking, it has not worked because of the weather. I have pictured it to work well on a overcast and preferably misty day on black and white film. Today was the day that I would finally go for it and try this old hut, that I for my own amusement has named «Jabba». It is a bit amusing to tell yourself to go out shooting Jabba the Hut.

I rolled up the Hasselblad 500C with a roll of Kodak Tri-X 400 and brought with me a selection of filters, including yellow, orange and red, and I set off into the misty and drizzly morning. I found the hut in its usual condition, rather tatty and derelict, but this time, there was some mist in the background, creating a more interesting atmosphere around it. The scene itself is a bit messy and overgrown after a very lush summer, but the mist made it work.

My first frame of the day – Hasselblad 500C – Kodak Tri-X – No filters – Ilfotec ID-11 1+1

I decided to try the compositions in different ways with different filters, partly just to see what they would do to a scene like this. Especially, I was curious to what the red filter would do in conditions like these, and hence, I tried different approaches to learn a bit more about my filters. My pack of filters is rather inexpensive and are just plastic filters. At some point, I will upgrade my collection of filters, but not for this trip.

Trying again at Jabba – Hasselblad 500C – Kodak Tri-X – Orange filter – Ilfotec ID-11 1+1

Based on my rather limited access to the hut, as it stands in a rather difficult area to move around, I only made two different compositions this time. One straight on and one from the side. I did the latter without filter and with all three colors I brought – Yellow, Orange and red – and I must say that the results were a bit different than I thought. I expected that the red filter would give me deeper contrasts than the yellow, but actually, my results pointed in the different direction. That the yellow filter actually gave me much punchier images than the red, and the one without any filters gave me the best results.

What I see that the red filter does, and also to some extent the orange, is brightening up the greens and making the trees in the background brighter. For future reference, I will probably leave the two darkest filters at home for these days, but I do think it was worth the try.

Another reflection I have after this shoot is that I remember why I have stopped using Tri-X and other Kodak-films for my images. At least to some extent. Their tendency to curl when trying after development is very annoying and makes it very difficult tu both scan and print them in the darkroom. I have not had this issue with ILFORD-films and since I really do not see any difference between Tri-X and HP5 at box speed, I usually save the Tri-X for the difficult lighting conditions where I have to push the film, as I see Tri-X to be a better push-film.

Morning shooting at Næra

One of the most photogenic lakes around my area is bu far the lovely little lake named Næra. Situated a bit east of Moelv, it is the main bathing-water for places like Næroset, Åsmarka, Lismarka and Moelv and it is also an important area for leisure boating. A few weeks ago, as I was pondering around Åsmarka looking for an infrared-view of Næra, I came in contact with some locals. They told me about what was allegedly a much better viewing point over the lake, and I decided to take their word and go there in an early morning quest.

Armed with the Hasselblad and two rolls of film, Ektar and HP5 plus, my friend Cameron and I went for a morning stroll to the viewing point, and indeed, what a view.

The lake Næra – Hasselblad 500C – Ilford HP5 plus @ 200 Yellow filter – Ilford ID-11

Realizing that I had misread the lighting conditions on this scene, I soon decided that the HP5 would most likely be the best film for the job. My total range within the scene pushed 9 stops, and I was afraid to blow out the skies or the water with the Ektar as I didn’t bring a polariser filter because I broke it a few days prior. I then settled for a yellow filter instead, and chose the approach of pull-processing to give me a flatter negative.

Along the path – Hasselblad 500C – Ilford HP5 plus @ 200 Yellow filter – Ilford ID-11

Our path went through some really lovely forest areas, and at one point, we had a row of telegraph-poles making their way towards the farm I believe is named Harabakken. I like the way that the poles made their way towards the farm and decided to attempt a composition with the HP5+. I would probably have gotten more out of this shot using an orange filter, but I decided to travel light, and only brought the yellow.

As we stopped to have out coffee, I spotted a really lovely trail of light coming through the forest, illuminating the path and some grass around. I decided to make an attempt with the Ektar-back, attempting to make a square- image.

Light on the path – Hasselblad 500C – Kodak Ektar – Tetenal C41

Our day concluded with a nice stop by another little pond that I am not going to name because it is more secluded and has a very fragile road going to it. We enjoyed another sip of coffee and had an absolutely lovely time out in nature this warm summers day.

I’ll include some more images in a gallery at the end, please enjoy

Frames of Norway pt3 – Redoing pt2

A few weeks ago, I went out to create a second episode of my new series «Frames of Norway», a series where I explore the landscapes of Norway with my analog cameras. I also dive somewhat into the history of the location and other interesting aspects of landscape and the characteristics of the area.

For this second part, I visited Amlisberget close to Moelv to enjoy the beautiful views over lake Mjøsa from high up. At the time, I was very excited about being out for that trip. It was my first real walk in nature for a while, and I got too trigger-happy and blew through a roll of FP4plus far too quickly. I think parts of my problem this day, was that I had the Canon T70 and shot aperture-priority, This made me not think well enough about my compositions to make proper photographs. I went into what I call the «digital trap» and just rattles off the shots and ended up with something that I am not happy with. At the time, when I looked at the images after development, I was very excited and felt they were nice, but after a while, I am not happy at all. So unhappy actually, that I decided to redo the trip.

For this round, I chose to go with medium format, I rolled up the Hasselblad with a roll of Kodak Ektar 100. I figured that most of my compositions in the last attempt were actually dependent on colour, and the weather was rather nice, and Ektar looks good when there is some light around. Also, the fact that I only have 12 shots and have to set them up manually using a light-meter, helps med focus and things closer about what I am doing.

Parts of the path – Hasselblad 500C w 80mm Planar – F11 1sec – Kodak Ektar 100

One of the greatest things about doing landscape-photography in Norway, is the culture of «friend associations». People sign up as «friends of the area» and spend their time and knowledge preparing and tidying good paths for everyone to use. These people work as volunteers and they are not even always reimbursed for their expenses. This path that I am following this time is marked and maintained by members of two different associations. The local sports-team and Moelvmarkas Venner. I don’t think we can measure the value of their work in money. Access to nature has been very important for the Norwegians during the difficult Pandemic-times.

Parts of the path – Hasselblad 500C w 80mm Planar – F5.6 1/8sec – Kodak Ektar 100

Much of the path towards Amlisberget goes through woodland, parts of it through copse-areas and some through your typical forest area. Most of the trees are spruces, as it is the most commonly grown tree in this area of Norway. One thing I learned very quickly at this path was to watch my steps. Not even a kilometer into my trip, I saw the first adder. Not that this snake possesses any threat to me at all, it is lightly venomous and not in any way aggressive. Most bites happen on hands and fingers when people try to pick them up or on feet when people step on them.But at the same time, I don’t want to upset my «host» when I am visiting their home. In all, I saw two adders (Vipera Berus) on this trip, and I heard the sound of five others creeping away in the grass as I was following the path. Sorry that I am not giving you any images of them here, I did not have the lens to photograph these images this time.

I walked out around noon this day because I wanted to have the mid-day lights and to use the blue sky and white clouds to my advantage. This gave me relatively short exposure times for most of my images that were not taken in the forest.

Lonely spruces in the view – Hasselblad 500C w 80mm Planar – F16 1/125sec – Kodak Ektar 100

As you can see in these coming images, this is one of the most important forestry-areas in Norway, and it is located on the outskirts of the huge Taiga – the boreal forest area that goes across the whole Northern part of the globe. It is said to start for real a few kilometers further east, but you can still see the same kind of landscape as you would see throughout the Taiga, from Løten to Vladivostok.

Much of the industry in this area is also based on forestry and wood-work, and in Norway the name «Moelven» is widely known to mean quality lumber. The lumber-industry in this area is still one of the strongest in Norway.

The View – Hasselblad 500C w 80mm Planar – F16 1/125sec – Kodak Ektar 100

The trip up to Amlisberget is recommended for everyone by me, the last 900 meters are quite steep and you should make sure to have enough water for this part when you are walking. There is also no guess-work where you need to go, as the path is well marked and easy to follow. If you walk in the morning or around noon, you will most likely have the place to yourself. The only person I met on my way up, was a local fireman who was out, putting up warning signs for forest fires. On my way back; however, I met more people. The trip is worth it, the view is magnificent.

The View – Hasselblad 500C w 80mm Planar – F16 1/125sec – Kodak Ektar 100 (The colours are a bit off in this one for some reason)

Old Wood

One of my favorite subjects for my photography is driftwood and other types of old wood, such as dry tree-roots or fallen branches that has been lying around for a while and gotten touched and greyed by the elements. To me, this represents a strength and a a token of persistence shown by nature. Yesterday, I was out very early in the morning, before sunrise with just the colours trying to capture them with my Hasselblad. Once my roll of KODAK Ektar was filled, I broke out my Olympus OM-1 with its incredible 50mm Zuiko lens and a roll of Kodak Tri-X in search of some driftwood.

Just a little sneak-in from the Hasselblad because I absolutely love this image – Hasselblad 500C – Planar 80mm f2,8 – KODAK Ektar

My location for the morning was Husodden in Søndre Land. A secluded little headland in the lake Randsfjorden, home to amazing sunrise-light and a wide selection of birds and forest colours in the summer. It is also the home of a little air-strip used by the local flying enthusiasts. I didn’t meet any of them this morning, but I made sure not to be in their way if they were coming.

Reklamer

After sunrise, but when the light was still rather bleak, I got soft and nice contrasts, but seeing the conditions become more and more contrasty, I decided to shoot tie Tri-X at 200 instead of 400. The only filter on the lens was a Hoya UV-filter, that I find to be helpful on this lens. Although it is supposed to be Multi-coated, I have found it to react somewhat with haze if used without. (Could be anything else as well, I am no lens expert)

Details in the old bark – Olympus OM-1 – 50mm Zuiko f1,8 – Kodak Tri-X @ 200 – Adox Atomal 49 1+1

It never ceases to fascinate me how incredibly nice the textures in old wood can be. The image above here was taken of a very small detail on a bigger log, but really shows the worn details in that old bark and how incredibly beautiful that is if you isolate it like this. I also thin that pulling the film a stop was the correct choice for this occasion, as it gave me the opportunities to shoot wider apertures such as this f2,8 with the shutter speed 1/250th. I don’t trust the Olympus at 1/1000th after having some uneven exposures with that shutter-speed. Also, I do appreciate the extra shadow detail, but I don’t think that would have been an issue with Tri-X at this shot anyway.

For development, I chose to go with Adox Atomal 49. A developer I have used a lot the last months. I bought it after having some «bad» experiences with my usual Kodak X-tol where it didn’t mix properly (two batches) and I was curious about trying something new. Ive found Atomal to be a brilliant match with many of the films I use, especially Tri-X and FP4 plus, but also HP5 plus and Fomapan 100. It gives me very fine grain and seems to give very nice grey-tones and full film speed. Trouble is, it is somewhat cumbersome to mix and consists of three bags of powder rather than two. It has also «coloured» my 5L-container red and I will have to get a new jug for the next batch.

This old log – Olympus OM-1 – 50mm Zuiko f1,8 – Kodak Tri-X @ 200 – Adox Atomal 49 1+1

The image above is taken at f 5,6 and shutter speed 1/125. I just love the lines and how it almost seems charred in the dark-area to the right bottom. The balance in this image is very soothing I find, and it really shows why I find the Olympus to be my favorite 35mm Camera.

Since I was at an airfield – Olympus OM-1 – 50mm Zuiko f1,8 – Kodak Tri-X @ 200 – Adox Atomal 49 1+1

I shot 36 images of drift-wood in different ways and I only included my top-picks here. However, on my way back to the car, I spotted the wind-indicatorthingie (whatever it is called) and decided that I would attempt a 37th frame. I find that the «last image» don’t always come out, but I figured it was worth giving it a shot. I think this was f8, but it did not take any notes about this shot.

Scouting a location and shooting slow film

Today I was out and about with one of my lovely analog cameras again looking for locations for some early-morning sunrise photo trips. I came across this lovely location called «Husodden» not too far away from where I live. Being sensible and staying local is an important part of the world we currently live in. While I was walking around Husodden to shout for possible locations, I did some photographs with the Olympus OM-1 and a roll of Rollei RPX25. I metered it at around ISO 18 (My light meter goes to ISO25, so I opened the aperture slightly more) and shot with an orange filter to get the popping effect in the sky and boost the contrasts a bit.

Randsfjorden, the lake, was still frozen and it became a white carpet in many of my images, and gave some extra contrast as well.

Sky-pop over Randsfjorden – Olympus OM-1 Rollei RPX25@18 Kodak HC110 Dil-B

I tried to use the remainders of the snow as a lead-in line in many of my images, and I aimed for a very large separation between snow and sky. In retrospect, some of these images would have benefited more from being shot with a graduated filter rather than a fill orange one.

Sky-pop over Randsfjorden – Olympus OM-1 Rollei RPX25@18 Kodak HC110 Dil-B
Reklamer

I decided to develop the film with «an old friend». Kodak HC110. I have not used this developer for a very long time, but there was something about the shots I took today, that made me bring out the golden syrup and mix Dilution B. HC110 used to be my favorite developer and, it is very economical and gives really nice greys. Also, there is something about it that I just like. I don’t really know what it is, but there is something about using that thick concentrate and stirring it properly that really wakes the «geek» in me.

A quick and pleasant day out for me today, and I am really looking forward to visiting this location again at some point in the near future. Both for woodland detail work and for early morning sunrise-shots.

A Bladventure

For the sake of balance, and because I happen to have some nice images, I am going to deviate slightly from the line of «cheap cameras» in this entry, and show some images taken with my, not by any means cheap, Hasselblad. Or in my case, some times a hassle-blad. The first thing my Hasselblad did to me after I bought it, was jamming up. And not the cute little sweet jam that can easily be mended, but the proper jammedy-jam-jam that has to be sent off for a very expensive repair abroad.

I recently got it back from repair, and I have brought it along for a few outings lately, and I really find myself to love using it. Not that it really makes any big difference to anyone an image is taken with an expensive or a cheap camera, but to me it has to do with inspiration. Some cameras inspire me to go out shooting and some do not. That’s why i often feature the Olympus, the Konica, Ikoflex and the Bronica ETR. For different reasons, these cameras make me «get out there» and «get the shutter finger active».

Reklamer

Here are some shots I did recently with my Hasselblad, that I find to inspire me a lot. The colour ones are taken with Kodak Ektar, and the BW ones are done with Ilford Pan F plus, that I pulled a stop. The Pan F is developed in Adox Atomal 49 stock for six minutes, which is 20% off the time for box speed. After having used Atomal 49 for a while, I have found this to be a developer I am very happy with, and it might replace Xtol as my number one developer.

Capturing bleak winter colours

As I have previously written on my blog, I like shooting Kodak ProImage 100 in the winter. There is something about the colours and the subtlety of it, that I find to be exactly the right media for my style of winter-shooting. Some days ago, I gave the Konica a roll of ProImage and went for a little outing to some different locations where I could access the lake. The day were one of those days where it was clearing up after some dull and grey days, and there were very bleak, oranges and purples in the landscape.

Lith Print feel – Konica Autoreflex TC – Hexanon 50mm f1,8 – Kodak ProImage 100

I have also found myself to be very fond of the little Konica camera. Yes, it has a bit fewer shutter speeds than the OM-1 that inspired me to buy it, and indeed it hates cold weather. But the camera, and its lens is in mint conditions and takes beautiful images. The lens is very sharp and produces beautiful bokeh. It also feels very sturdy in the hand. From what I gather this is because mine is an early model where the whole body is a metal construction. It does not produce any light leaks at this point and I guess the light meter would work if I gave it a battery.

Tree root in snow – Konica Autoreflex TC – Hexanon 50mm f1,8 – Kodak ProImage 100

Based on the fact that this was marketed as an «entry level» SLR camera in its time, I must say that its performance is incredible. If I was to recommend an entry level SLR to anyone at this point, I would be very tempted to say Konica Autoreflex TC and just smile. I am very happy that I purchased this camera and I will probably keep it as one of my regular users over some time, along side with the Olympus OM-1.

A DDR Rangefinder camera

We all have our weak-spots as photography enthusiasts. I certainly have a weak spot for the lovely Carl Zeiss Jena Tessar lens. I will not in any way claim that I am even close to a lens and optics expert, but this lens, with its four elements in three groups, gives a sharpness and tone to the images I just love. I had one of these lenses for my M42 cameras, but this lens would benefit from some servicing as the aperture blades keeps jamming when stopping down further than f8, and the focusing ring is very heavy to operate.

A little while back, I read about a little rangefinder camera from East Germany that was said to be magnificent value for money and deliver splendid image quality and sharpness. The camera was called «Welta Belmira» and was, believe it or not, equipped with a lovely Carl Zeiss Jena Tessar 50mm f2,8 lens. I started looking for one of these cameras to try out, and it was not difficult to find them. However, they were often in very varying condition and it was clear that getting the right and good one would take a while. And so sure it did, but after some months of searching and looking, I found one in decent condition. Yes, it was a bit dusty, and yes it had a dim rangefinder, but the camera in itself seemed to work really well.

My lineup for this test – a Welta Belmira and a roll of Kodak Tri-X400. I also used an external rangefinder unit, because the inbuilt one is very dim and only usable if the light is bright.

I went out to a location where there is a lovely artistic installation close to the lake, and I have thought for a while to experiment with some photography around this location. The origin of this artwork is unknown to me, but it is only accessible in the winter and spring time, as it will be submerged by the lake most of the summer time.

Welta Belmira – Kodak Tri-X 400 Adox Atomal 49 1+1
Reklamer

I also with this outing, made my first test of the Adox Atomal 49 developer. I read a bit about it online and saw some images developed in it, and I got curious to try it out myself. Atomal 49 is a very fine grain developer that gives you full film speed unlike Perceptol that will eat some of your speed. For that reason alone, I bought a 5L package of it and decided to give it a try. And based on these results with Tri-X at 35mm, I am very happy with what it looks like. This might well become a developer of preference to me, but I will obviously have to make more tests before deciding.

Back to the camera. I really enjoyed using the camera. It has a very special and differently engineered slider instead of the usual advance lever. It is a bit fiddly to use and has a tendency to stick at different points, but it works faultlessly. The dim rangefinder is not really an issue as long as you have an external one, and the focus ring seems to be pretty much accurate. However, I believe the camera «drags» the shutter speeds a little bit, but slight overexposure is not any issue with any negative film really.