Frames of Norway pt3 – Redoing pt2

A few weeks ago, I went out to create a second episode of my new series «Frames of Norway», a series where I explore the landscapes of Norway with my analog cameras. I also dive somewhat into the history of the location and other interesting aspects of landscape and the characteristics of the area.

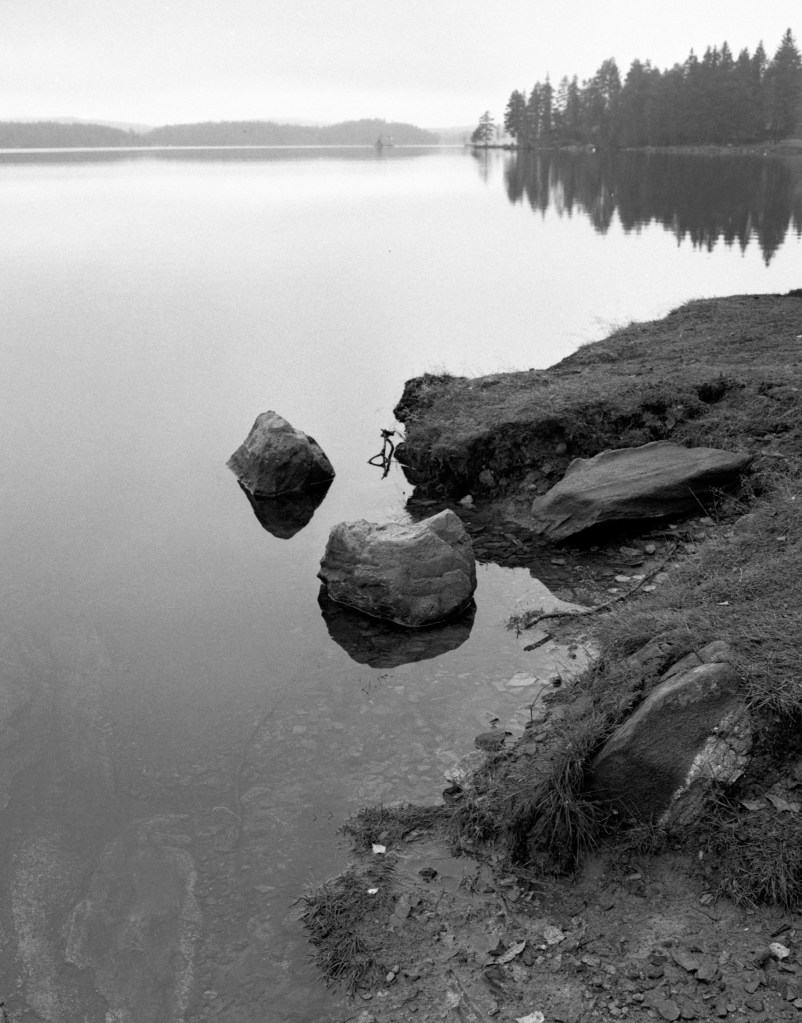
For this second part, I visited Amlisberget close to Moelv to enjoy the beautiful views over lake Mjøsa from high up. At the time, I was very excited about being out for that trip. It was my first real walk in nature for a while, and I got too trigger-happy and blew through a roll of FP4plus far too quickly. I think parts of my problem this day, was that I had the Canon T70 and shot aperture-priority, This made me not think well enough about my compositions to make proper photographs. I went into what I call the «digital trap» and just rattles off the shots and ended up with something that I am not happy with. At the time, when I looked at the images after development, I was very excited and felt they were nice, but after a while, I am not happy at all. So unhappy actually, that I decided to redo the trip.

For this round, I chose to go with medium format, I rolled up the Hasselblad with a roll of Kodak Ektar 100. I figured that most of my compositions in the last attempt were actually dependent on colour, and the weather was rather nice, and Ektar looks good when there is some light around. Also, the fact that I only have 12 shots and have to set them up manually using a light-meter, helps med focus and things closer about what I am doing.

Parts of the path – Hasselblad 500C w 80mm Planar – F11 1sec – Kodak Ektar 100

One of the greatest things about doing landscape-photography in Norway, is the culture of «friend associations». People sign up as «friends of the area» and spend their time and knowledge preparing and tidying good paths for everyone to use. These people work as volunteers and they are not even always reimbursed for their expenses. This path that I am following this time is marked and maintained by members of two different associations. The local sports-team and Moelvmarkas Venner. I don’t think we can measure the value of their work in money. Access to nature has been very important for the Norwegians during the difficult Pandemic-times.

Parts of the path – Hasselblad 500C w 80mm Planar – F5.6 1/8sec – Kodak Ektar 100

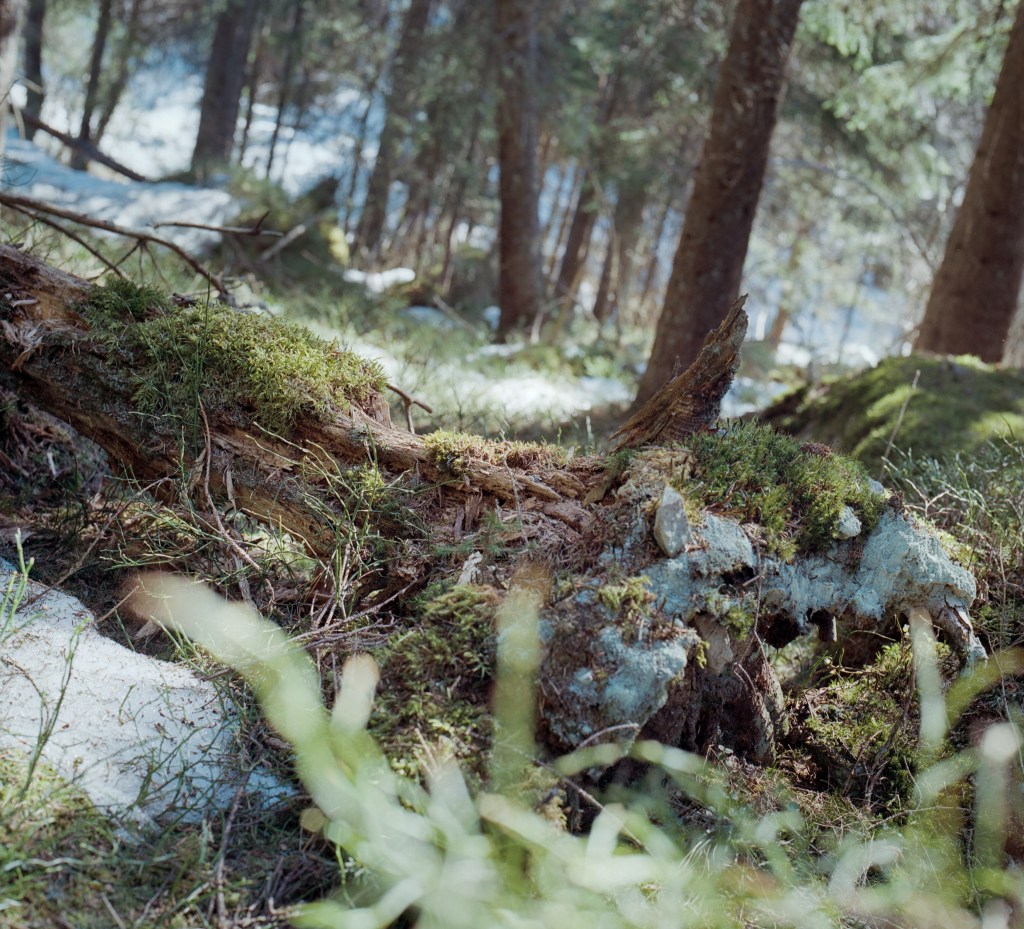
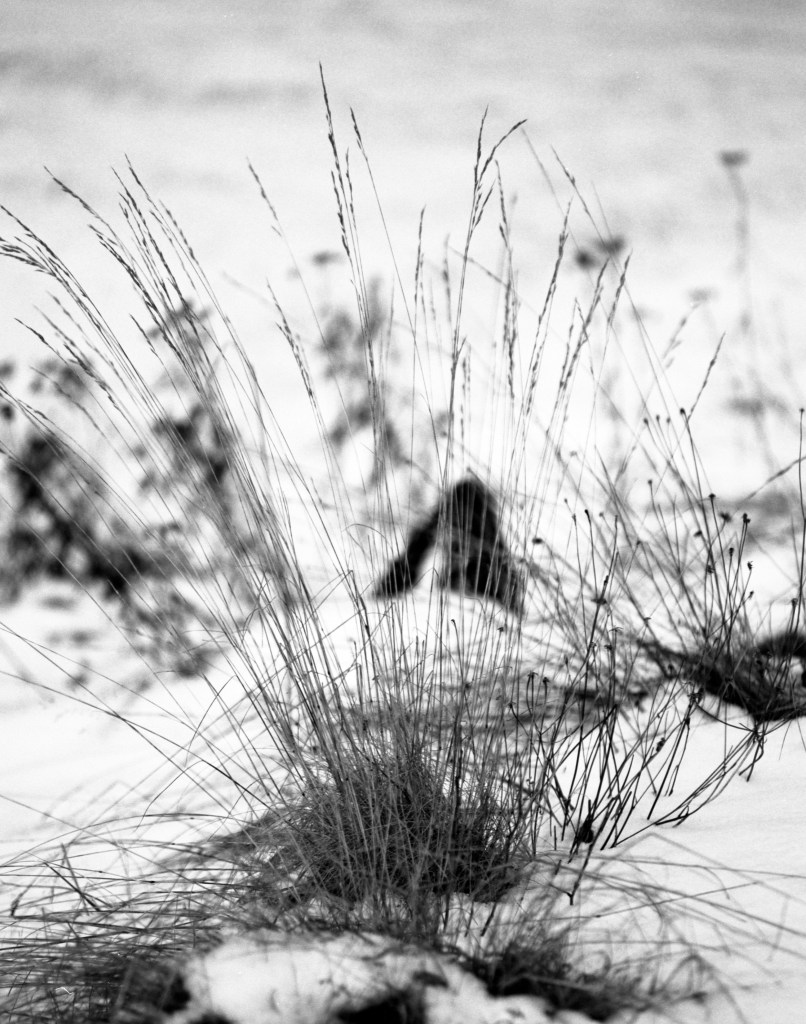
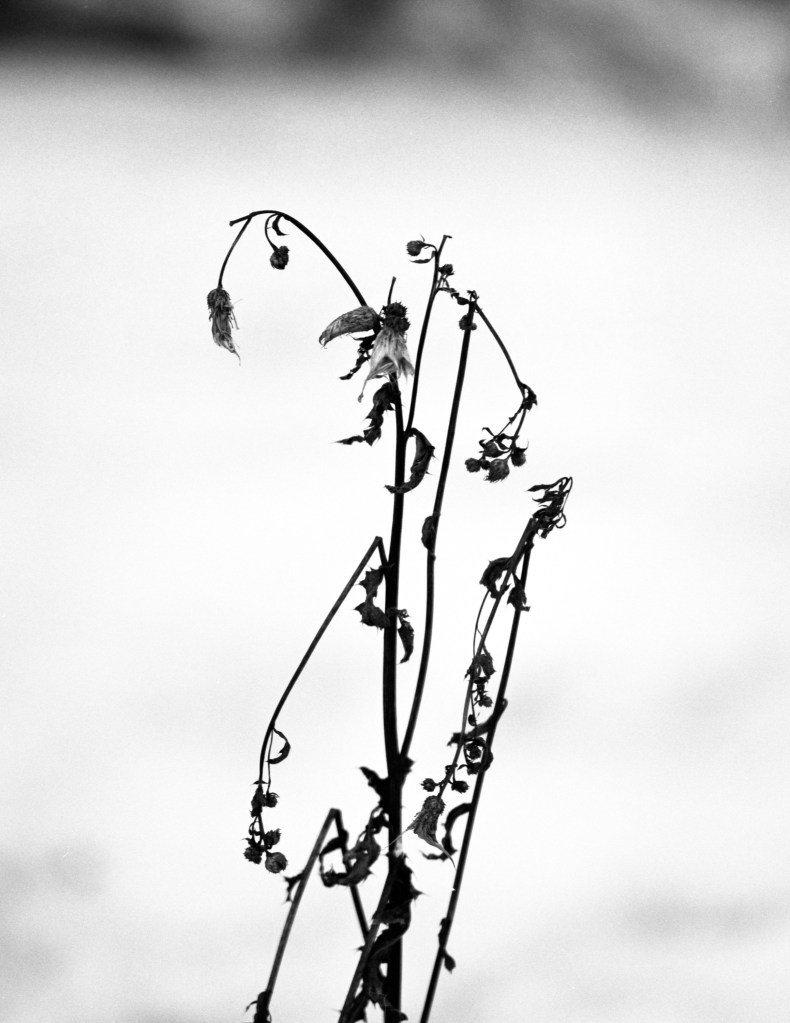
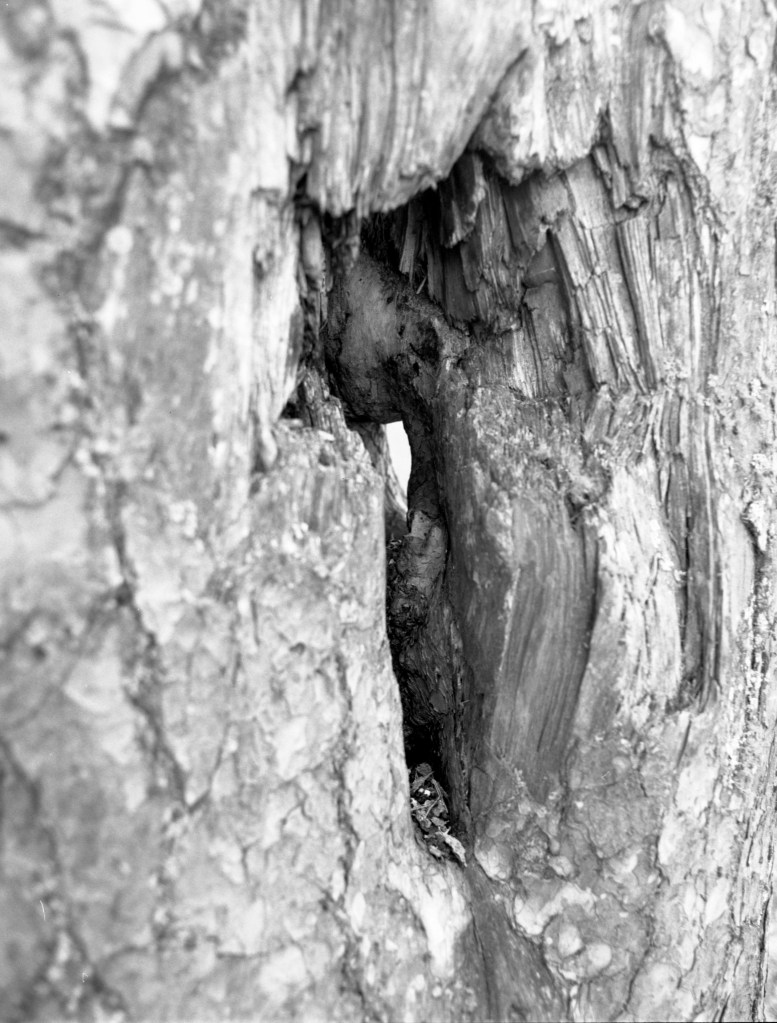
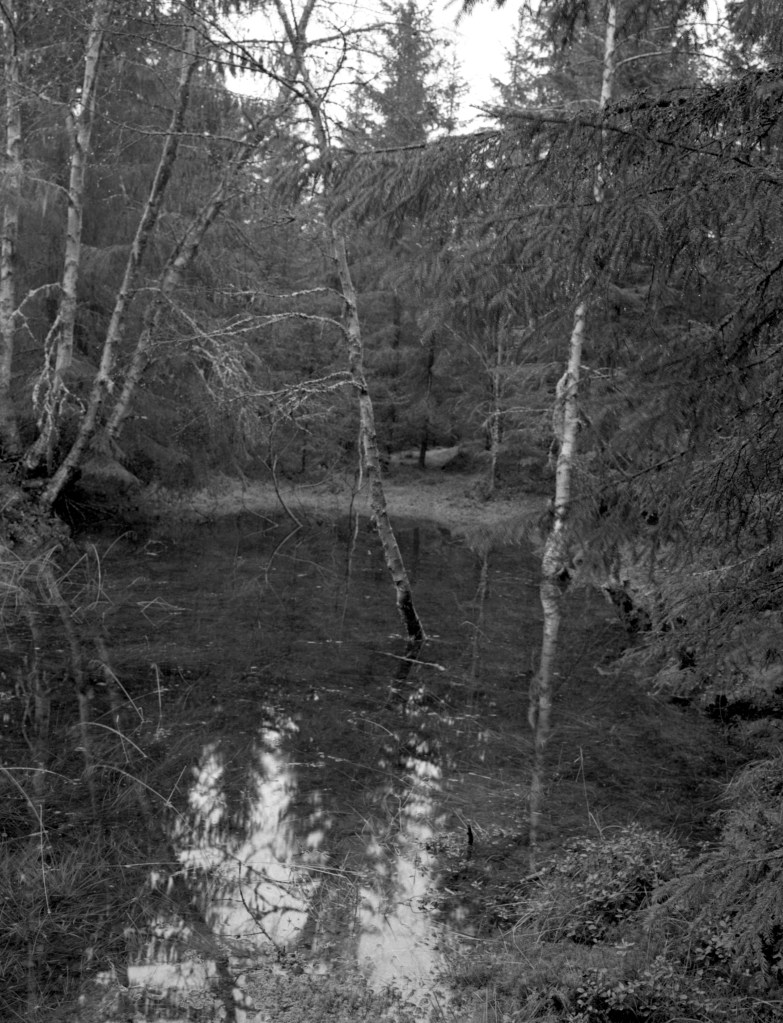
Much of the path towards Amlisberget goes through woodland, parts of it through copse-areas and some through your typical forest area. Most of the trees are spruces, as it is the most commonly grown tree in this area of Norway. One thing I learned very quickly at this path was to watch my steps. Not even a kilometer into my trip, I saw the first adder. Not that this snake possesses any threat to me at all, it is lightly venomous and not in any way aggressive. Most bites happen on hands and fingers when people try to pick them up or on feet when people step on them.But at the same time, I don’t want to upset my «host» when I am visiting their home. In all, I saw two adders (Vipera Berus) on this trip, and I heard the sound of five others creeping away in the grass as I was following the path. Sorry that I am not giving you any images of them here, I did not have the lens to photograph these images this time.

I walked out around noon this day because I wanted to have the mid-day lights and to use the blue sky and white clouds to my advantage. This gave me relatively short exposure times for most of my images that were not taken in the forest.

Lonely spruces in the view – Hasselblad 500C w 80mm Planar – F16 1/125sec – Kodak Ektar 100

As you can see in these coming images, this is one of the most important forestry-areas in Norway, and it is located on the outskirts of the huge Taiga – the boreal forest area that goes across the whole Northern part of the globe. It is said to start for real a few kilometers further east, but you can still see the same kind of landscape as you would see throughout the Taiga, from Løten to Vladivostok.

Much of the industry in this area is also based on forestry and wood-work, and in Norway the name «Moelven» is widely known to mean quality lumber. The lumber-industry in this area is still one of the strongest in Norway.

The View – Hasselblad 500C w 80mm Planar – F16 1/125sec – Kodak Ektar 100

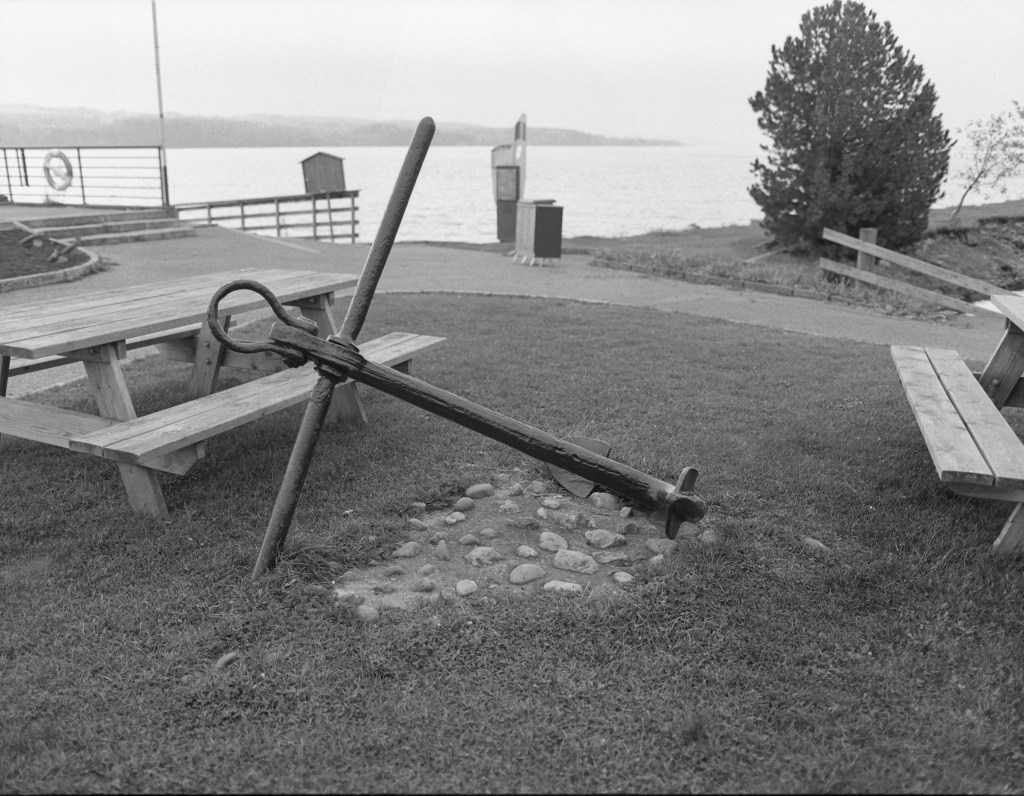
The trip up to Amlisberget is recommended for everyone by me, the last 900 meters are quite steep and you should make sure to have enough water for this part when you are walking. There is also no guess-work where you need to go, as the path is well marked and easy to follow. If you walk in the morning or around noon, you will most likely have the place to yourself. The only person I met on my way up, was a local fireman who was out, putting up warning signs for forest fires. On my way back; however, I met more people. The trip is worth it, the view is magnificent.

The View – Hasselblad 500C w 80mm Planar – F16 1/125sec – Kodak Ektar 100 (The colours are a bit off in this one for some reason)

Frames of Norway 1

With this entry, I am opening a new series of entries and also Youtube-videos. In these entries, I don’t care too much about the camera or film, but rather focus on composition and my thoughts behind the choice of location or film in regards to what I wanted to achieve. Everything is allowed in these entries, regardless of price of camera. And yes, obviously I will still have some entries in the old manner too.

For the kick-off of my new series, I chose one of my favorite cameras. My Hasselblad 500c, which not by any means is a cheap camera. I love shooting square format, and the Hasselblad along with my Ikoflex are to me the most inspiring cameras I own. There could be something with the waist-level finder that just makes everything look very lively and nice and makes composition very easy.

My location for this outing is the site of an old derelict saw-mill just north of Gjøvik. Back in the day, this was a very active saw-mill with close proximity to the lake and easy access for boat-cargo on the lake. There are still a lot of poles and marks in the shallow water after extensive log-driving on Mjøsa.

Remains from the Log-driving on Mjøsa – Hasselblad 500C w 80mm Planar f2,8 -Bergger Pancro 400 – Adox Atomal 49 1+1

Log-driving was a dangerous job and many log drivers would drown while working on floating timber. Sometimes, workers had to do the dangerous maneuver of loosening up jammed logs using a pike-pole. To utilize this tool, they had to walk on the floating logs, and sometimes, they either were hurt when the jam broke up, i.e. being crushed, or they could stamp on a loose log and fall unto the water and get stuck in the water under the massive amount of logs.

In honor of the history of these brave workers, I decided to go with a somewhat gloomy look to these images. To me, gloom means additional grain and a rather «grey» palette. A film I have often had issues with being too grainy or gloomy for my taste is the Bergger Pancro 400. I have used this film just a few times, and I still have some lying around in the freezer. I thawed up one of them and went for this choice.

Remains from the Log-driving on Mjøsa – Hasselblad 500C w 80mm Planar f2,8 -Bergger Pancro 400 – Adox Atomal 49 1+1

It turned out better than I expected, and this film might just be perfect for this kind of shooting. A few pieces of reflection though are the following:

  1. Be very precise when exposing Pancro 400 as it handles underexposure extremely poorly and easily loses the highlights. I tries my best to nail my exposures dead on, and did reasonably well until my lightmeter decided to produce a flat battery. After that I had to rely on a simple app on my phone, which surprisingly worked rather well.
  2. Take your time with this film. I have tried different development cycles for this film, but this is by far my best results with it. I often shy away from very long development times of more than 12 minutes if possible, but to me, it seems like the results with Pancro400 gets better the longer you develop. This process in Adox Atomal 49 1+1 took 23 minutes.
  3. Fix for more than the double time of what you would normally do. As in the previous point. Time is gold with this film. I fixed this one in fresh fixer for 12 minutes, double the time recommended by Bergger, and that seems to give clean negatives. Anything gives harsher grain due to remaining emulsion I guess?
  4. Use it for its potential of making moody and gloomy shots. This is not an «everyday happy snappy film». You have to work with its strengths.
The remains of Biri Bruk – Hasselblad 500C w 80mm Planar f2,8 -Bergger Pancro 400 – Adox Atomal 49 1+1

From my research online, I find that the sawmill was active until the early eighties. I cannot guarantee my accuracy here, but it was defunct before the nineties. In 1994, Lillehammer hosted the Winter Olympics, and the old sawmill was being restored, the goal being it becoming a restaurant. Situated along the road between two venue-towns, Lillehammer and Gjøvik, the location was ideal.

During its restoration, something happened and the old sawmill house caught fire and burned to the ground on Friday the fourth of June 1993. The fire started in the old chip-silo and quickly spread resulting in devastating damage with fire-fighters unable to over-win the fire. Today, only the foundation walls are left, and is what you can see photographed in some of these images.

Ruins of Biri Bruk – Hasselblad 500C w 80mm Planar f2,8 -Bergger Pancro 400 – Adox Atomal 49 1+1

For me, this location has some personal value. My grandfather used to work in this place as a lorry-driver for many years, and when walking around, I can still hear his voice takling about all the interesting and struggle some days they had at work in this old sawmill. What was important for me in this outing, was to capture the mood of the place in regards to its history and how it is a symbol of a very decentralized way of structuring agriculture. And maybe most important, how we still have some remains of a very active workplace in a very smack little settlement.

Remains from the Log-driving on Mjøsa by Biri Bruk – Hasselblad 500C w 80mm Planar f2,8 -Bergger Pancro 400 – Adox Atomal 49 1+1

I hope you enjoyed reading this entry, and that you can catch the mood I am trying to convey through them. I would also love hearing your thoughts about Bergger Pancro400 and if you have different or supporting experiences.

Going Panoramic in the fog

I have never worked with any kind of panoramic equipment before. I have held a Hasselblad X-pan in my hand at one point, but I never tried shooting it. Even so, panorama photography is interesting, and I have wanted to give it a proper try. Not that I will really try it properly in this entry, but I recently bought some very cheap 3D-printed (I guess) plastic parts off eBay. Specifically, the small plastic parts that you use for using 35mm film in your medium format cameras. To be honest, I didn’t really expect much results from this. My anticipation was the following:

  1. The film will not be kept dark enough after exposure and will be fogged.
  2. The film might not be kept flat enough in the camera.
  3. Composing the image will be difficult not having a proper viewfinder for it.
  4. Unknown amount of images pr film and difficult to know how far to wind.
The plastic-stuff and a canister of film. Not the one I used for this test.

I decided to give it a try in my Zeiss Ikon Nettar. This because it is the only MF camera I have where the film is inserted in the horisontal direction, allowing me to easily shoot landscape without turning my camera into portrait. I decided to go for a roll of Ilford Delta 400 and go for a little walk while the fog was lifting over the lake. I was looking for wide compositions, which was a new experience for me, and I felt that I often reverted back to looking for squares or normal rectangles rather than the super wide compositions that this line-up would allow for.

Didn’t quite nail it with this one. See the light leaks that I got for most of the shots on the roll. Luckily not too bad in this shot.

First of all, I can confirm the first part of my assumption. Using this system, with the 3D-printed parts, will give you severe light leaks between the shots. I know for a fact that it is not the light seals acting up, because I used black tape to ensure no light-leaks would come from that area.

Reklamer

For the most part, I think that the film stayed flat in the camera, and that the adapter kept it reasonably well aligned throughout the roll. I did; however, notice that the film was not as «in the middle» of the viewfinder as I had thought, and I shot a few of the frames «too high» losing parts of my intended compositions.

Over the rocks – Zeiss Ikon Nettar, Ilford Delta 400 Adox Atomal 49 Stock

Even though I like some of these images and the way they look and how they turned out, I am not certain I would use this adaptor system a lot. I will very likely do some more experiments with it and try it out at different occasions, and maybe I am luckier with my next rounds and avoid some light leaks. I find the system to be functional for shooting only one frame at a time. This would mean a lot of «cutting the film out of the camera» and «developing fragments of a roll». Not that I mind doing that, but it is a hassle.

Lifting fog – Zeiss Ikon Nettar, Ilford Delta 400 Adox Atomal 49 Stock

Photographing a modern church

Not far from where I live, there is a modern, wooden church called Seegård. It was built in 1997, following the tragic fire in the old church during easter in 1994. The new church was raised in the same spot as the old one, and in an attempt to keep the cross structure of the old church and modernizing it, but at the same time make something that would suit its area. Not easy demands for an architect to meet, but I find that the architect Arne Thorsrud has pulled it off really well.

I have worked with this church on multiple occasions, mainly digital, but the other day, I decided to bring out my Bronica ETR, and make some black and white images of the church in winter time. I fitted the Bronica with the 50mm Zenzanon lens and a yellow filter to help balance the contrasts a bit.

Reklamer

To get the smooth results I wanted for this shoot, I decided to go with Ilford FP4 plus and combining it with Ilfotec Perceptol extremely fine grain developer. This is a combination I have found to work very well with winter conditions where snow and whites are prominent. However, you lose some film speed. In this instance, I shot the FP4 plus at ISO 50, and went for f11 which I find to be the sweet-spot of this lens. With a still standing subject like this church, which does not tend to move a lot, slower shutter speed is no real issue, and my shutter speeds were around 1/4th and 1/8th of a second with the correction for the yellow filter.

Seegård Church under the winter carpet. Zenza Bronica ETR w Zenzanon 50mm f2,8 and yellow filter. Ilford FP4 plus at 50 ISO – Ilfotec Perceptol 1+1

I did a few different angles and compositions, and a little bit of bracketing on a few of the compositions. After all, I ended with two images that I am very happy with, and they are the two I will share.

Seegård Church under the winter carpet. Zenza Bronica ETR w Zenzanon 50mm f2,8 and yellow filter. Ilford FP4 plus at 50 ISO – Ilfotec Perceptol 1+1

Trying out an expired film

I am normally not too enthusiastic about expired films. For me photography is more about precision and less about experimenting. However, a while back I bought a camera online, and with it came a full package of Svema Foto65 expired in 1986. As this package was full and dust-free, I guessed they had been stored properly, maybe frozen or refrigerated over time. Therefore I decided to give these films a go.

As they are 120 films, I rolled one of them into my Bronica ETR, and went back to my favorite old derelict train station. If you have followed my blog for a while, you will have seen me shooting at that location before. I chose to rate the film at ISO 20 and bracket one stop in each direction. As it turned out, ISO 10 would have been my best pick for this outing. The films original box-speed was once ISO 80, and with the «one stop pr decade» 10 would be the correct speed I guess.

Because I feared very low contrast in the images, I chose to shoot with an orange filter to give the film some extra contrast boost. It seems to have worked out the way I expected it to.

Bronica ETR w 150mm Zenzanon f3,5 – Orange filter – Svema Foto65 @Iso10 – Rodinal 1+100 70min

Despite the nasty mottling all over the frame, the Svema Foto65 seems to have been a very fine grain and sharp film once. My guess is that this mottling has come off the backing paper, there are visible discoloration on both the negatives and the backing paper. If I am mistaking, please let me know in the comments. All in all, the Svema performed acceptably I find, and maybe a well kept roll of this film would still make really nice images, despite its age.

Reklamer
Bronica ETR w 150mm Zenzanon f3,5 – Orange filter – Svema Foto65 @Iso10 – Rodinal 1+100 70min

Going minimalistic with Delta 100

Today as I was relaxing, enjoying a cup of coffee, I looked out the window. The first fall of snow has just blessed us with its arrival, and this always brings new objects to my attention. Things that I maybe haven’t noticed because it is hidden in the November-browns.

Today my attention was drawn towards some wilted plants. Their very dark brownish colors made a nice, almost minimalistic, tone towards the snowy background. I immediately ran to put a roll of Ilford Delta 100 into my Bronica ETR. I also fitted it with a lens I just bought. a Zenzanon 150mm f3,5. Equivalent to around 90mm at a 35mm camera, and used a yellow filter to get the minimalistic contrast that I was looking for.

Zenza Bronica ETR w 150mm Zenzanon f3,5 + Yellow filter. Ilford DD-X developer

I aimed to keep the snowy areas around zone 8-9, to not completely blow it out, and my dark areas around zone 3-4 to retain some shadow detail. I got fairly good negatives, but I would have loved to have retained some more detail, especially in the most contrasty images.

Reklamer

Once again I chose to develop Delta 100 in DD-X developer, and this time as well, it gave me fabulous negatives. I am really looking forward to working with some of these images in the darkroom, and I expect to use lower grade filters, or maybe some split grading to get the most out of the negatives. A spot on my wall is already prepared for one of these images.

Once again. Thanks to Bjørn for sending me these films and the developer to test. I do really love the results it gives.

Working with Delta 100

Some days ago, I was contacted by another Norwegian photographer who has a collaboration with Ilford Photo. He kindly sent med some rolls of Ilford Delta100, some DD-X developer, Fixer and Wetting agent to try out. Today I went out with my Bronica ETR to try it out. Before I go any further, visit his amazing gallery on Flickr and read his posts here.

WordPress: https://bjorn-joachimsen.com

Gran Canaria
Bjørn Joachimsen Flickr

When I heard that I would be sent Delta100, I was thrilled. When I took up analog photography again some years ago, Delta 100 was one of the films that really rekindled my interest in film-photography and I find it to be one of the best films I know about. The smooth and soft T-grain structure gives pleasant results. even when developed in Rodinal. In most cases I shoot Delta 100 at 50, but today I chose to go at box speed, because of the lighting conditions.

Reklamer

My location for this outing was Tallodden. A beautiful little place not too far from where I live, and I brought my Bronica ETR, some square filters and a tripod. I always mount the Bronica on a tripod. It is too heavy to shoot steadily by hand, especially at shallow apertures or longer shutter speeds.

My setup at the location.

There is something about walking around with a proper MF SLR like this. It makes people interested, and I had a shot chat with a nice elderly man who was out for a little stroll along the lake. He told me that he had not seen anyone with such equipment around that area for years, and asked me all sorts of questions about the camera, my lens, film, plans and where I would post my images for him to see.

A lonely autumn leaf. Bronica ETR w 50mm Zenzanon f2,8. Shot at f2,8 1/30th with yellow filter. Developed in Ilford Ilfotec DD-X 1+4

I spent some time scouting around for interesting subjects that would give me a smooth and calm mood to my images. I wanted the fine grain the Delta100 gives to be one of the main focus on my shots. I chose to use a yellow filter for most of the images to boost some contrast, and get the most out of the range. But I swapped for an orange filter for shots where I wanted the «silky water» effect, and more depth in the range.

I then went home and developed.

Reklamer

This is the first time I have ever used DD-X. Actually I have never used Ilford Developers before, so I was very excited to see what the grain structure and the range would be like. This is a shoot where I would normally have gone for Kodak Xtol, and I am comparing a bit to what I would have expected from Xtol.

I am very happy with my results, and I am happy to see the smooth and lovely grain in this shoot, and I think the DD-X brought it out beautifully. I still have more rolls to shoot and develop in this developer, so I will not come with any analysis of any kind based on my limited knowledge, but so far I am very happy.

Once again, thank you for sending me films and chemistry to try out. More entries with this film and developer will come. Also a video of me making darkroom prints of some of these images.

Stay tuned

Contrast and foggy landscape

Today was a wet, unpleasant and foggy day in Norway. No real need and point in going out, but there was some interesting fog, and a very white sky that lured me out anyway. The conditions were almost black and white anyway, so I chose to go with a Black and White film. Because of the verylow level of natural contrast, I went with a slow film. Ilford FP4 Plus. I also chose to stand-develop the film in Rodinal 1+100 for an hour, to get some extra contrast and find some beautiful grays.

I chose to use the Bronica ETR, because I wanted to do medium format and that it would give me 15 frames to a roll.

I also got to test out my new scanner. Thank you for the friendly photographer who pointed out to me that my old scanner was probably shot. My new one is far better and gives me lovely scans.

Trying out 645

For a while I have been looking to buy a 645 camera. Preferably a SLR of some kind and many different options have been considered. Both Mamiya 645, Pentax 645 and even some Hasselblads. However, some days ago, I came across a very reasonably priced Zenza Bronica ETR. I have had my experiences with Bronica. I once owned an Zenza Bronica S2 fitted with a beautiful Nikkor 80mm lens. I only sold this because it had the habit of giving me half frames a few times on each roll and I cannot afford wasting expensive film and possibly losing a strong shot due to a camera issue.

I contacted the seller on the ETR and we came to an agreement and got a deal together. Very reasonable and rather quick.

Zenza Bronicas are beautifully designed Japanese cameras, with incredibly sharp lenses and a rugged feel to it. The camera is heavy, about two kilos, and you can get them in different configurations. Later ones are more plasticky and lighter, but I don’t really mind the weight, as I often shoot on a tripod. My ETR came with a prism, eye-level viewfinder and a razor sharp 50mm f2,8 Zenzanon lens.

I went out the other day to test the camera, and I made some really beginner mistakes.

Fist of all, I used the wrong film. I loaded the camera with a Fomapan 100, because I had one lying around about to expire, and I found I could «waste that one» if the camera did not work properly. The biggest problem was that I went out on a very dull and overcast day where there was not really sufficient light to shoot 100 ISO. Because of this I had to shoot around 1/30th of a second, and I forgot to bring a tripod. A lot of motion blur later, I decided to discard the test and go out for another go with a different film.

Reklamer

This second time, I went out in the morning as the fog was lifting from the lake (Mjøsa) and went for a short session Trying to capture some magic. Wiser than last time, I loaded the camera with a roll of Kodak Tri-X 400, a film I don’t use that often but had lying around and went down to the docks in Gjøvik.

Before I went out, I had a coffee. I documented my coffee with an image taken at f2,8, maximum aperture at 1/15th of a second.

Zenza Bronica ETR w 50mm Zenzanon 2,8. Kodak Tri-X400@400 Fomadon Excel 1+1 9 minutes

I am really surprised with the smooth bokeh the Zenzanon lens gives me, and I find that the Tri-X grain and contrast gives the image a really nice tone. A tone I don’t often find with Tri-X as I find it a bit to punchy in the contrasts for my taste. Similarly I like the way it handled my location by the lake.

I appreciate the tones I got in the picture of the anchor. Shot at f4, it gave me a perfect depth of field for this image and the Tri-X tones gives the smooth tones. I also love the way the background disappears into the fog behind.

In a slightly under exposed image of some birds fleeing away from the Norwegian winter which is approaching in a months time. I find this image to be a bit «gritty» but I will attempt to make a beautiful print of this image in the darkroom.

All in all, I am very happy with my new Zenza Bronica ETR, as well as my expedition into 645 format, and will shoot it regularly in the future.

Stay tuned

Reklamer

Vintage shoot with Frida and her old Ford

Analog photography is has the loveliest tones imaginable for vintage style photography. The special look an old lens gives is an exquisite vibe to your photo that no digital preset can really copy, and the feeling of doing this with vintage equipment adds an extra element. Photography is not just about the picture, but the way to get there and the feeling of the process.

Yesterday I went out to photograph my friend Frida and her lovely 1950 Ford Shoebox. To go with me for this shoot, I chose two cameras. The Weist SL-35 and my lovely TLR, the Zeiss Ikon Ikoflex. Both these cameras are reasonably accurate and has sharp lenses that does really bring out that «vintage feel». I rolled up both cameras with Ilford FP4 Plus, A film that for me is my first choice when I want that «Vintage feel». This film has a really fine cubical grain structure, and has a more visible grain than other films around its speed, and I love how this grain structure affects the images.

My equipment for this shoot. Zeiss Ikon Ikoflex medium format TLR and the Weist SL-35, 35mm M42 SLR.

We met at a lovely location in Kapp just south of Gjøvik. This location used to be a condensed milk factory back in the days, but today it is used for cultural purposes among other things.

Reklamer

We first set off with the Ikoflex. I shot as close to f4 as I could get, and did some bracketing with f5,6 to be sure not to overexpose too wildly. I shot the Ikoflex at its highest shutter speed around 1/300th of a second, but my guess is that this shutter speed is a bit slower. Probably around 1/250th which is still very good for a 70 year old camera like this.

I refer to the Ikoflex as «the bird box» and this is one of my absolute favorite camera in use. When I bought it, it came from a Swedish Zeiss collectors house, and the seller did not believe that it worked. Probably because he didn’t really understand how it works. These cameras have their specific way of use, and you will not be able to shoot this camera if you don’t know how to load film in it and how to set it up.

When we were done with the film in the IKOFLEX, I changed it for some Kodak Portra 160, but these images are not included in this entry.

Reklamer

We then set off with the Weist and its exquisite Weistar 135mm lens. I also shot this one as close to F4 as I could to get that lovely bokeh you get from this lens. This is the first time I tried this camera and lens for a shoot with a model, and I am very happy with how it performed.

These are just quick scans of the negatives. This shoot will be finished as Darkroom prints. Whether the prints and the process of making them will be entered in this blog is yet to be decided.

All in all, I am very happy with how both cameras performed during this shoot and I feel humble and lucky for being allowed to with with people like Frida, who is on board with the analog nerdity.

Photographs open doors into the past, but they also alloq a look into the future

Sally Mann